However, encountering obstacles during the installation process can be frustrating.
While SSDs offer numerous advantages, they can also present unique challenges during the installation of an operating system.
Troubleshooting the installation process requires a combination of technical knowledge and problem-solving skills.
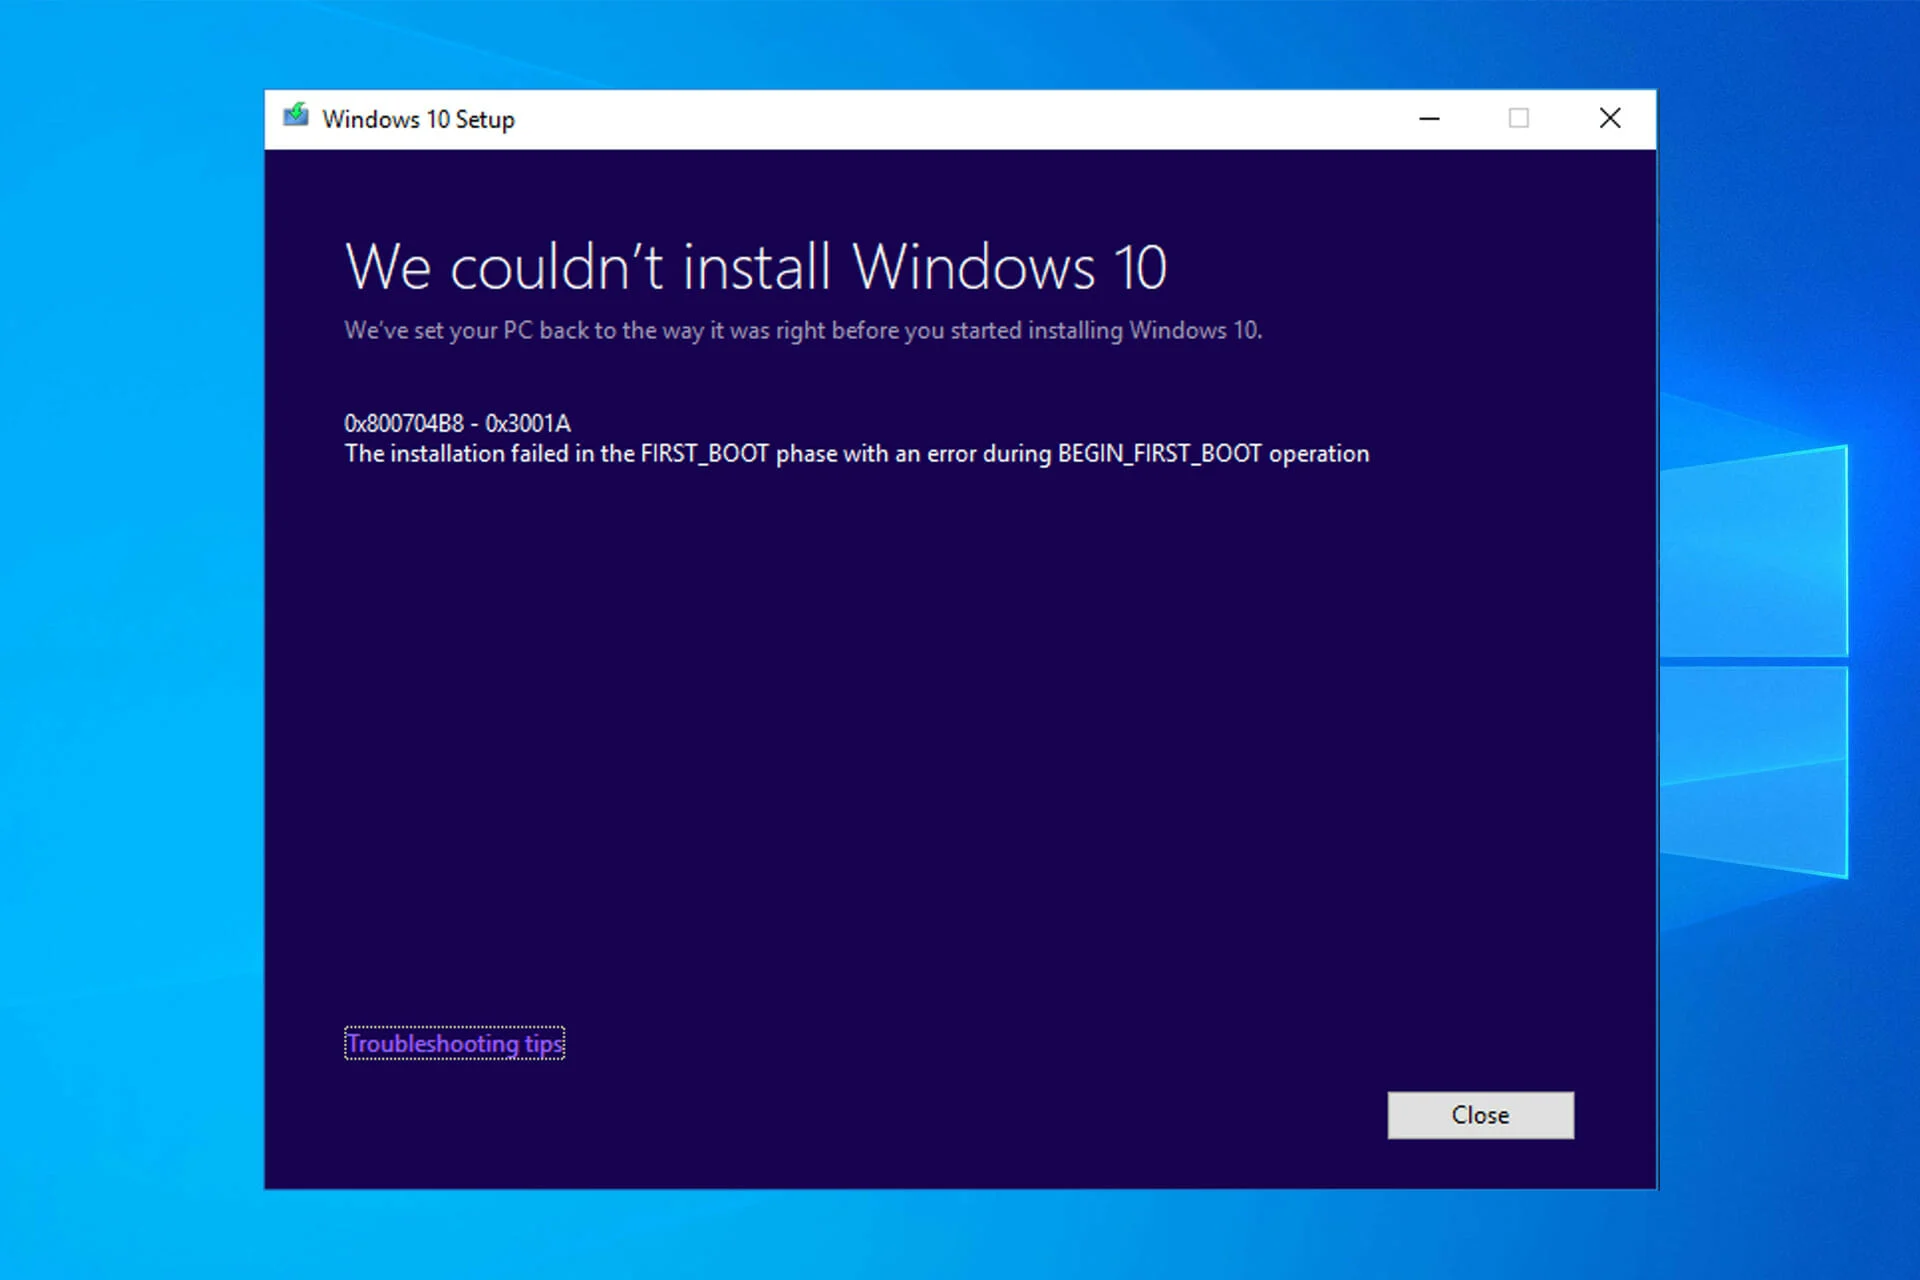
Understanding these issues will help you troubleshoot and handle the problem effectively.
Lets delve into some of the common reasons why Windows wont install on your SSD.
One possible issue is an inadequate power supply to your SSD.
SSDs require a stable power source to function properly, and insufficient power can cause installation errors.
Consider upgrading your PSU if it is not providing adequate power to your system.
Incorrect BIOS prefs can also prevent Windows from installing on your SSD.
jump into the BIOS controls of your setup and see if the SATA or storage configuration is properly set.
Ensure that the SSD is recognized and set as the primary boot equipment.
Compatibility issues may arise between your SSD and the motherboard or other hardware components.
Different generations of SSDs and motherboards may not be fully compatible, leading to installation problems.
Check the specifications of both the SSD and the motherboard to ensure compatibility.
Updating the BIOS and SSD firmware to the latest versions can sometimes resolve compatibility issues.
A damaged SSD can also be a culprit.
Physical damage or logical errors on the SSD can prevent proper installation.
Additionally, run diagnostic tools to check for logical errors and bad sectors on the SSD.
If a damaged SSD is identified, consider replacing it with a new one.
Another factor to consider is insufficient storage space on your SSD.
Windows requires a certain amount of free space to install and function properly.
Ensure that your SSD has enough free space for the Windows installation.
If it is running low on storage, consider deleting unnecessary files or upgrading to a larger capacity SSD.
Finally, insufficient RAM (Random Access Memory) can hinder the installation process.
Windows 10, for example, requires a minimum of 2GB of RAM for the 64-bit version.
SSDs require a stable and sufficient power source to function properly.
Check the wattage rating of your PSU and compare it to the power requirements of your system.
Its worth mentioning that the power supply cables also play a crucial role in delivering power to the SSD.
Ensure that all power connectors between the PSU and the SSD are securely plugged in.
Sometimes, loose connections can cause intermittent power supply, which could lead to installation issues.
Checking and reseating the power cables can help ensure a stable power connection.
Furthermore, it is essential to verify that your power outlet is functioning correctly.
Faulty outlets, power surges, or inadequate grounding can also impact the stability of your power supply.
Removing any unnecessary components or upgrading your PSU to a higher wattage can help alleviate this problem.
To address this issue, you will need to reach the BIOS prefs of your box.
Once you are in the BIOS, navigate to the storage configuration tweaks.
Look for an option related to SATA or storage devices.
Ensure that the SSD is properly recognized and set as the primary boot gadget.
AHCI is a modern storage interface that allows for improved performance and features, especially for SSDs.
Enabling AHCI mode is necessary for the optimal operation of an SSD.
Therefore, exercise caution and refer to the documentation or support resources provided by your motherboard manufacturer for guidance.
After making the necessary changes in the BIOS, save the prefs and exit.
your setup will then restart, and you’re free to proceed with the Windows installation process.
Different generations of SSDs and motherboards may not always be fully compatible, which can result in installation problems.
To address compatibility issues, the first step is to check the specifications of your SSD and motherboard.
Updating the BIOS firmware and SSD firmware to the latest versions can sometimes resolve compatibility issues.
Motherboard manufacturers often release BIOS updates that improve compatibility and add support for newer hardware.
Similarly, SSD manufacturers release firmware updates that address compatibility and stability issues.
In some cases, compatibility issues may arise due to older motherboard chipsets that lack compatibility with newer SSDs.
If this is the case, consider upgrading your motherboard to a model that supports your SSD.
Consult the motherboard manufacturers documentation or support resources to verify compatibility before making any purchasing decisions.
Another consideration is the operating system itself.
Older versions of Windows may not have full support for newer SSDs.
Ensure that you are using a compatibleversion of Windowsthat supports your particular SSD model.
If necessary, consider upgrading to a newer version of Windows to ensure optimal compatibility and performance.
It is essential to research and verify compatibility before purchasing and installing an SSD.
Checking the compatibility list provided by the manufacturer or seeking advice from experts can help you avoid compatibility issues.
Compatibility testing with your specific hardware setup can also be beneficial to ensure a smooth installation process.
Physical damage or logical errors on the SSD can prevent proper installation and operation.
If you suspect that your SSD is damaged, its essential to diagnose and address the issue promptly.
The first step in troubleshooting a damaged SSD is to check for any physical signs of damage.
Inspect the SSD for loose connections, bent pins, or visible defects.
If you find any physical damage, it may be necessary to replace the SSD with a new one.
In addition to physical damage, logical errors and bad sectors on the SSD can also cause installation problems.
Running diagnostic tools specific to your SSD model can help identify and repair any logical errors.
Many SSD manufacturers provide software tools for diagnosing and repairing their SSDs.
These tools can help you determine the health of your SSD and attempt to repair any issues detected.
Another approach is to connect the SSD to a different computer and test if it works properly.
If your SSD is still under warranty, contacting the manufacturers support team is recommended.
They can provide guidance on troubleshooting and may offer a replacement if the SSD is found to be faulty.
Be prepared to provide them with detailed information about the issue and any diagnostic results.
Keep in mind that attempting to repair a damaged SSD can be risky and could potentially cause further damage.
In some cases, it may be necessary to replace the damaged SSD with a new one.
When purchasing a replacement, ensure that it is compatible with your system and meets your storage requirements.
Consult the specifications and compatibility lists provided by the SSD manufacturer to make an informed decision.
To address this issue, you better ensure that your SSD has enough free space for the Windows installation.
Start by removing any unnecessary files and programs that are taking up valuable space.
you might access this tool by searching for Disk Cleanup in the Start menu.
Consider using file compression tools to reduce the size of large files without losing data quality.
This can help free up substantial space on your SSD.
Before purchasing a new SSD, ensure that it is compatible with your system and meets your needs.
Consult the specifications and compatibility lists provided by the SSD manufacturer to make an informed decision.
The most straightforward solution is to upgrade your RAM by adding more memory modules to your system.
Purchase compatible RAM modules and install them according to the manufacturers instructions.
Before upgrading your RAM, it is also important to consider the limitations of your system.
Some older systems may have a maximum limit on the amount of RAM they can support.
Verify themaximum RAM capacity of your motherboardor computer to ensure that your upgrade will be compatible.
This can help free up some memory resources for the installation process.
Another option is to consider using a lightweight or stripped-down version of Windows that requires less RAM.
These steps will help you identify and address any potential issues that may be preventing a successful installation.
Double-check hardware connections: Ensure that all connections between the SSD and the motherboard are secure.
Verify that the SATA or NVMe cable is properly connected to both the SSD and the motherboard.
peek if the AHCI mode is enabled for optimal SSD performance.
Update firmware and drivers: Check for any available firmware updates for your SSD and motherboard.
Similarly, update any necessary drivers, especially storage-related drivers, to ensure compatibility and optimal performance.
This can help identify any potential issues or errors.
Check for BIOS and Windows updates: Ensure that your BIOS and Windows operating system are up to date.
Manufacturers often release updates to improve compatibility and address known issues.
This can help determine if the issue is specific to the SSD or the computer system.
Disable unnecessary hardware: Temporarily disconnect any unnecessary hardware devices, such as secondary hard drives or peripherals.
Sometimes, conflicts between hardware components can interfere with the installation process.
Remember to take proper precautions and document any changes or modifications made to your system for future reference.
Carefully document any changes made to your system to make future troubleshooting easier.
Remember that troubleshooting may require a combination of technical knowledge and problem-solving skills.
