One of the primary uses of the Hosts file is to block or redirect certain websites.
Another key feature of the Hosts file is the ability to override DNS resolution.
The Hosts file can also be used to create local development environments.
This helps to ensure that all functionality and design aspects are working correctly before going live.
Its important to note that the Hosts file overrides DNS controls only on the local machine.
This means that the changes made to the file will not affect other devices on the data pipe.
The Hosts file is typically stored in the etc folder within the system directory.
One of the simplest ways to edit the Hosts file is by using File Explorer.
Each entry within the Hosts file follows a specific format.
The file typically contains commented-out lines (starting with a #) to provide instructions and examples.
you might add your own entries following this format.
Remember to save the changes after editing the Hosts file.
Its worth noting that modifying the Hosts file requires administrative privileges.
Using File Explorer to edit the Hosts file is a simple and effective method.
Lets explore that option next.
This method offers a quick and efficient way to make changes to the file.
you might now make the desired changes to the file.
Alternatively, you might press Ctrl+S to save the file.
If prompted by User Account Control, click Yes to confirm the change.
Its important to note that command prompt access is required to edit the Hosts file.
if you hit any issues saving the changes, check that you have administrative privileges in Command Prompt.
Lets explore that option next.
Editing the Hosts file allows you to control how your gear resolves domain names and customize web link connections.
There are two commonly used methods for editing the Hosts file: using Notepad or using third-party text editors.
To add a new entry, simply bang out the IP address, followed by the domain name.
Alternatively, you’re free to press Ctrl+S to save the changes.
If prompted by User Account Control, click Yes to confirm the change.
Lets explore that next.
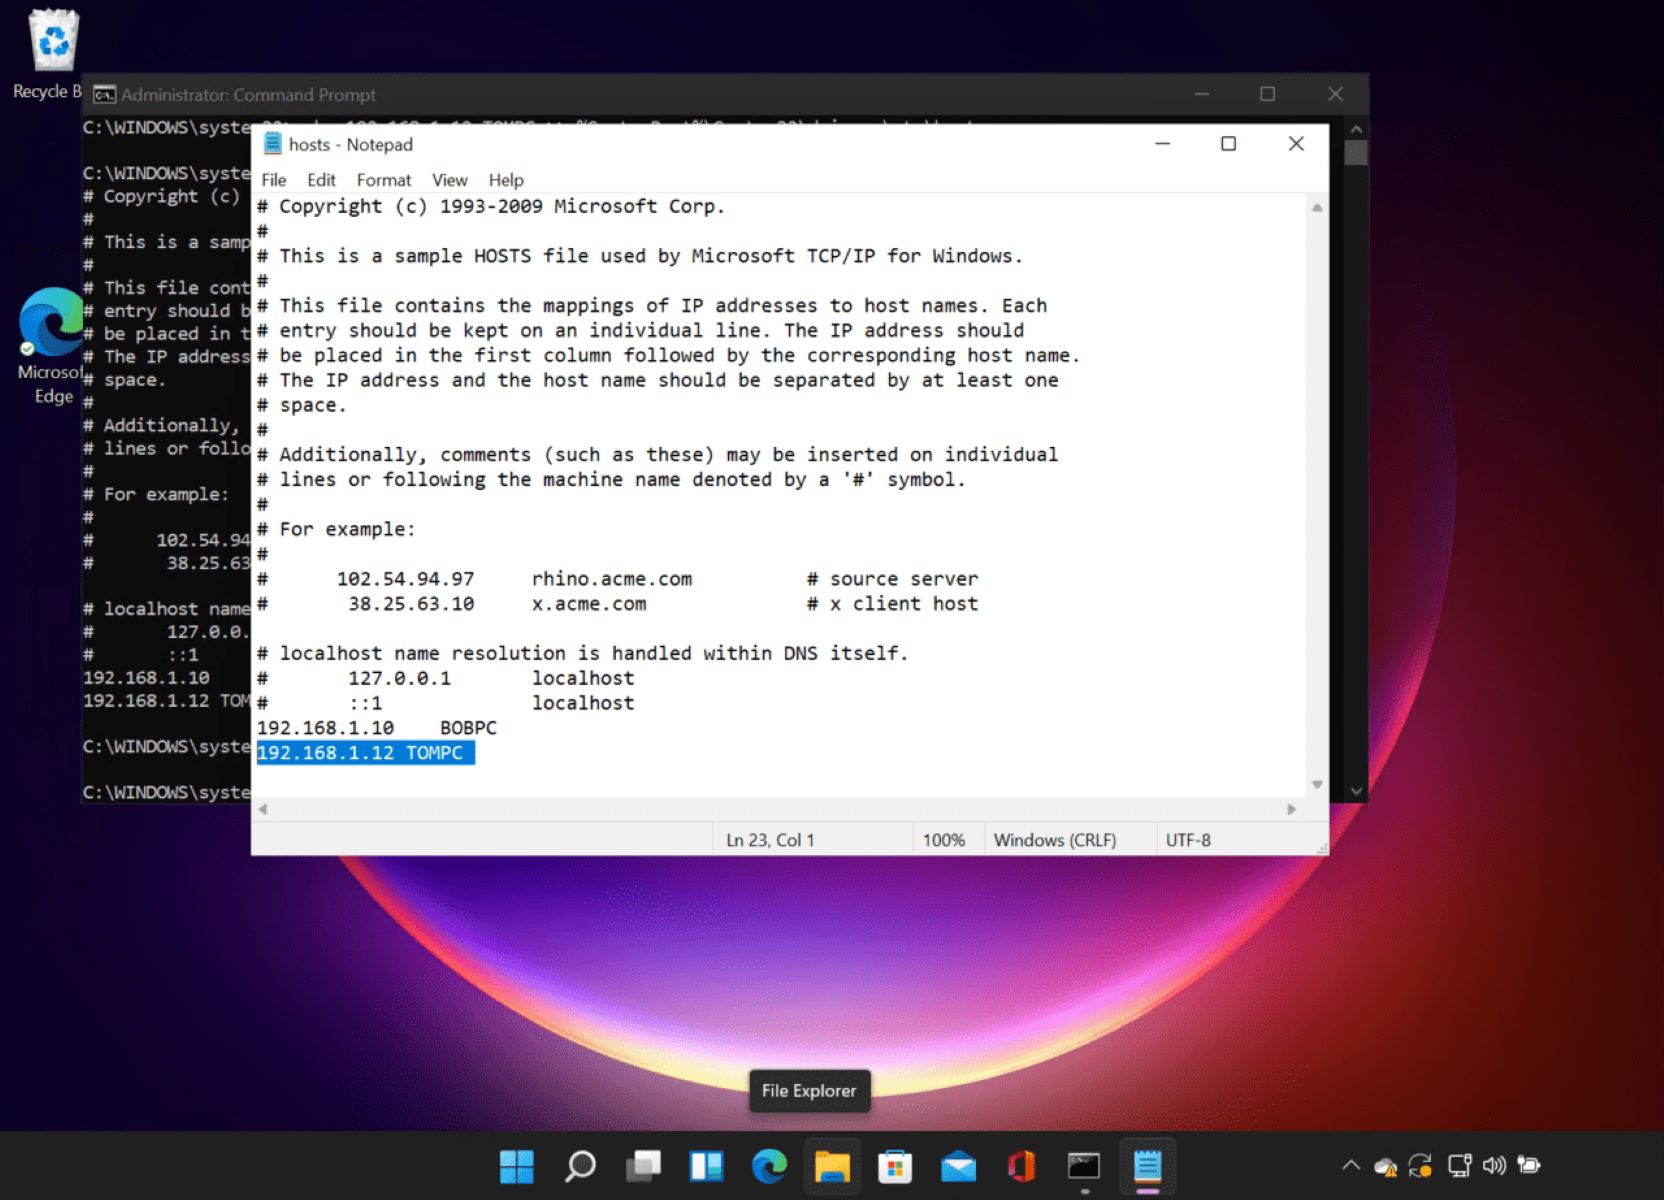
Notepad provides a straightforward interface and is suitable for basic editing tasks.
To add a new entry, simply pop in the IP address followed by the domain name.
For example:
In this example, the IP address 127.0.0.1 is mapped to the domain name localhost.
Alternatively, you’re free to press Ctrl+S to save the changes.
if you run into any issues while saving the Hosts file, ensure that you have administrative privileges.
Modifying the Hosts file requires administrative access, so verify you are running Notepad as an administrator.
Using Notepad to edit the Hosts file offers a straightforward and simple method to make the necessary changes.
Lets explore that option next.
These text editors offer additional features that can enhance your editing experience.
These features can greatly enhance your editing efficiency and accuracy.
Using third-party text editors to edit the Hosts file offers a more feature-rich and customized editing experience.
However, saving the file alone doesnt apply the changes immediately.
Websites will be redirected or blocked according to the entries you added to the Hosts file.
This way, you’re free to revert to the original file if needed.
Ensure that you are running the text editor or Command Prompt with administrative privileges.
Right-press the system and select Run as administrator to reach the necessary permissions.
Inaccurate formatting
The Hosts file follows a specific formatting structure.
Avoid inserting unnecessary or incorrect characters to maintain the integrity of the file.
Enter the commandipconfig /flushdnsto erase the DNS cache and allow the changes to take effect.
If you experience slow internet connections, consider cleaning up the Hosts file and removing any unnecessary entries.
Keep the file clean and only include entries that are relevant to your needs.
