It serves as the foundation for all other hardware components, including the CPU cooler.
Understanding the key components of a motherboard is essential for understanding where the CPU cooler plugs into.
Understanding the layout and specifications of your motherboard is essential when selecting a CPU cooler.
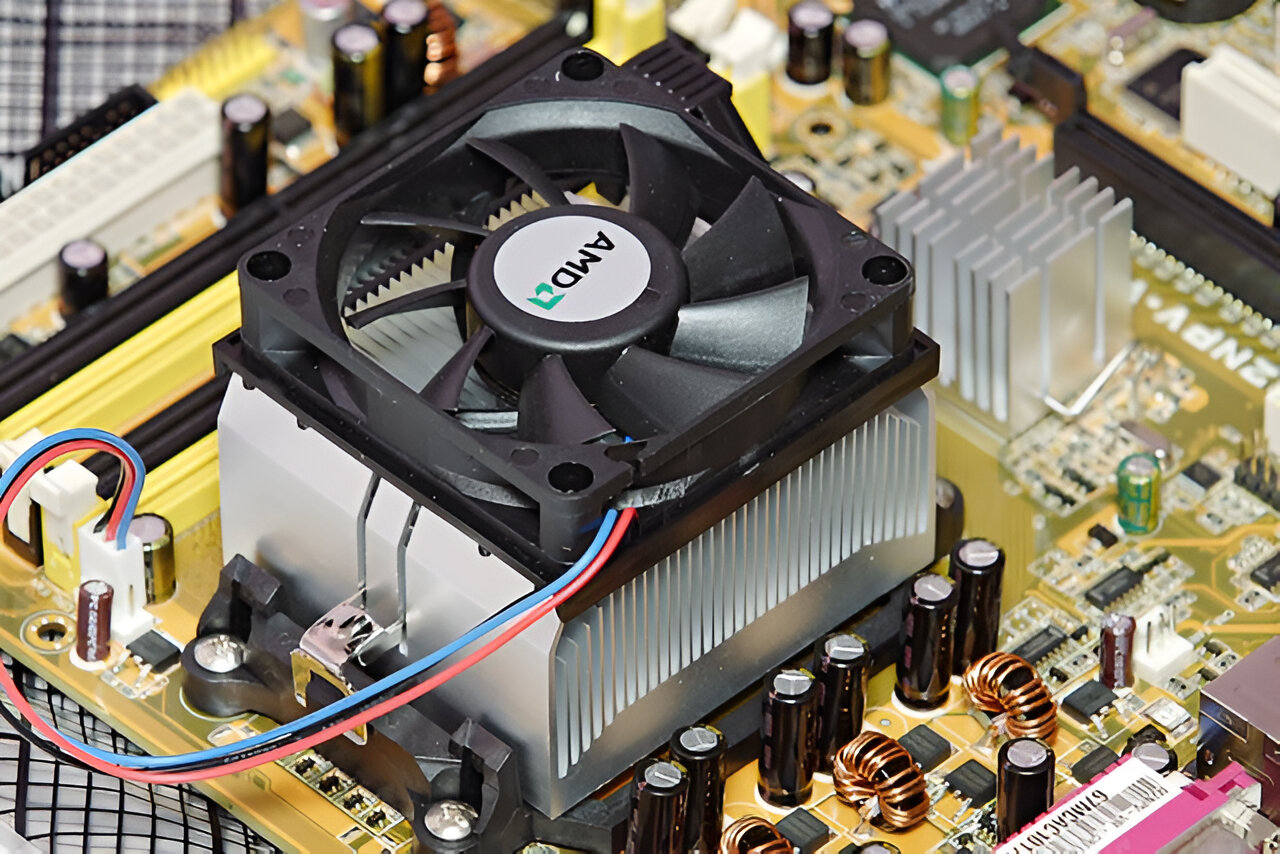
The fan, attached to the heat sink, helps to increase airflow and enhance the cooling efficiency.
Next, lets take a closer look at the different types of CPU coolers and their installation methods.
It consists of a metal heatsink with heatpipes embedded in it, which draw heat away from the CPU.
The heat is then dissipated through the fins of the heatsink with the help of a fan.
Air coolers are known for their reliability, simplicity, and cost-effectiveness.
They come in various sizes, from compact low-profile models to larger tower-style coolers.
Tower-style air coolers typically offer better heat dissipation due to their larger surface area and multiple heatpipes.
Installation of air coolers is relatively straightforward.
Most modern air coolers use a universal mounting system that is compatible with a wide range of CPU sockets.
It uses a closed-loop system that circulates a liquid coolant to cool the CPU.
A typical liquid cooler setup consists of a pump, a radiator, liquid coolant, and a fan.
The pump circulates the coolant, absorbing heat from the CPU and transferring it to the radiator.
The radiator then dissipates the heat with the help of the fan, resulting in efficient cooling.
They are particularly popular among gamers, overclockers, and users with high-performance CPUs.
Next, lets discuss the placement of CPU coolers on the motherboard.
The main component of an air cooler is the heatsink, which is typically made of aluminum or copper.
The heatsink consists of multiple fins that increase the surface area for heat dissipation.
The airflow created by the fan enhances the cooling effect by carrying away the heat absorbed by the heatsink.
Air coolers are known for their simplicity, reliability, and cost-effectiveness.
They offer efficient cooling for a wide range of CPUs, from entry-level to high-end processors.
Installation of an air cooler is relatively straightforward.
The heatsink is placed on top of the CPU, and the mounting brackets secure it in place.
The fan is then attached to the heatsink, usually using clips or screws.
Air coolers with larger heatsinks and more powerful fans tend to offer better cooling performance but can be louder.
It is essential to ensure that the chosen air cooler is compatible with your CPU socket key in.
Fortunately, many air coolers are designed to support multiple socket types, providing flexibility and ease of use.
In addition, consider the height of the air cooler when installing it in your box case.
Overall, air coolers are a reliable and effective choice for keeping your CPU temperatures under control.
Next, lets explore the other throw in of CPU cooler: liquid coolers.
A liquid cooler consists of a closed-loop system that circulates a liquid coolant to remove heat from the CPU.
It absorbs the heat from the CPU before transferring it to the radiator for cooling.
The radiator is a heat exchanger equipped with multiple fins that dissipate the heat absorbed by the liquid coolant.
It is usually mounted on the back or top panel of the computer case to maximize heat dissipation.
A fan is attached to the radiator to increase airflow and boost cooling efficiency.
They excel at keeping the CPU temperatures significantly lower, which can enhance the systems stability and longevity.
The increased cooling capacity allows enthusiasts and overclockers to push their systems to higher frequencies while maintaining reasonable temperatures.
Next, we will discuss the different headers on the motherboard where the CPU cooler plugs into.
When installing an air cooler, the heatsink should be positioned directly on top of the CPU.
The base of the cooler should make full contact with the CPU heat spreader to maximize heat transfer.
For tower-style air coolers, it is important to consider the clearance inside your system case.
Most liquid coolers come with pre-filled coolant and feature pre-attached hoses to simplify installation.
The radiator for a liquid cooler is typically mounted on the back or top panel of the computer case.
The orientation of the pump can vary depending on the specific cooler model.
Refer to the manufacturers instructions for the recommended placement to ensure optimal performance.
Proper airflow and clearance play a significant role in maintaining low CPU temperatures and preventing thermal throttling.
The CPU fan header is typically a 4-pin or 3-pin connector located near the CPU socket.
The main function of the CPU fan header is to provide power and control signals to the fan.
The motherboard sends voltage or PWM signals to the fan depending on the desired speed and cooling requirements.
It is important to note that the CPU fan header is specifically designed for connecting the CPU cooler fan.
When connecting the CPU cooler fan to the CPU fan header, verify to align the pins correctly.
The connector is usually keyed to prevent incorrect insertion.
Gently push the connector onto the header until it is fully seated and secure.
Avoid using excessive force to prevent damage to the connector or header pins.
The CPU fan header is a vital component in ensuring effective cooling for your CPU.
Next, we will discuss another header on the motherboard specifically optimized for CPU cooling.
It offers additional features and functionalities compared to a standard CPU fan header.
In addition to higher power delivery, the CPU optimized header often offers more precise fan speed control.
This level of control can be especially beneficial for overclockers or enthusiasts seeking maximum cooling for their CPUs.
When connecting a CPU cooling machine to the CPU optimized header, it is important to ensure compatibility.
Some cooling devices may require a specific punch in of connector or additional adapters to connect to this header.
This can be particularly beneficial for users who require heavy CPU workload or engage in overclocking activities.
It is worth noting that not all motherboards include a separate CPU optimized header.
Consult the motherboard documentation or manufacturers website to determine the specifics of your motherboards fan headers and their functionalities.
The number of system fan headers may vary depending on the motherboard model and form factor.
Some motherboards offer two or more headers, allowing for easy connection and control of multiple case fans.
These headers may be labeled SYS_FAN, CHA_FAN, or similar names, depending on the motherboard manufacturer.
Connecting case fans to system fan headers provides crucial airflow management within the computer case.
Like with the CPU fan header, its important to avoid applying excessive force or bending the pins.
Having multiple system fan headers gives you the flexibility to connect and manage additional fans within your system.
Be sure to consult your motherboard manual for specific details.
In summary, system fan headers play a crucial role in managing the cooling performance of your setup system.
Now, lets conclude the article.
Air coolers and liquid coolers are the two main types of CPU coolers available.
Air coolers, consisting of a heatsink and fan, are reliable and cost-effective options for most users.
When it comes to installation, air coolers require careful positioning to ensure sufficient clearance and airflow.
Liquid coolers, although more complex to install, offer advantages in overclocking and high-performance scenarios.
