Introduction
Welcome to this informative guide on RAM slots and their configuration.
Therefore, its crucial to consult your motherboard manual for accurate and detailed information tailored to your specific model.
These slots play a crucial role in the overall functioning of your computers memory.
The number of RAM slots on a motherboard can vary, depending on the model and manufacturer.
We will delve deeper into this topic in later sections.
Understanding the role of RAM slots is essential when it comes to correctly installing and optimizing your computers memory.
This information can be found in your motherboards manual or by visiting the manufacturers website for specifications.
First, identify the maximum amount of RAM that your motherboard can support.
This information is usually listed in the specifications section of the manual or on the manufacturers website.
Its important to note that older motherboards may have limitations on the maximum amount of RAM they can handle.
Next, determine the bang out of RAM supported by your motherboard.
Common types include DDR4, DDR3, and DDR2.
Another factor to consider is the maximum speed supported by your motherboard.
RAM modules come in different speeds, such as 2400MHz or 3200MHz.
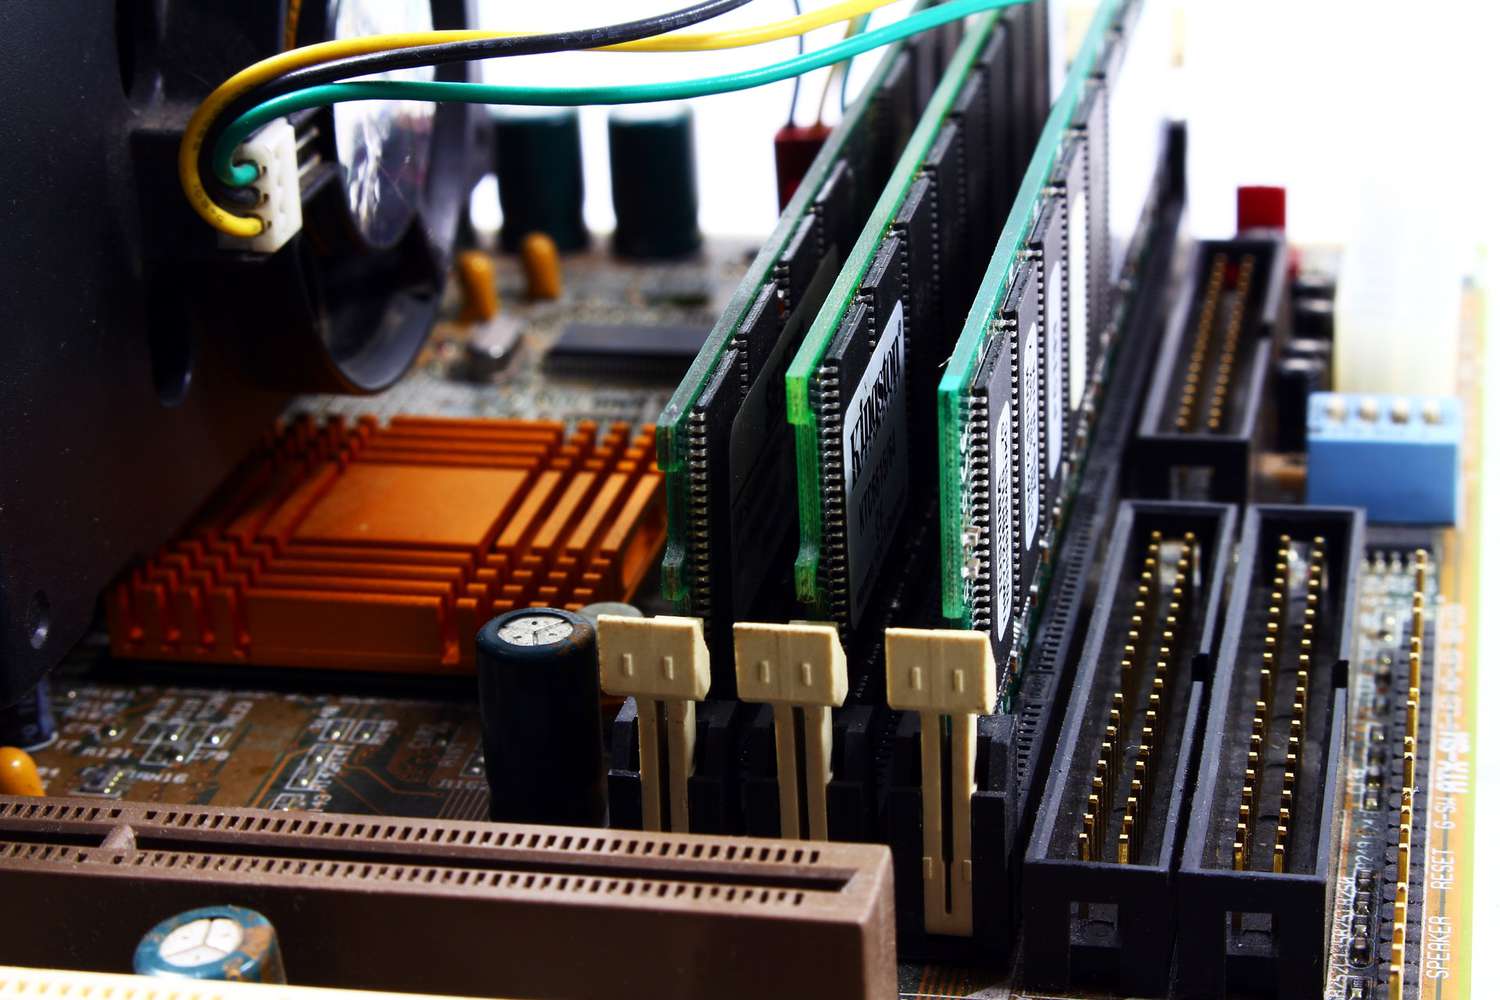
Additionally, check the number of RAM slots available on your motherboard.
This will determine the maximum number of RAM modules you’re able to install.
Some motherboards may have four slots or more, while others may have only two.
Lastly, consider the memory channels supported by your motherboard.
This determines the configuration of memory modules that will provide the best performance.
Some high-end motherboards even support quad-channel memory, but this is less common.
These configurations refer to how the RAM modules are installed in the motherboards RAM slots.
In a single-channel configuration, the RAM modules are installed individually in separate slots.
This means each module functions independently, accessing and transferring data to and from the CPU.
This allows the CPU to access data from two modules simultaneously, effectively doubling the bandwidth.
The matching pairs should be installed in specific slots to enable dual-channel mode.
Typically, the slots are color-coded to indicate which modules should be paired together.
The increased bandwidth offered by dual-channel configuration translates into improved performance, particularly in memory-intensive tasks.
This can result in faster data transfers, reduced latency, and enhanced overall system responsiveness.
For everyday computing tasks that are not memory-intensive, the difference may not be as noticeable.
In such cases, the motherboard will switch to asynchronous dual-channel mode or operate in single-channel mode.
you’re free to simply insert the RAM modules into any available slot on the motherboard.
However, its important to refer to your motherboard manual or manufacturers website for any specific recommendations or restrictions.
For dual-channel configurations, the placement of RAM modules is more critical.
To achieve a dual-channel configuration, you should install matching RAM modules in the corresponding colored slots.
This pairing ensures that the memory channels are utilized correctly.
Apply moderate pressure evenly on both ends of the module until it clicks into place.
Proper installation guarantees a stable connection and ensures optimal performance.
Refer to your motherboard manual or manufacturers website for accurate and detailed instructions tailored to your specific model.
However, some general guidelines apply across most dual-channel configurations.
The first step is identifying the paired slots on your motherboard.
These are typically color-coded or labeled to indicate which slots should be populated with matching RAM modules.
The pairing typically follows an A1-B1, A2-B2 scheme.
Once youve identified the correct paired slots, you should install matching RAM modules in those slots.
Apply gentle pressure on both ends of the module until it clicks into place.
In such cases, the system may operate in single-channel mode, which can impact memory performance.
Remember to double-check the slot placement before securing your motherboard back into the case.
Inspect the module connections to ensure they are firmly in place and aligned correctly.
Incorrectly seated modules can cause instability or booting issues.
Its important to reiterate that the dual-channel configuration offers improved memory bandwidth and performance, particularly in memory-intensive tasks.
Next, we will explore potential RAM slot configuration issues and how to troubleshoot them effectively.
Here are a few common RAM slot configuration issues and tips on how to troubleshoot them effectively.
Incorrect Slot Placement:One of the most common issues is installing the RAM modules in the wrong slots.
This can lead to the system operating in single-channel mode or causing instability.
Incompatible RAM Modules:Mixing different types or speeds of RAM modules can result in compatibility issues.
Its crucial to ensure that all installed RAM modules are compatible with each other and with your motherboard.
Check the manufacturers specifications and consider using RAM modules from the same brand and series to minimize compatibility concerns.
Apply even pressure on both ends of the module until it clicks into place.
To identify this issue, try swapping the RAM modules between slots to determine if the issue persists.
Conclusion
Understanding how to properly configure andinstall RAMmodules is essential for optimizing your computers performance.
Upgrading or installing RAM modules can greatly enhance your computers multitasking capabilities, gaming performance, and overall speed.
Its a cost-effective way to boost your systems performance without having to replace the entire motherboard.
This will enable you to make informed decisions when upgrading or expanding your computers memory in the future.
