Additionally, having a backup serves as a safety net in case of unforeseen issues during the transfer process.
Finally, tap “Back Up Now” to initiate the backup process.
It is important to allow the backup to complete successfully before proceeding to the next steps.
Option 2: iTunes Backup
Alternatively, you could create a backup of your iPhone using iTunes.
Simply connect your iPhone to a computer, open iTunes, and select your equipment.
Under the “Summary” tab, select “Back Up Now.”
This includes your unique identification number, web connection authorization details, and personal contacts.
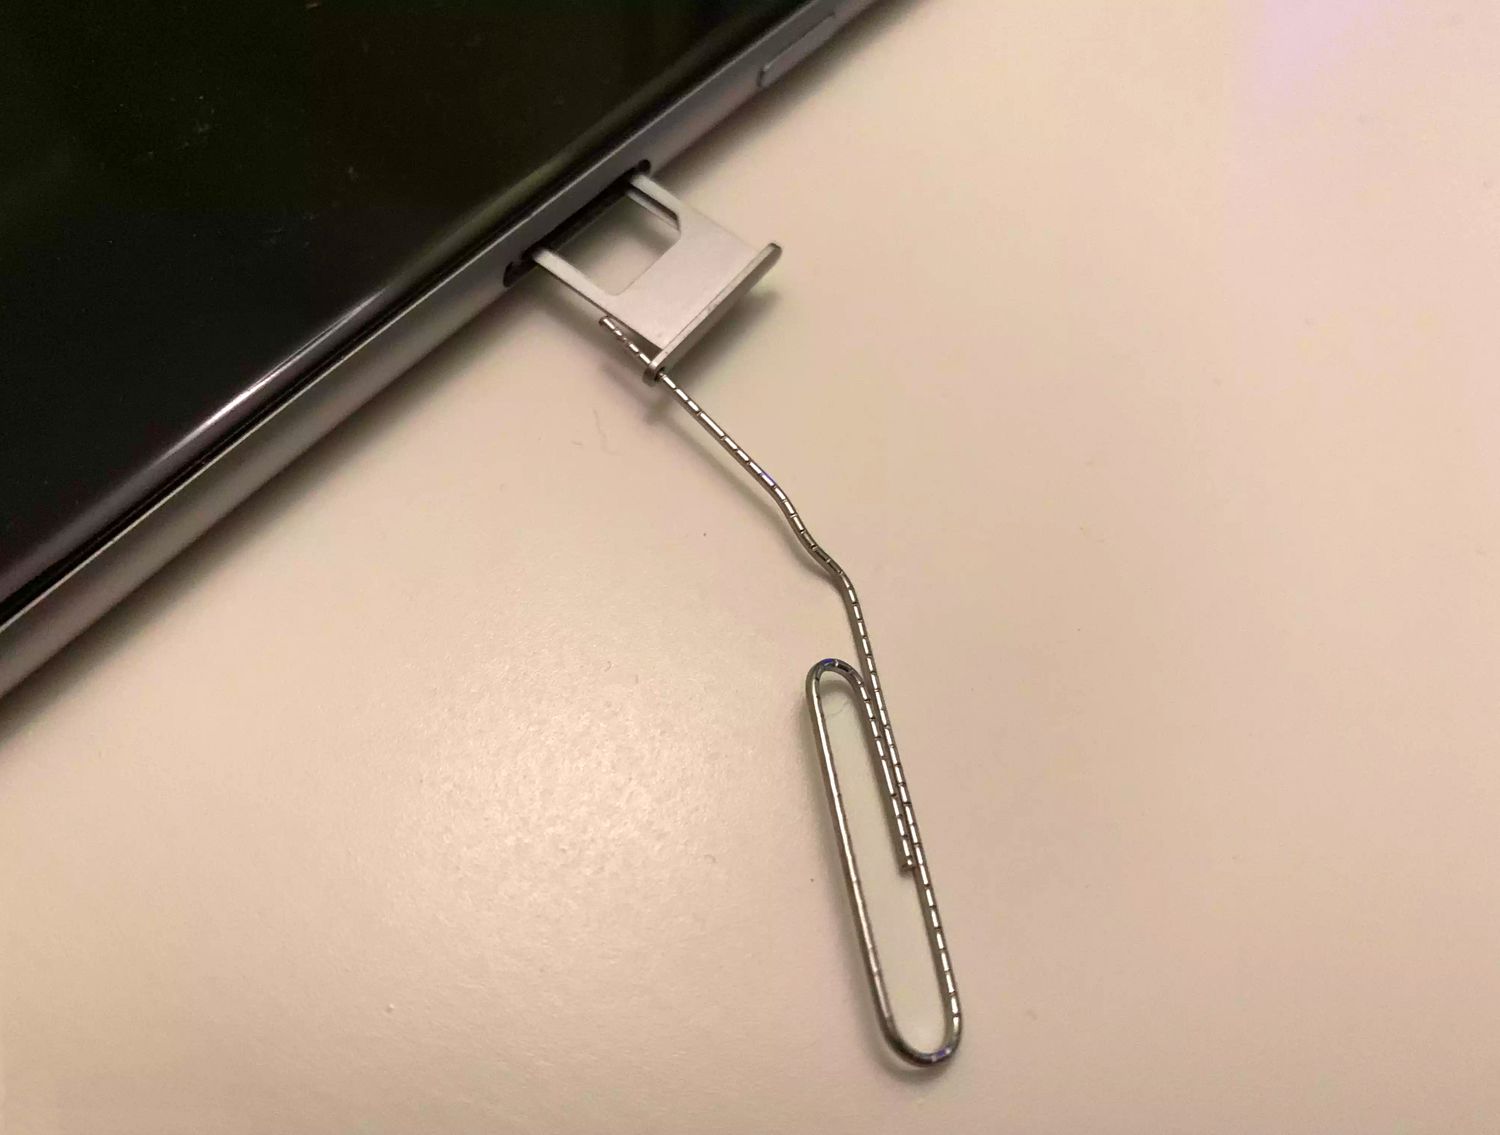
To pull up the tray, you will need a SIM card removal tool or a small paperclip.
Gently apply pressure to the tool, and the tray will pop out slightly.
Carefully pull the tray out of the iPhone, ensuring that it does not dislodge abruptly.
Avoid touching the metal contacts on the SIM card, and refrain from bending or scratching it.
In most cases, the SIM card slot is situated on the right-hand side of the machine.
Carefully identify the position of the SIM card slot on your new iPhone before proceeding.
Apply light pressure to eject the SIM card tray from the new iPhone.
Gently push the tray back into the iPhone until it is flush with the machine’s frame.
Ensure that the tray is fully inserted, and there are no obstructions preventing it from closing properly.
Once the tray is securely in position, power on your new iPhone to initiate the setup process.
As the unit activates, it will recognize the inserted SIM card and establish the necessary web link connection.
These foundational parameters establish the framework for your iPhone’s functionality and connectivity.
This includes your contacts, calendar events, photos and videos, app data, and gear preferences.
