It’s typically included in the original packaging of the gear.
Ensure that the new SIM card is activated and ready for use before proceeding with the replacement process.
It’s a small, circular button that is easily accessible.
This action prompts the gear to begin shutting down.
Wait for the gear to Power Off: Allow the iPhone 4S to complete the power-off sequence.
You’ll notice the screen turning black, indicating that the rig is powered off.
Verify Power Off: To ensure that the machine is completely powered off, briefly press the power button.
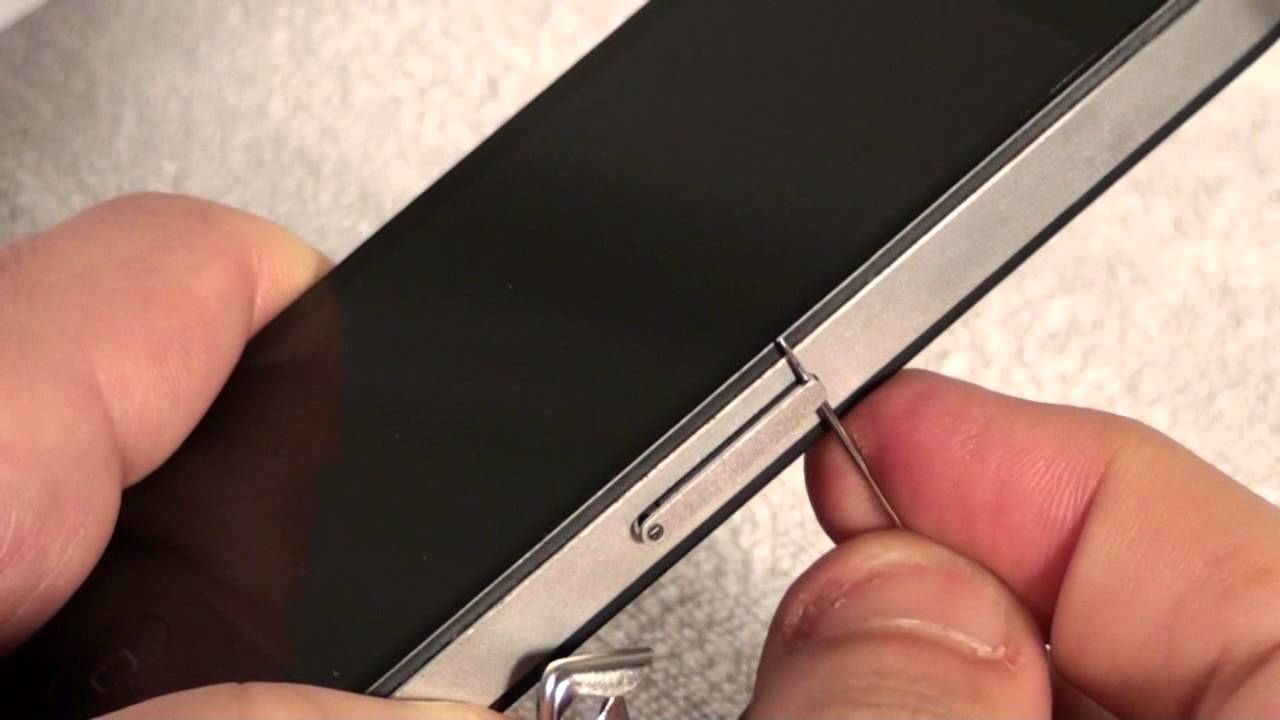
The SIM card tray houses the SIM card and facilitates its secure insertion and removal from the gadget.
This slot is designed to accommodate the SIM card tray and is typically located just below the power button.
The presence of this slot indicates the positioning of the SIM card tray within the gear.
Understanding the physical features and orientation of the equipment will aid in locating the SIM card tray with precision.
Ensure that the tool is readily accessible and held securely in your hand.
Apply gentle pressure to insert the tool into the pinhole, ensuring that it fits snugly.
This action activates the internal mechanism, causing the SIM card tray to protrude slightly from the equipment.
Exercise caution to prevent any sudden movements that may dislodge the SIM card or cause damage to the tray.
Ensure that it is free from any visible damage or debris.
This visual inspection allows you to identify any potential issues with the old SIM card before its removal.
Hold the SIM card by its edges, avoiding contact with the metal contacts or the embedded chip.
Ensure that it is clean and free from any residual debris.
Apply even pressure to guide the tray into the slot, ensuring a smooth and seamless insertion.
