Propercase fan setupis essential for maintaining low temperatures and preventing thermal throttling of your components.
So, lets dive in and give your system the cooling it deserves!
The NZXT H440 supports up to six 120mm fans or four 140mm fans.
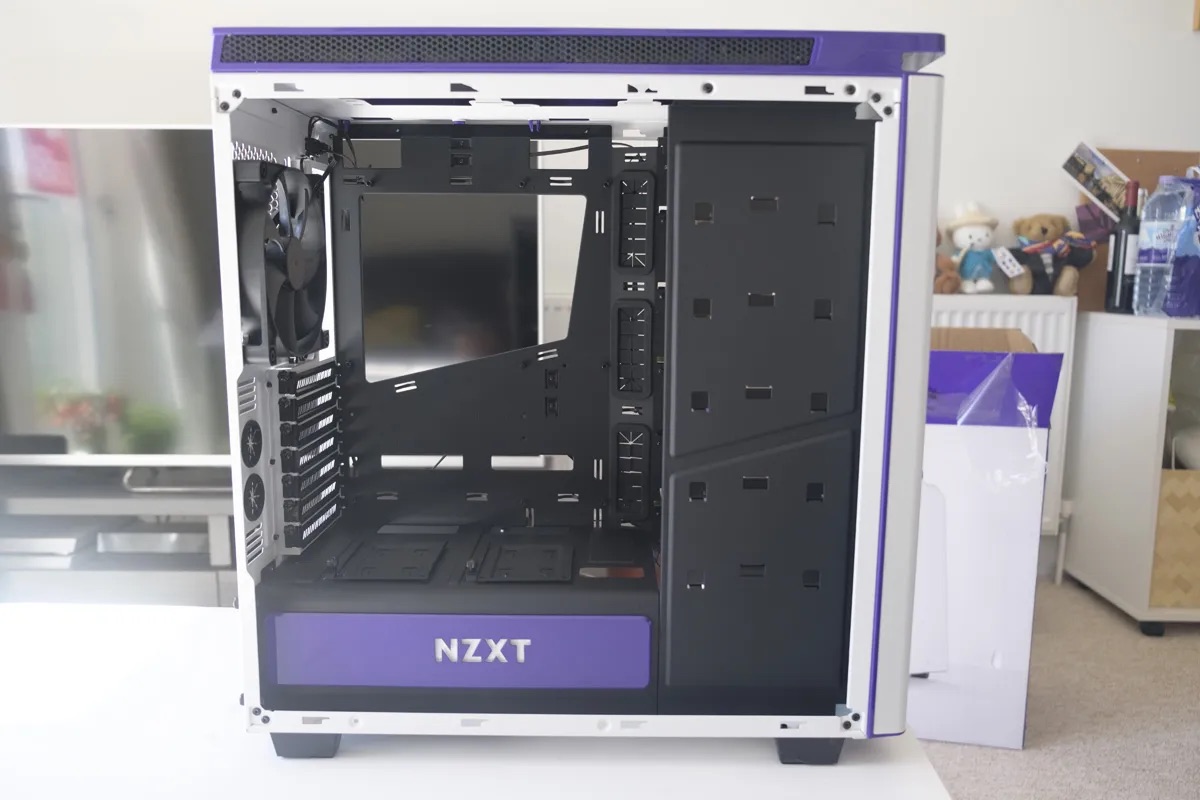
It features fan mounting locations at the front, top, and rear of the case.
Its essential to consider the airflow direction when installing case fans.
This setup ensures a steady airflow and prevents the accumulation of hot air inside the case.
The hub simplifies cable management, reduces clutter, and provides centralized control over fan speeds.
The right fans can significantly impact your systems cooling performance and noise levels.
Here are some key points to keep in mind:
1.
Size: The NZXT H440 supports both 120mm and 140mm fans.
Consider the available fan mounting locations and choose the appropriate size that fits seamlessly into your case.
Airflow and Static Pressure: Fans are typically categorized into two types: airflow fans and static pressure fans.
Assess your cooling requirements and choose fans accordingly.
Fan Speed: Fan speed is measured in revolutions per minute (RPM).
Higher RPM fans tend to provide better airflow but can be noisier.
Consider the desired airflow and noise levels and choose fans with appropriate RPM ranges.
Depending on your preference and motherboard capabilities, choose the jot down of fan that suits your needs.
Consider budget constraints, brand reputation, and customer reviews to make an informed decision.
Heres how to identify and locate these spots:
1.
Front Panel: The front panel of the NZXT H440 supports either three 120mm fans or two 140mm fans.
Look for the fan mounting slots or brackets located behind the front panel cover.
Remove the cover to jump into the mounting spots.
In some cases, you may need to remove drive bays or brackets to make space for the fans.
Top Panel: The top panel of the H440 case can accommodate two 120mm or two 140mm fans.
Locate the fan mounting holes on the top of the case.
The top panel may have a removable magnetic dust filter or a vented area specifically designed for fan installation.
Rear Panel: The rear panel of the NZXT H440 case supports either a 120mm or a 140mm fan.
Look for the single fan mounting hole near the top of the rear panel.
This spot is ideal for exhaust fans, as it helps expel hot air from the case.
when you’ve got identified the fan mounting spots, take a moment to plan your fan configuration.
Consider the airflow direction and the overall cooling strategy.
Remember that installing fans in all available spots is not always necessary.
Assess your cooling requirements and choose the appropriate number of fans.
More fans dont always guarantee better cooling, as an imbalance in airflow or excessive fan noise can occur.
Step 3: Installing Fans at the Front of the Case
1.
Prepare the fans: Ensure that you have the desired number of fans for the front panel.
verify if any additional screws or mounting brackets are provided with the fans.
You may need to apply a bit of pressure, but be careful not to exert too much force.
Set the cover aside for now.
Locate the fan mounting spots: Look for the fan mounting slots or brackets behind the front panel.
These spots should align with the fan sizes you have chosen.
Remember to remove any drive bays or brackets that may obstruct the installation process.
- set up the fans: Line up the screw holes on the fans with the mounting spots.
Insert the screws provided with the fans through the screw holes and tighten them snugly.
Ensure that all the clips and tabs are securely fastened.
Give it a little wiggle to find out if it is properly attached.
Test the fans: Power on your PC and find out if the front fans are spinning.
input your motherboards BIOS or use software to monitor and adjust fan speeds if desired.
Ensure that the fans are running smoothly without any abnormal vibrations or noises.
Step 4: Installing Fans at the Top of the Case
1.
The NZXT H440 supports either two 120mm or two 140mm fans at the top panel.
Ensure you have the necessary screws or mounting brackets for installation.
Check for a removable magnetic dust filter or a vented area specifically designed for fan installation.
Ensure there are no obstructions or cables in the way.
Insert the screws provided with the fans through the screw holes and tighten them securely.
Be careful not to overtighten, as this can damage the fans or strip the mounting holes.
Ensure all connections are secure.
Test the fans: Power on your PC and find out if the top fans are spinning.
put in your motherboards BIOS or use software to monitor and adjust fan speeds if desired.
Ensure that the fans are running smoothly without any abnormal noises or vibrations.
Step 5: Installing Fans at the Rear of the Case
1.
Prepare the fan: Ensure that you have the appropriate size fan for the rear panel.
The NZXT H440 case supports either a 120mm or a 140mm fan at the rear.
verify if any additional screws or mounting brackets are provided with the fan.
This spot is specifically designed for the installation of a rear fan.
Remove any obstacles or cables that may interfere with the installation process.
Insert the screws provided with the fan through the screw holes and tighten them securely.
Be cautious not to overtighten, as it can damage the fan or strip the mounting hole.
Ensure the connection is secure.
Test the fan: Power on your PC and find out if the rear fan is spinning.
type your motherboards BIOS or use software to monitor and adjust the fan speed if desired.
check that the fan is running smoothly without any abnormal noises or vibrations.
With the rear fan installed, you have completed the primary fan installation process.
Step 6: Managing and Connecting Fan Cables
1.
Consider the length of the cables and the locations of the fan headers or fan hub.
Aim for clean cable runs that avoid obstructing airflow or interfering with other components.
Use cable ties or Velcro straps: Secure your fan cables using cable ties or Velcro straps.
Bundle the cables together to avoid clutter and make them easier to manage.
Be sure not to overtighten the ties or straps, as this can damage the cables or restrict airflow.
Route your fan cables behind the tray to keep them out of sight and maintain a clean interior look.
Utilize cable routing holes or grommets to guide the cables neatly.
Ensure you connect them according to your desired fan configuration and airflow direction.
Test the fan connections: Power on your PC and peek if all the fans are functioning properly.
Use motherboard BIOS or fan control software to adjust fan speeds if desired.
Confirm that the fan cables are securely connected and there are no loose connections or cable tangling.
Now, lets move on to the final step of testing and adjusting fan speeds.
Step 7: Testing and Adjusting Fan Speeds
1.
Check your motherboards manual or manufacturers website for specific instructions on accessing fan controls.
Monitor fan speeds and temperatures: Use the BIOS or software to monitor fan speeds and CPU/GPU temperatures.
Many motherboards offer real-time fan speed and temperature readings.
Adjust fan curve configs: Fan curve configs determine how fan speeds respond to changes in temperature.
Most modern motherboards allow you to set custom fan curves or choose from preset profiles.
Experiment with different tweaks to find a balance between airflow and noise.
Higher fan speeds provide more cooling power but can increase noise levels.
Stress test your system: Run intensive tasks or stress testing software to put your system under heavy load.
This will help you assess whether the current fan speeds are sufficient for cooling your components effectively.
Monitor the temperatures during the stress test and adjust the fan speeds if necessary.
Fine-tune as needed: Use the monitoring tools to identify any hotspots or areas that require additional cooling.
Adjust the fan speeds accordingly to ensure adequate airflow to those areas.
Pay attention toCPU and GPUtemperatures, as these are typically the most critical components that require efficient cooling.
These could indicate an issue with the fans or improper installation.
If you notice any abnormalities, double-check the fan installation or consider replacing the fans if necessary.
By testing and adjusting fan speeds, you might optimize the cooling performance of your NZXT H440 case.
Finding the right balance between cooling and noise levels ensures a stable and comfortable computing experience.
Conclusion
Congratulations!
Furthermore, managing and connecting fan cables ensures a clean and clutter-free interior, minimizing interference with other components.
Regularly clean and maintain your fans and filters to prevent dust buildup, which can negatively impact cooling efficiency.
