This wireless keyboard allows you to connect to your setup without the hassle of tangled wires or limited mobility.
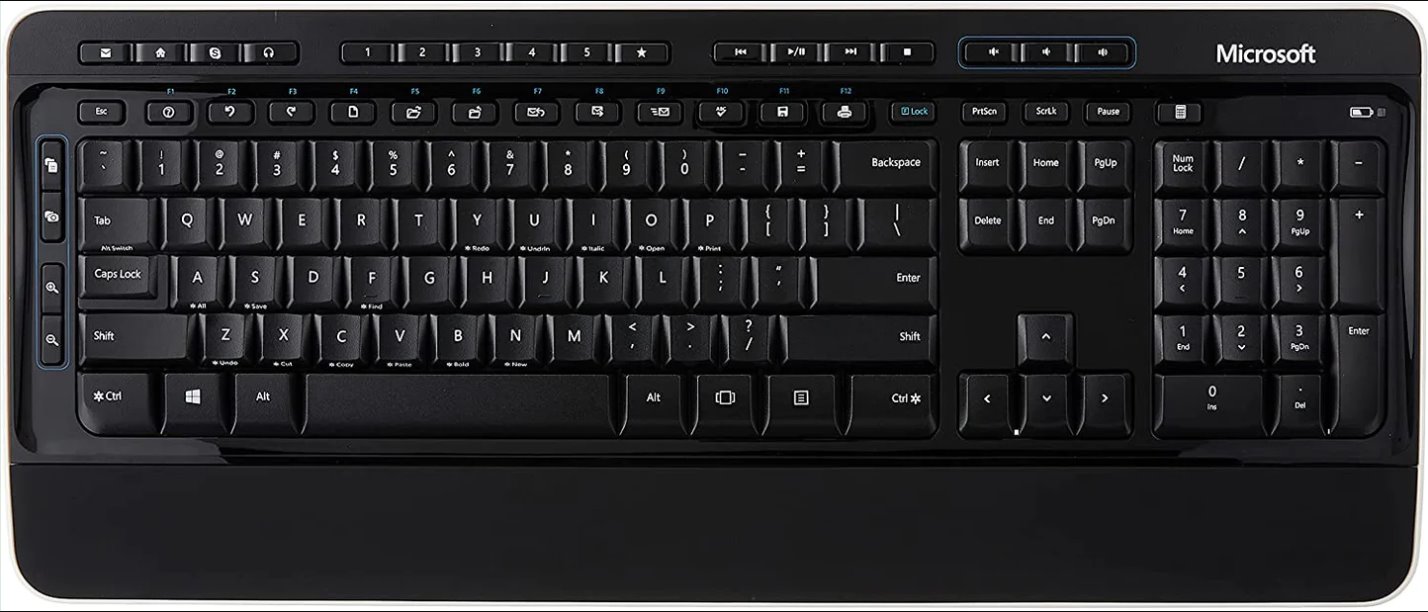
The keyboard features a full-size layout with responsive keys, making typing effortless and comfortable.
Additionally, its wireless connectivity eliminates clutter and allows you to work from a distance.
One of the key features of this keyboard is its compatibility with both Windows and Mac operating systems.
So, lets get started and connect your Microsoft Wireless Keyboard 3000 V2.0 to your system hassle-free!
Lets take a closer look at some of its standout features:
1.
Wireless Connectivity: This keyboard employs advanced wireless technology, allowing you to connect to your setup effortlessly.
Full-Size Layout: With a full-size layout, the Microsoft Wireless Keyboard 3000 V2.0 provides a comfortable typing experience.
The keys are well-spaced and responsive, making it easy to jot down quickly and accurately.
The full-size design also includes a dedicated numeric keypad for effortless number input.
Quiet-Touch Keys: The keyboard features Quiet-Touch keys, which provide a silent typing experience.
With regular use, the batteries can last for several months, minimizing the need for constant replacements.
Additionally, the keyboard features a battery status indicator, alerting you when its time to replace the batteries.
Multimedia Control: This keyboard includes dedicated multimedia keys that allow you to control media playback with ease.
Step 1: Checking the Battery Level
1.
On the back of the keyboard, locate the battery compartment.
It is usually located near the top edge of the keyboard.
Use a coin or your fingernail to twist the battery compartment cover counterclockwise and remove it.
Set the cover aside.
Inside the battery compartment, you will find the battery indicator and the battery slot.
The battery indicator provides a visual representation of the battery level.
Check the battery indicator for the current battery level.
A green light indicates a sufficient battery charge, while a red light indicates a low battery.
If the battery level is low, you will need to replace the batteries with fresh ones.
The Microsoft Wireless Keyboard 3000 V2.0 typically uses two AA batteries.
Step 2: Connecting the Receiver to your machine
1.
Locate an available USB port on your gear.
Insert the USB receiver into the USB port.
Ensure that it is inserted fully to establish a secure connection.
Wait for a few seconds for your system to recognize the USB receiver.
You may see a notification or hear a sound indicating that the receiver has been detected.
If your box is unable to detect the receiver, try inserting it into a different USB port.
Some computers have multiple USB ports, so its worth trying another one to ensure a successful connection.
Step 3: Turning on the Keyboard
1.
Locate the power switch on the underside or the side of the keyboard.
It is usually a small toggle switch labeled with a power icon.
Flip the power switch to the On position.
Once the keyboard is turned on, it will start searching for the receiver and establishing a connection.
This process may take a few seconds.
This ensures a strong and stable connection between the keyboard and the computer.
Once the keyboard has successfully connected to the receiver, it is ready for use.
Its worth noting that the Microsoft Wireless Keyboard 3000 V2.0 also has an auto-off feature to conserve battery life.
If the keyboard is left idle for a certain period, it will automatically enter a power-saving mode.
To wake it up, simply press a key, and it will quickly reconnect to the receiver.
Step 4: Connecting the Keyboard to the Receiver
1.
Look for the connect button on the USB receiver.
It is typically located on the top or side of the receiver.
The button might be labeled as Connect or have a symbol resembling a wireless signal.
Press and hold the connect button on the USB receiver until the LED light on the receiver starts blinking.
This activates the receiver and prepares it to search for the keyboard.
Next, locate the connect button on the underside of the keyboard.
It is usually located near the power switch or in close proximity to the battery compartment.
This indicates that the keyboard has successfully connected to the receiver.
Release the connect buttons on both the USB receiver and the keyboard.
Test the keyboard by typing a few keys to ensure that the connection is working properly.
You should see the characters appearing on your rig screen as you throw in.
Here are a few troubleshooting tips to help you resolve them:
1.
Ensure that the batteries are properly inserted and have sufficient charge.
If needed, replace them with fresh batteries.
Verify the connection: Double-check that the USB receiver is securely connected to your computers USB port.
Ensure that it is inserted fully and not loose.
If necessary, try connecting it to a different USB port.
Start by turning off the keyboard and unplugging the receiver.
Wait for a few seconds, then plug in the receiver and turn on the keyboard again.
This can help establish a fresh connection.
Remove interference: Wireless devices can sometimes be affected by interference from other devices.
These devices can cause signal interference, resulting in connectivity issues.
- cycle your gear: If the keyboard is still not working, try restarting your gear.
Sometimes, a simple reboot can resolve connectivity issues by resetting system options.
Update drivers: Ensure that your computers drivers are up to date.
Visit the manufacturers website to check for any driver updates specifically related to your keyboard model.
Installing the latest drivers can help resolve compatibility issues and improve performance.
This will reset the keyboard to its default tweaks and may help resolve any software-related issues.
They will be able to provide specific guidance and solutions tailored to your situation.
Remember to check the battery level before starting the setup process and insert fresh batteries if required.
Connect the receiver to an available USB port on your machine, ensuring a secure connection.
Turn on the keyboard and establish a connection with the receiver.
