In the realm of photography, the Galaxy S7 truly shines.
The ability to record 4K videos further enhances the rig’s appeal to photography and videography enthusiasts.
The gear’s connectivity options are equally impressive.
Overall, the Galaxy S7 stands as a testament to Samsung’s commitment to innovation and user-centric design.
Firstly, locate the power button on the right-hand side of the rig.
Directly above the power button, you will find the SIM card tray slot.
This small, metallic tool is specifically designed to facilitate the removal and insertion of the SIM card tray.
Gently insert the SIM eject tool into the pinhole, applying a slight amount of pressure.
This action will cause the SIM card tray to partially eject from the unit.
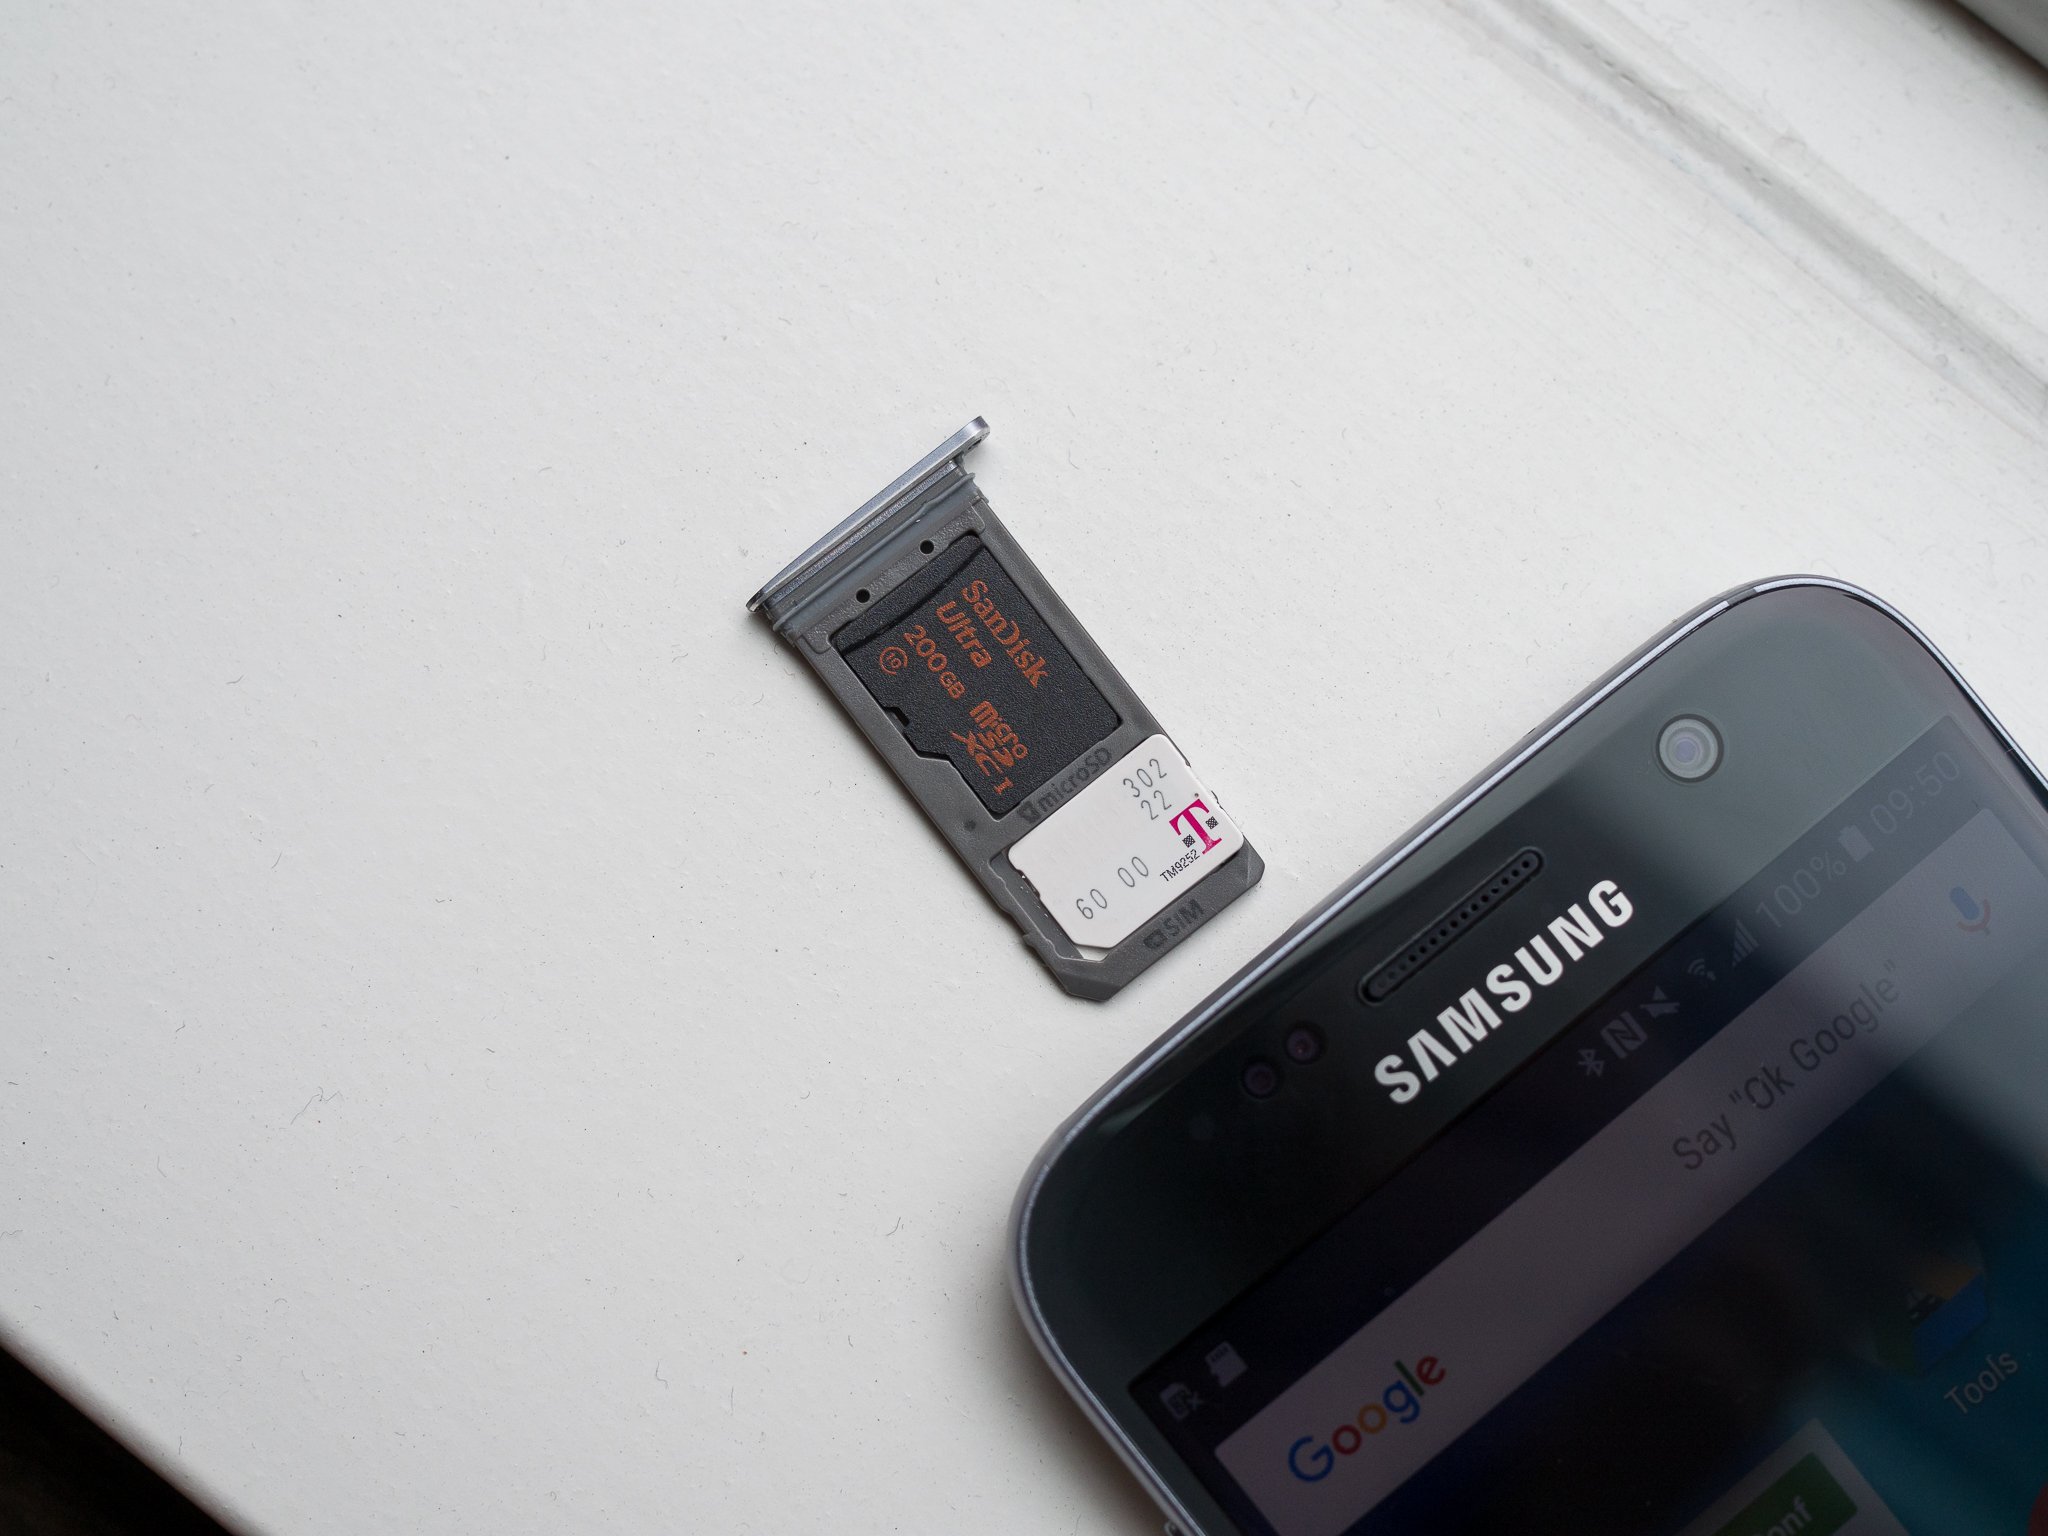
The SIM card slot is clearly labeled, allowing for easy identification and proper positioning of the SIM card.
Apply slight pressure to eject the SIM card tray, ensuring that it comes out smoothly without any resistance.
Next, inspect the SIM card and the tray for any signs of damage or debris.
Ensure that the SIM card is clean and free from any visible defects that may hinder its functionality.
Avoid applying excessive force during this step to prevent any damage to the SIM card or the gear.
Handle the SIM card with care, ensuring that it is safely stored or replaced as needed.
However, like any technological component, the SIM card may encounter issues that can disrupt its functionality.
Inspect the SIM card for any visible damage or debris, ensuring that it is clean and properly positioned.
Power on your Galaxy S7 and verify if the SIM card detection issue has been resolved.
This action can trigger the machine to reestablish its connection to the internet.
Verifying that the SIM card aligns with the machine’s requirements is crucial in preventing compatibility issues.
