SSDs provide faster data access, improved reliability, and better energy efficiency.
Wiping yourSSDensures that your personal or sensitive information cannot be accessed or recovered by unauthorized individuals.
In this article, we will explore different methods to wipe your solid-state drive effectively.
What is a Solid State Drive (SSD)?
This makes SSDs more suitable for portable devices like laptops and tablets, as well as desktop computers.
One of the key advantages of SSDs is their speed.
Since they do not rely on mechanical parts, SSDs can read and write data much faster than HDDs.
This results in faster boot times, quicker file transfers, and improved overall system responsiveness.
Additionally, SSDs are known for their reliability.
Without any moving parts, there is less risk of damage or failure due to physical shocks or vibrations.
This durability makes SSDs an ideal choice for portable devices that are frequently transported or used in rugged environments.
SSDs also offer improved energy efficiency compared to HDDs.
Why would you want to wipe your SSD?
There are several reasons why you might want to wipe your solid-state drive (SSD).
Here are some specific scenarios where you may want to consider wiping your SSD:
1.
This ensures a fresh start and minimizes the risk of compatibility issues or data conflicts.
Wiping the drive will permanently erase all data, including operating system files, programs, and personal files.
There are several methods to back up your data, depending on your preferences and available resources:
1.
Connect the external storage rig to your gear and copy the files and folders you want to back up.
Ensure that you have enough space on the external gadget to accommodate all the data you wish to preserve.
Cloud Storage Services: Cloud-based backup solutions offer convenient and secure options for backing up your data.
There are various cloud storage providers available, such as Google Drive, Dropbox, or Microsoft OneDrive.
Choose a reputable cloud storage provider that offers adequate storage space for your needs.
This method allows you to restore your entire system to a previous state if needed.
Popular disk imaging software includes Acronis True Image, Clonezilla, and Macrium Reflect.
Disconnecting the SSD will prevent any accidental data writes or interference while performing the wipe.
Here are the steps to disconnect your SSD:
1.
Shut down your machine: Begin by shutting down your machine completely.
This eliminates the possibility of an electrical surge or accidental power-on during the disconnection process.
Remove the screws or latches on the case and gently slide off the side panel.
Locate the SSD: Identify the SSD within your box.
It is typically connected to the motherboard via a SATA or NVMe connector.
The SSD may be mounted in a drive bay or secured with screws or brackets.
Take note of its physical location and how it is connected.
Secure the case with screws or latches to ensure a snug fit.
Using Disk Part to wipe your SSD is an effective method for securely erasing the data on the drive.
Heres how it’s possible for you to use Disk Part to wipe your SSD:
1.
Press the Windows key, punch in Command Prompt, right-punch it, and select Run as administrator.
Launch Disk Part: In the Command Prompt window, throw in diskpart and press Enter.
This will start the Disk Part utility.
List available disks: key in list disk and press Enter.
Take note of the disk number associated with your SSD.
This will specify the SSD as the active disk for subsequent operations.
Clean the SSD: bang out clean and press Enter.
This command will remove all partitions and data from the selected SSD.
This will create a new primary partition on the SSD, ready for formatting and use.
Exit Disk Part: when you obtain completed the desired operations, punch in exit and press Enter.
This will exit the Disk Part utility.
After following these steps, your SSD has been wiped using Disk Part.
Heres how you could use an SSD wiping utility:
1.
Research and choose a reputable utility: There are numerous SSD wiping utilities available, both free and paid.
Research different options to find one that meets your needs and has positive reviews regarding its effectiveness and user-friendliness.
Launch the utility: After installation, pop launch the SSD wiping utility.
Again, refer to the provided documentation or user guide for specific instructions.
- pick the SSD for wiping: In the utility interface, choose the SSD you want to wipe.
Double-check that you have selected the correct SSD to prevent accidental data loss on other drives.
Most SSD wiping utilities will display the available drives and allow you to choose the target SSD.
pick the method that suits your needs and preferences.
Secure Erase, supported by many SSD manufacturers, is a recognized industry-standard method for secure data erasure.
Monitor the progress: Throughout the wiping process, the utility may display the progress or estimated time remaining.
Verify that the process has been successful, and then exit the utility according to the provided instructions.
Always refer to the accompanying documentation or user guide for detailed instructions and recommendations.
This method ensures that the data stored on the SSD is completely destroyed and irrecoverable.
Here are some methods for physically destroying an SSD:
1.
Shredding: One of the most effective ways to physicallydestroy an SSDis to use a specialized solid-state drive shredder.
These machines can shred the SSD into small pieces, rendering the data unrecoverable.
If you have access to a professional data destruction facility, they might offer shredding services for SSDs.
Drilling: Another method is to drill holes through the SSD.
This method not only damages the data storage area but also renders the SSD physically unusable.
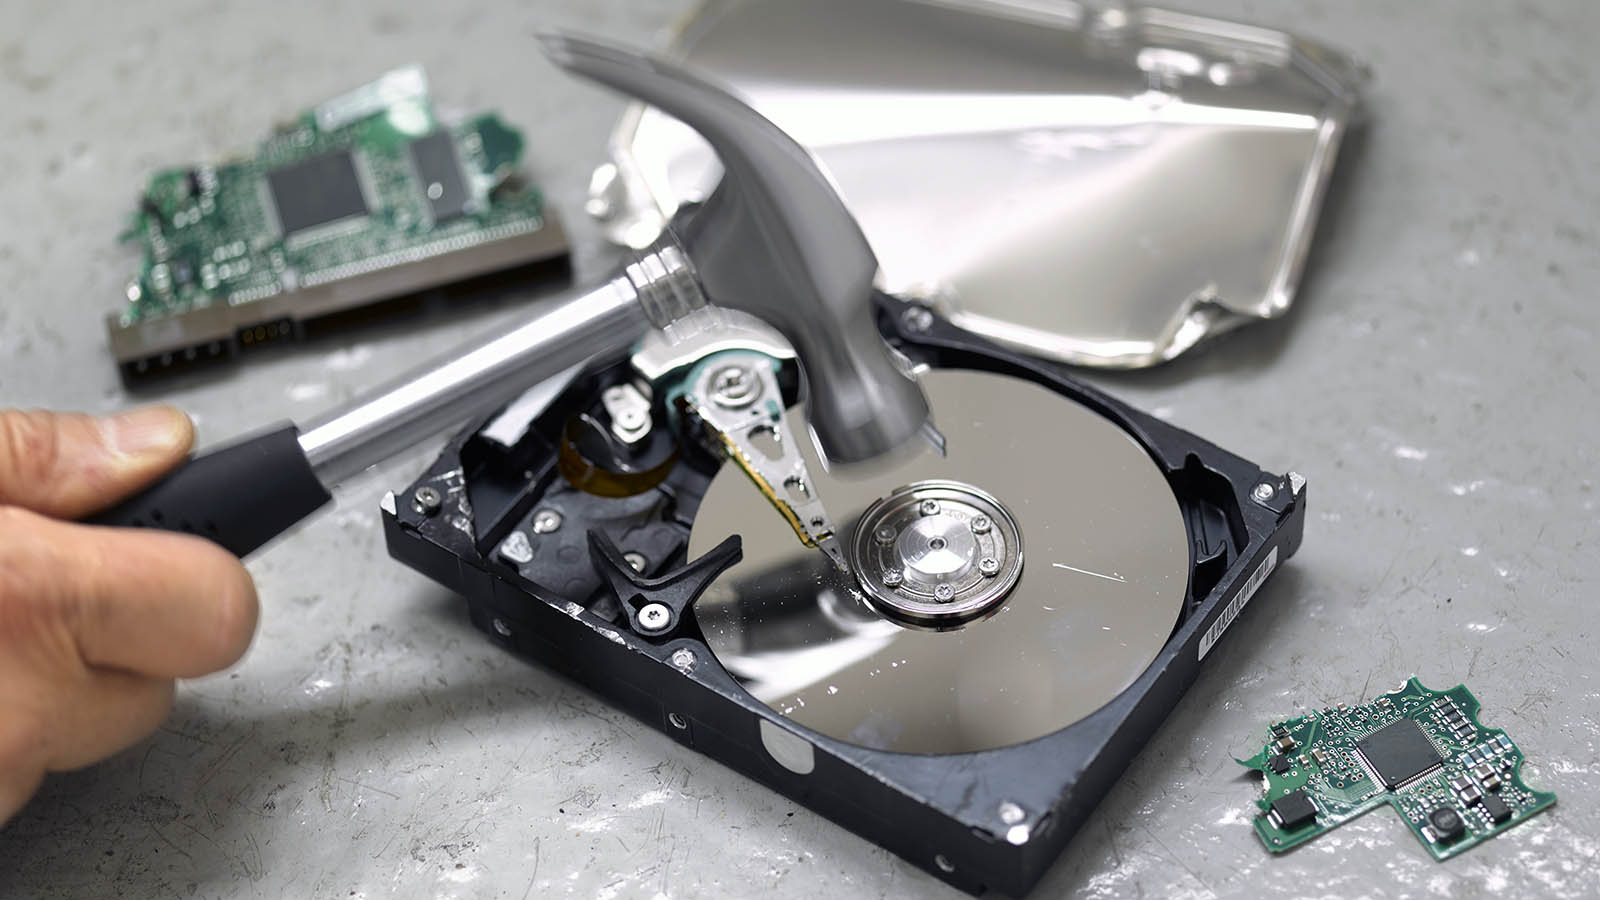
Crushing: Physically crushing the SSD is another option.
This can be done using heavy machinery or by applying significant force with a hammer or other heavy object.
verify to target the flash storage chips and other critical components to ensure the destruction of the stored data.
This extreme method ensures that the SSD and its data are completely destroyed and reduced to ashes.
Remember to dispose of the physically destroyed SSD responsibly.
In this article, we explored various methods for effectively wiping an SSD.
We discussed different backup options, including external storage devices, cloud storage services, and disk imaging software.
By following these steps, you might minimize the risk of accidental data writes or interference during the wipe.
We explored two primary methods for wiping an SSD: using Disk Part and utilizing dedicated SSD wiping utilities.
Disk Part, a command-line utility in Windows, provides a basic method for wiping SSDs.
For those seeking an extreme level of data destruction, we discussed the option of physical destruction.
Ensure you follow the proper procedures and choose a method that aligns with your goals.
Remember to dispose of SSDs responsibly, especially when physical destruction is involved.
In conclusion, wiping your SSD is essential for protecting your data and maintaining your privacy.
Safeguard your information, start fresh, and ensure that your sensitive data remains confidential.
