Introduction
Welcome to the fascinating world of GPU water cooling!
In this guide, we will take you through the process of water cooling your GPU step by step.
Why would you want to water cool your GPU in the first place, you might ask?
Well, there are several compelling reasons.
First and foremost, water cooling offers superior cooling performance compared to air cooling.
Additionally, water cooling also helps to reduce noise levels.
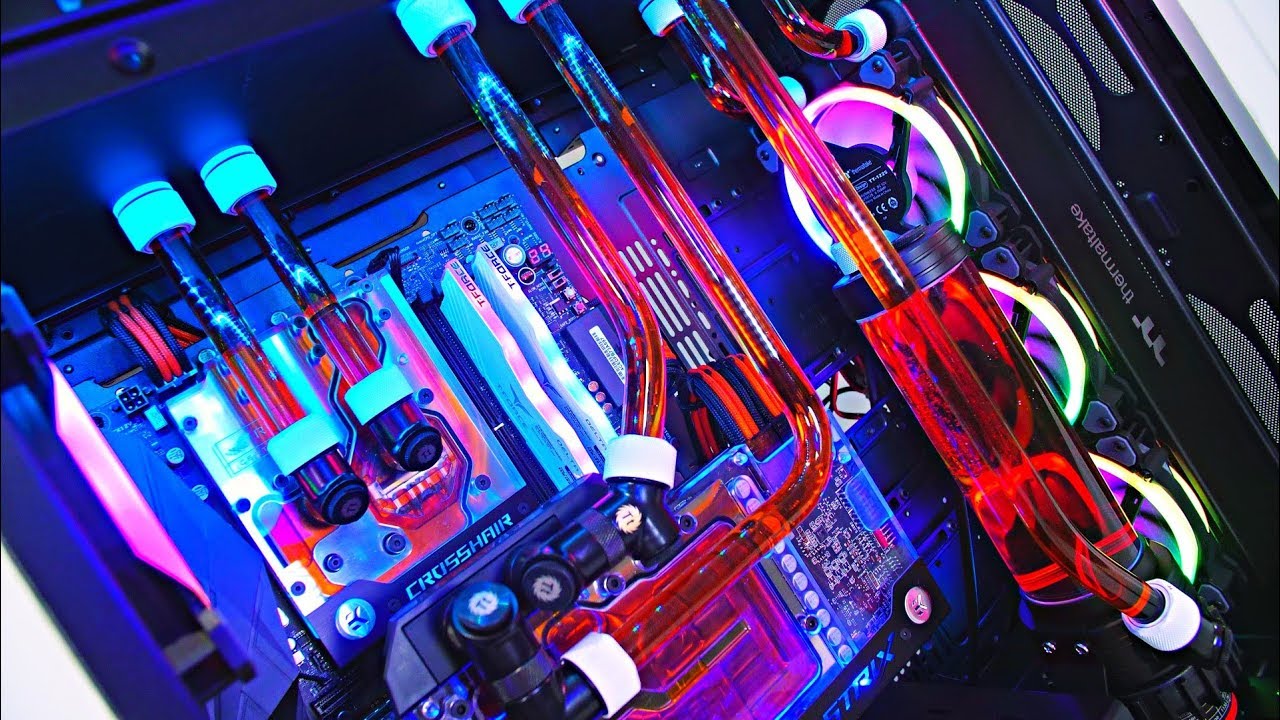
Furthermore, water cooling allows for greater flexibility in terms of customization and aesthetics.
Strap in, because were about to embark on a thrilling adventure into the realm of GPU water cooling!
Why Water Cooling a GPU?
Water cooling a GPU offers a range of advantages over traditional air cooling methods.
Lets explore why you might want to consider water cooling your graphics card.
This results in improved performance and stability, especially during demanding tasks like gaming or rendering.
Overclocking Potential:Water cooling can unlock the full overclocking potential of your GPU.
Overclocking refers to increasing the clock speed and voltage of a graphics card to achieve higher performance.
As GPUs generate more heat when overclocked, water cooling becomes crucial for maintaining stable temperatures under heavy loads.
In contrast, water cooling allows for quieter operation.
Aesthetic Customization:Water cooling offers the opportunity to personalize the look of your GPU and overall system.
This degree of customization allows you to design a system that matches your personal style and preferences.
Longevity and Protection:Excessive heat can shorten the lifespan of your GPU and other components.
Now that we understand the benefits, lets delve into the basics of water cooling.
Lets dive into the basics of water cooling to understand how it works.
The water block is responsible for transferring heat from the GPU to the coolant.
The pump circulates the coolant through the loop, allowing the heat to be transferred to the radiator.
Coolant Selection:The coolant used in water cooling systems is a vital component.
Water blocks are typically made of copper, which has excellent thermal conductivity.
They feature a series of small channels or fins to maximize the surface area in contact with the coolant.
Some water blocks even include RGB lighting or other aesthetic elements to enhance the visual appeal of your system.
Its important to select fans with good static pressure to ensure optimal cooling efficiency.
Regular maintenance is also essential to keep the loop running smoothly.
This includes periodic cleaning of the water blocks, checking for any leaks, and replacing coolant as needed.
Lets explore the key components you should probably consider when selecting your water cooling setup.
Its important to select a water block that is specifically designed to fit your GPU model.
Manufacturers often provide compatibility lists to help you identify the correct water block for your GPU.
Pump:The pump is responsible for circulating the coolant through the loop.
A reliable pump is crucial to ensure proper flow and efficient heat transfer.
Look for pumps that offer sufficient flow rate and head pressure to accommodate your specific loop configuration.
Its also worth considering pumps with adjustable speed tweaks, allowing you to balance performance and noise levels.
Radiator:The radiator is responsible for dissipating heat from the coolant.
Radiators come in various thicknesses (usually 30mm-60mm) and fin densities (FPI).
Thicker radiators provide more surface area but may require adequate clearance in your case.
Fans:Fans play a crucial role in enhancing airflow through the radiator.
Look for high-quality fans that offer good static pressure and low noise levels.
The number of fans you need will depend on the radiator size and your cooling requirements.
Tubing:Selecting the right tubing is important for maintaining proper coolant flow and minimizing the risk of leaks.
Common tubing materials are PVC, acrylic, or more advanced options like PETG or soft silicone.
Coolant:The choice of coolant goes beyond its color.
This process involves disassembling the existing cooler and cleaning the GPU surface for the installation of the water block.
Gently release the locking latch on the PCIe slot and remove the GPU from the motherboards slot.
Remove any screws or fasteners that secure the cooling assembly to the GPU.
Use a thermal paste remover and carefully wipe away any existing thermal paste from the GPUs core.
Allow it to dry completely before moving on to the next step.
Step 6: Apply new thermal paste (optional):This step is optional but recommended.
Be cautious not to apply too much, as it can lead to poor thermal conductivity.
Ensure the thermal paste (if applied) is evenly spread.
Check for any loose screws or cables that might interfere with the installation of the water block.
By following these steps, youll be able to successfully remove the stock cooling from your GPU.
Allow it to dry completely.
Check the manufacturers website or product documentation to ensure that the water block is designed to fit your GPU.
Pay attention to any specific instructions or additional components required for compatibility.
Ensure that all necessary mounting hardware and fittings are included and in good condition.
If you notice any issues or missing components, communicate with the manufacturer for assistance or replacement if necessary.
Ensure that the fittings are tightened properly and that the tubing is cut to the appropriate length.
Take care to route the tubing in a way that allows for easy installation and optimal coolant flow.
By following these steps, youll be well on your way to preparing your GPU for water cooling.
Take note of any specific orientations indicated by the manufacturer.
Be cautious not to overtighten and risk damaging the GPU or water block.
Ensure that no cables or connectors are interfering with the installation.
Use the appropriate fittings for your tubing size and securely tighten them to ensure a leak-free connection.
Cut the tubing to the desired length, leaving some slack for ease of installation and maintenance.
Use fittings and clamps to secure the tubing to the water block and other components in the loop.
verify the tubing is properly aligned to allow for optimal coolant flow.
By following these steps, you could install a GPU water block effectively.
The manufacturers instructions or labeling on the water block itself will indicate which port is which.
In most cases, the water block will have an arrow or marking indicating the flow direction.
Ensure that the size of the tubing matches the fittings and that the connections are snug but not overtightened.
Consider using clamps or compression fittings to secure the tubing in place for leak-free operation.
Take into account factors such as aesthetics, space constraints, and the most efficient route for coolant flow.
Avoid kinking or sharp bends in the tubing, as it can impede flow and potentially cause leaks.
Use the appropriate fittings and connectors to ensure a secure and leak-free connection.
Consider using angled fittings or adapters if needed to ensure a clean and tidy tubing route.
Fill the loop with coolant, ensuring that all components are properly submerged.
Power on the pump and monitor the system for any signs of leaks or drips.
Use the manufacturer-recommended method to bleed the air from your specific water cooling system.
confirm you follow the manufacturers instructions for your specific radiator model.
Use the provided screws or mounting hardware to attach the fans to the radiator.
Power on your system and monitor the GPU temperature under both idle and load conditions.
Ensure that the fans are spinning correctly and that the radiator is effectively dissipating heat.
Adjust fan speed or other options as necessary to achieve optimal cooling performance.
This allows air bubbles to rise to the top, making the bleeding process easier.
If not, consider using a separate tube or funnel to pour the coolant into the loop without spilling.
Keep a close eye on the tubing and the components to ensure that no leaks or spills occur.
Allow time for the coolant to flow through the loop and fill any empty spaces.
Be patient and take your time to ensure a thorough filling and bleeding process.
It should be at the recommended level as indicated by the manufacturer.
If necessary, top up the coolant to the appropriate level.
Carefully inspect the entire loop for any signs of leaks.
Check all fittings and connections to ensure they are secure and tight.
Reconnect all components and cables, ensuring everything is secure.
By following these steps, you could effectively fill your water cooling loop with coolant.
Once the loop is filled, its time to move on to the final step: testing for leaks.
This allows you to detect and address leaks without risking damage to your system.
This reduces the risk of any electrical damage in case of a leak.
Additionally, have some absorbent material or paper towels nearby to quickly address any minor leaks.
Look for any signs of dripping, droplets forming, or dampness around fittings, connectors, and tubing.
Check for any changes in coolant levels, air bubbles, or unusual temperatures.
Take note of the location and tighten the affected connections as necessary.
This allows you to detect any latent leaks that may have been initially missed.
By following these steps, you’re free to effectively test for leaks in your water cooling loop.
Being vigilant and addressing any leaks promptly will help protect your components and ensure the integrity of your system.
Additionally, troubleshooting may be necessary if you hit any issues or abnormalities.
Here are some important tips to help you maintain and troubleshoot your water cooling system:
Maintenance:
1.
Use compressed air or a soft brush to gently clean the radiator.
Additionally, periodically clean the water blocks and any filters in the loop to remove accumulated sediment or particles.
Coolant Replacement:The coolant in your water cooling system may degrade over time or become contaminated.
Consider replacing the coolant every 6 to 12 months, or according to the manufacturers recommendations.
Ensure that the fans are operating correctly, the radiator is clean, and the pump is functioning properly.
Also, check the thermal paste on the CPU and GPU to ensure proper contact and thermal transfer.
Ensure that the pump is receiving adequate power and that it is properly secured.
If the pump continues to exhibit issues, it may be necessary to replace it with a new one.
Leaks:If you detect any leaks, address them immediately.
Double-check the fittings, tubing connections, and water block mounting to ensure they are secure.
Air Bubbles:Air bubbles trapped in the loop can hinder cooling performance and cause intermittent temperature fluctuations.
Over time, the air bubbles should naturally dissipate as the coolant circulates.
Corrosion and Maintenance:Regularly inspect all components for corrosion or signs of wear.
Conclusion
Congratulations!
You have now reached the end of this comprehensive guide on water cooling your GPU.
Regular maintenance is key to preserving the efficiency and longevity of your water cooling setup.
Water cooling can provide significant benefits in terms of cooling performance, noise reduction, and aesthetic customization.
We hope this guide has equipped you with the knowledge and confidence to embark on your water cooling adventure.
Remember to enjoy the process, experiment, and share your experience with the PC enthusiast community.
