Introduction
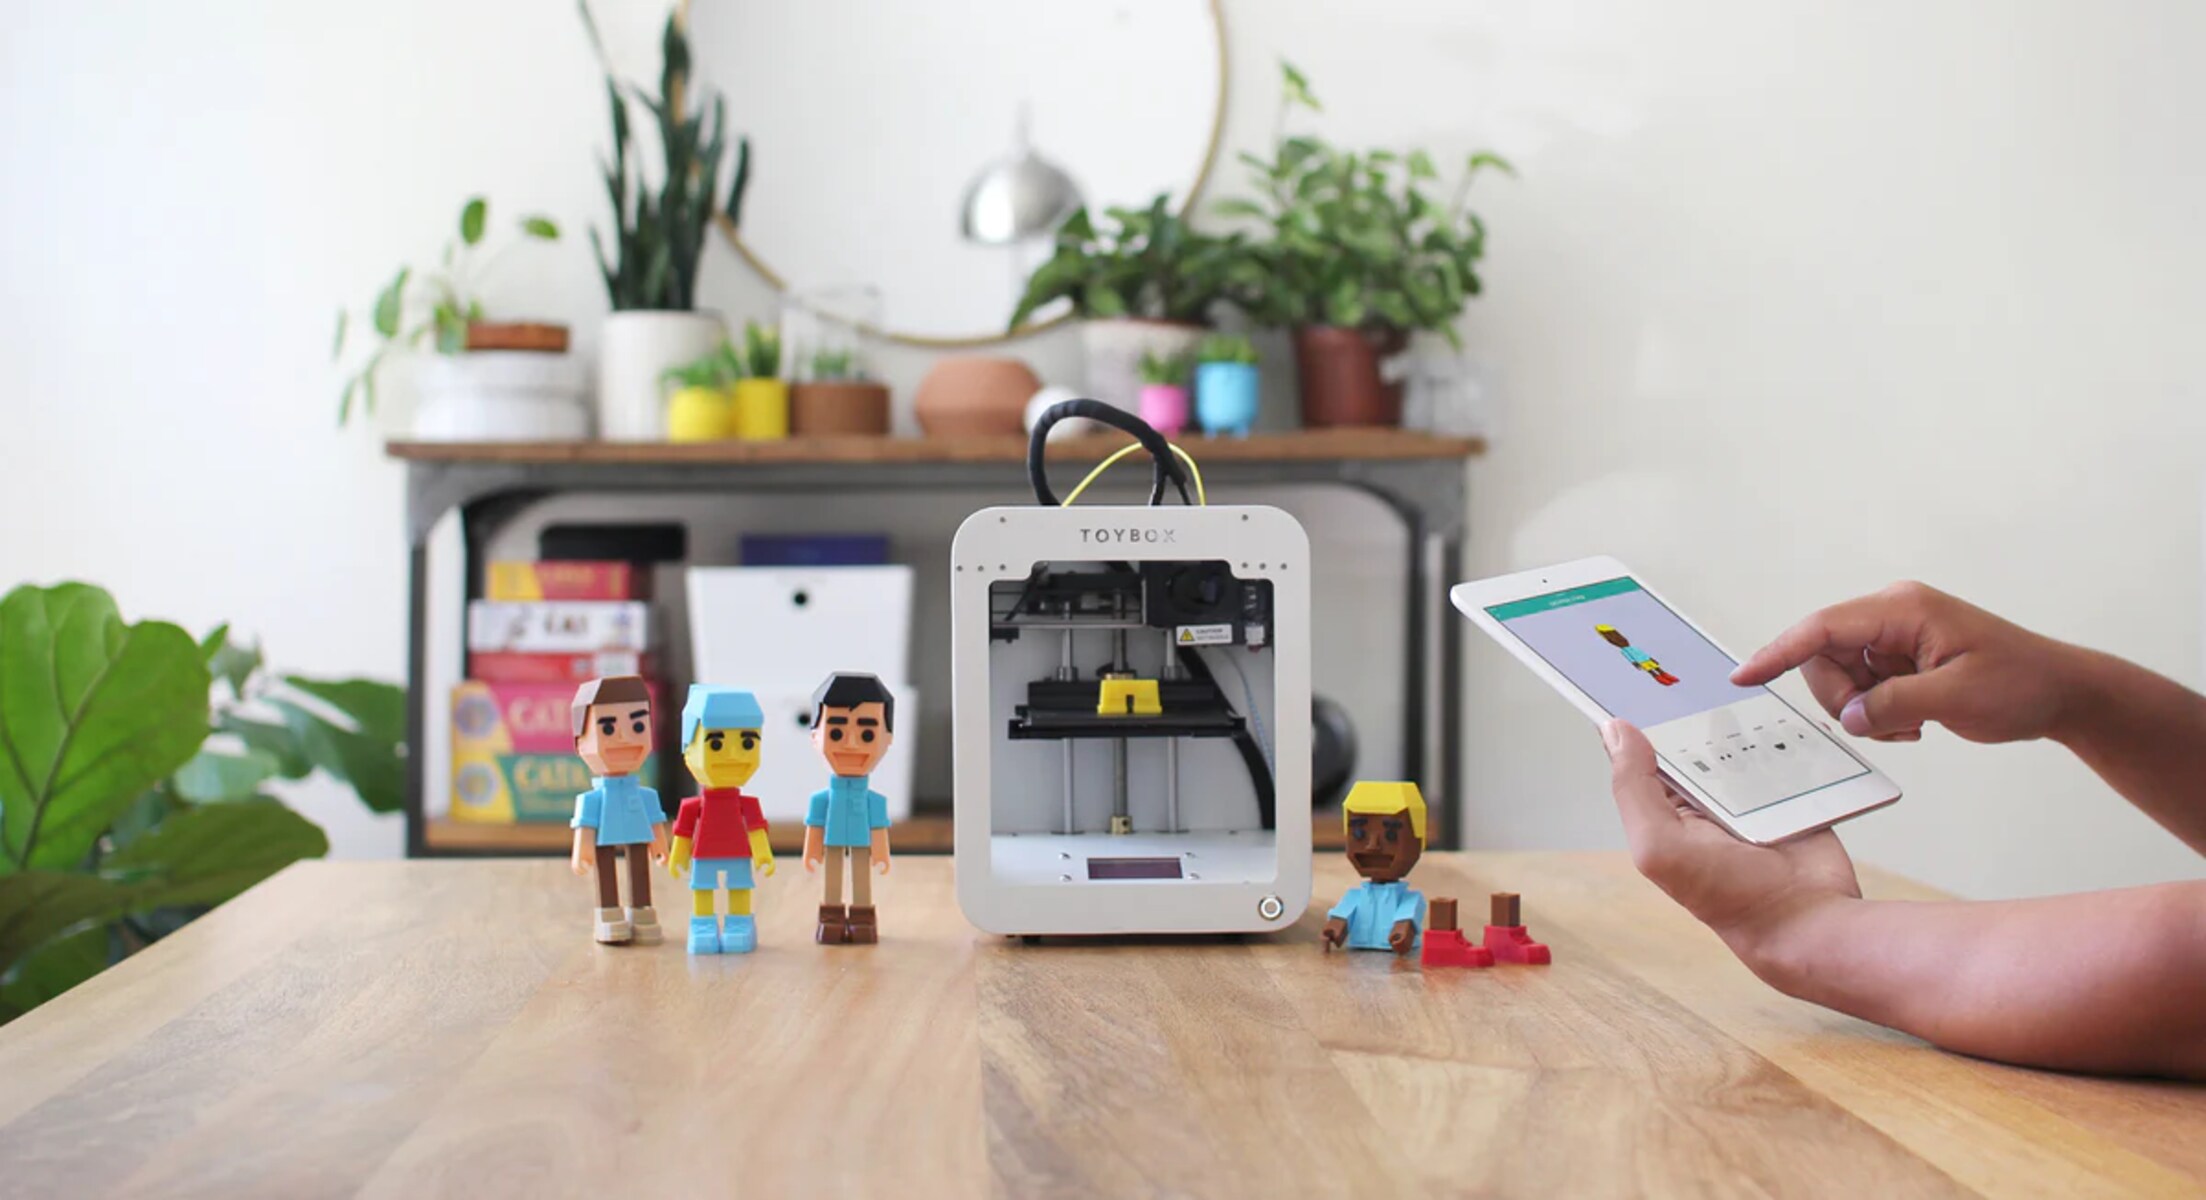
Welcome to the exciting world of 3D printing with the Toybox 3D Printer!
From designing and printing your own toys to creating functional prototypes, the possibilities are endless.
Before we dive into the details, lets take a moment to understand what 3D printing is all about.
Unlike traditional manufacturing methods that involve subtractive processes like cutting or carving, 3D printing is an additive process.
It builds objects layer by layer, using a digital model as a blueprint.
This means you have full control over the design and can create complex and intricate objects with ease.
The Toybox 3D Printer utilizes the latest technology to ensure high-quality prints and ease of use.
It offers a multitude of features and functions to enhance your printing experience.
Well also provide troubleshooting tips in case you encounter any issues along the way.
Get ready to bring your imagination to life and transform your ideas into tangible objects.
This section will guide you through the initial setup and familiarize you with the necessary tools and software.
The first step is to ensure that you have all the components of the Toybox 3D Printer.
If you find any missing or damaged parts, reach out to the manufacturer for assistance.
Next, find a suitable location for your printer.
Choose a stable surface away from direct sunlight and excessive moisture.
The printer should also be easily accessible for filament changes and maintenance.
Once youve found the perfect spot, plug in the power adapter and turn on the printer.
While the printer is booting up, its a good time to download the Toybox app.
Visit the app store on your unit, search for Toybox, and download the free app.
Once the app is installed, open it and create an account.
This account will allow you to save and access your designs from any gadget.
So lets get creative and bring your ideas to life!
Carefully lift it from the packaging and place it on a clean, flat surface.
Take a moment to appreciate the sleek and compact design of the printer.
Its modern aesthetics make it a stylish addition to any workspace.
Next, locate the power adapter and the accompanying cables.
These will be needed to power up the printer and ensure smooth operation.
Check that all cables are intact and free from any damage.
Now, lets explore the various accessories included with the Toybox 3D Printer.
Youll typically find a starter pack of filament, which allows you to begin your printing journey right away.
Inspect the filament spool and ensure it is securely sealed to maintain its freshness and quality.
Additionally, you may find a set of calibration cards or tools.
These aids are used to fine-tune the printers configs and ensure optimal print quality.
Familiarize yourself with these tools, as they will come in handy during the setup process.
Lastly, check for any documentation or instruction manuals.
As you unbox each component and inspect them, take note of any damage or missing items.
If something seems amiss, its essential to drop a line to the manufacturer or retailer promptly.
Unboxing the Toybox 3D Printer is an exciting moment that marks the beginning of your 3D printing journey.
Take a moment to familiarize yourself with the printers interface and prefs.
Explore the various options and features available to customize your prints and ensure optimal output quality.
The Toybox app often includes sample designs that it’s possible for you to choose to print.
Select a simple design and follow the instructions to start the printing process.
Setting up the Toybox 3D Printer is an essential step to ensure a seamless printing experience.
Lets continue our journey into the world of 3D printing!
This section will guide you through the steps of transforming your creative ideas into printable files.
The first step in preparing your design is to choose or create a 3D model.
The recommended file format is STL (Standard Tessellation Language).
This file format represents the geometry of the model and is widely supported by 3D printing software.
These programs allow you to import your design and export it in the required format.
Simply follow the instructions provided by the software to store your file as an STL.
With your design converted into an STL file, its time to import it into the Toybox app.
launch the app and navigate to the design section.
grab the option to upload a new design, and choose the STL file from your devices storage.
Once your design is uploaded, you could further customize it using the tools provided by the app.
Scale the size of the model, adjust its orientation, or add supports if needed.
The app will provide visual cues and indicators to help you optimize your design for printing.
Before sending your design to the printer, its a good practice to preview it.
The Toybox app offers a preview feature that allows you to visualize how your design will look once printed.
Get ready to bring your designs to life!
Upon opening the Toybox app, youll be greeted with a visually pleasing and intuitive home screen.
The design library is where you’ve got the option to manage and organize your designs.
Upload your own STL files or browse through the pre-existing designs available in the library.
The library offers convenient filters and search options to help you find the perfect design for your next project.
Once youve selected the design you want to print, its time to customize your print tweaks.
Use the apps intuitive tools to adjust these configs to your preference.
Once youre satisfied with the preview, its time to send your design to the Toybox 3D Printer.
you could share your designs, get feedback, and discover new tips and techniques to improve your skills.
Take advantage of this community to learn and grow as a 3D printing enthusiast.
fire up the Toybox app and navigate to the design library, where your customized design is saved.
choose the design you want to print.
Once youre satisfied with the tweaks, tap on the Print button.
The Toybox app will establish a connection with your printer and begin the transfer of your design wirelessly.
This may take some time, depending on the size and complexity of your design.
Its important to ensure a stable Wi-Fi connection to avoid any interruptions during the transfer.
Take a moment to double-check that the design name and parameters match your expectations.
At this point, you’re free to step back and let your Toybox3D Printer workits magic.
This interface provides real-time updates on the printing time, progress, and estimated time remaining.
It also allows you to pause or cancel the print if needed.
Dont be afraid to take the time to watch the process unfold.
Once the printing process is complete, carefully remove your finished print from the Toybox 3D Printer.
One way to customize your print is by adjusting its size and scale.
Experiment with different dimensions to achieve the desired outcome.
Another way to personalize your print is by choosing the right filament color.
Select a color that aligns with your design or invokes the desired mood for your creation.
In addition to color, you’ve got the option to also experiment with different filament materials.
The Toybox 3D Printer supports a wide range of filaments, including PLA, ABS, and flexible materials.
When customizing your print, consider adding support structures if needed.
The Toybox app provides tools to automatically generate support structures, ensuring successful prints with intricate designs.
Furthermore, you’re able to explore post-processing techniques to further enhance your prints.
Experiment with different techniques and materials to achieve the desired finish.
Aside from physical customization, you might also explore the realm of software customization.
Remember, the only limit to customizing your print is your imagination.
Feel free to experiment, take risks, and push the boundaries of whats possible.
The Toybox 3D Printer empowers you to create one-of-a-kind prints that truly reflect your vision and creativity.
The Toybox app provides a dedicated interface for monitoring the printing process.
Pay attention to any unusual noises or behaviors from the printer.
These could indicate a problem that needs to be addressed.
In some cases, you may need to pause or cancel the print due to unforeseen circumstances.
The Toybox app allows you to pause or cancel the print directly from the monitoring interface.
A weak or intermittent connection may result in communication errors and could negatively affect the print.
Occasionally, prints may fail or encounter issues such as warping, stringing, or incomplete layers.
It allows you to maintain the quality of your prints and reduces the likelihood of failed or imperfect objects.
Removing your Print from the Toybox 3D Printer
Congratulations!
This section will guide you through the process of safely and effectively removing your print.
Before you begin, see to it the print has had enough time to cool down.
Depending on the complexity and size of the print, this may take several minutes to an hour.
Touching a hot print can result in burns or damage, so exercise caution and prioritize safety.
Once the print has cooled down, locate the print bed on the Toybox 3D Printer.
This is the surface on which your print was built.
Use a spatula or a specialized print removal tool to gently lift the edges of the print.
Take your time and be patient to avoid damaging the print or the printer while removing it.
if you run into resistance during the removal process, avoid forcing or jerking the print.
Instead, use the spatula or tool to gently apply pressure and ease the print off the bed.
You may need to repeat this process at different points along the prints edges until it detaches completely.
verify to handle the print with care to avoid damaging fragile or intricate parts.
If your print includes moving components, test their functionality to ensure they are working as intended.
This gives you an opportunity to identify any defects or issues that may need further attention.
Finally, take a moment to admire your completed print.
Marvel at the details and craftsmanship that the Toybox 3D Printer has brought to life.
Removing your print from the Toybox 3D Printer is the final step in the printing process.
Now that youre equipped with troubleshooting tips, go ahead and continue your 3D printing journey with confidence!
Conclusion
Congratulations on completing this guide to using the Toybox 3D Printer!
With this knowledge, youre well-equipped to unleash your creativity and bring your ideas to life through 3D printing.
Remember to always follow proper safety precautions when using the Toybox 3D Printer.
Avoid touching hot parts, maintain a clean printing environment, and supervise younger users if necessary.
Familiarize yourself with the user manual and manufacturers guidelines to ensure safe and optimal operation of the printer.
Embrace the possibilities, have fun, and enjoy the incredible world of 3D printing!
