Random Access Memory (RAM) serves as the temporary storage space for data that your laptop actively uses.
To do this, you will need to gather some information about your laptops specifications.
Look for information regarding the maximum supported RAM capacity and the punch in of RAM module required.
Additionally, there are different types of RAM, such as DDR3, DDR4, or LPDDR4.
see to it to note the exact pop in required by your laptop.
The frequency or speed of the RAM is another important factor to consider.
after you grab gathered this information, it’s possible for you to start looking for compatible RAM modules.
There are various online retailers and computer hardware stores that offer a wide range of RAM modules.
Use the specifications you gathered earlier to search for RAM modules that meet your laptops requirements.
Upgrading with incompatible or mismatched RAM modules can lead to system instability or even cause damage to your laptop.
Before making a purchase, its important to consider a few factors.
Look for reputable sellers and check for customer reviews to ensure reliability.
When selecting the RAM module, consider the capacity and speed that best suits your needs.
Additionally, consider the warranty and return policy offered by the seller.
While waiting, be sure to handle your laptop with care to avoid any damage to the existing components.
This step ensures your safety and prevents any electrical damage during the upgrade process.
To power off your laptop, save any open documents or files and close all running applications.
Allow your laptop a few moments to shut down completely.
Take a moment to inspect your laptop and ensure that all cables and peripherals are disconnected.
This step is crucial to prevent any accidental damage during the upgrade process.
Before proceeding to open your laptop, ensure you are working in a clean and static-free environment.
Consider using an antistatic wrist strap to prevent any static electricity from damaging sensitive components.
Start by carefully flipping your laptop over and inspecting the bottom panel.
Look for any screw markings or indications of a removable compartment.
Note that some laptops have multipleslots for RAMmodules, while others may only have one.
Taking these precautions will help ensure a smooth and successful RAM upgrade process.
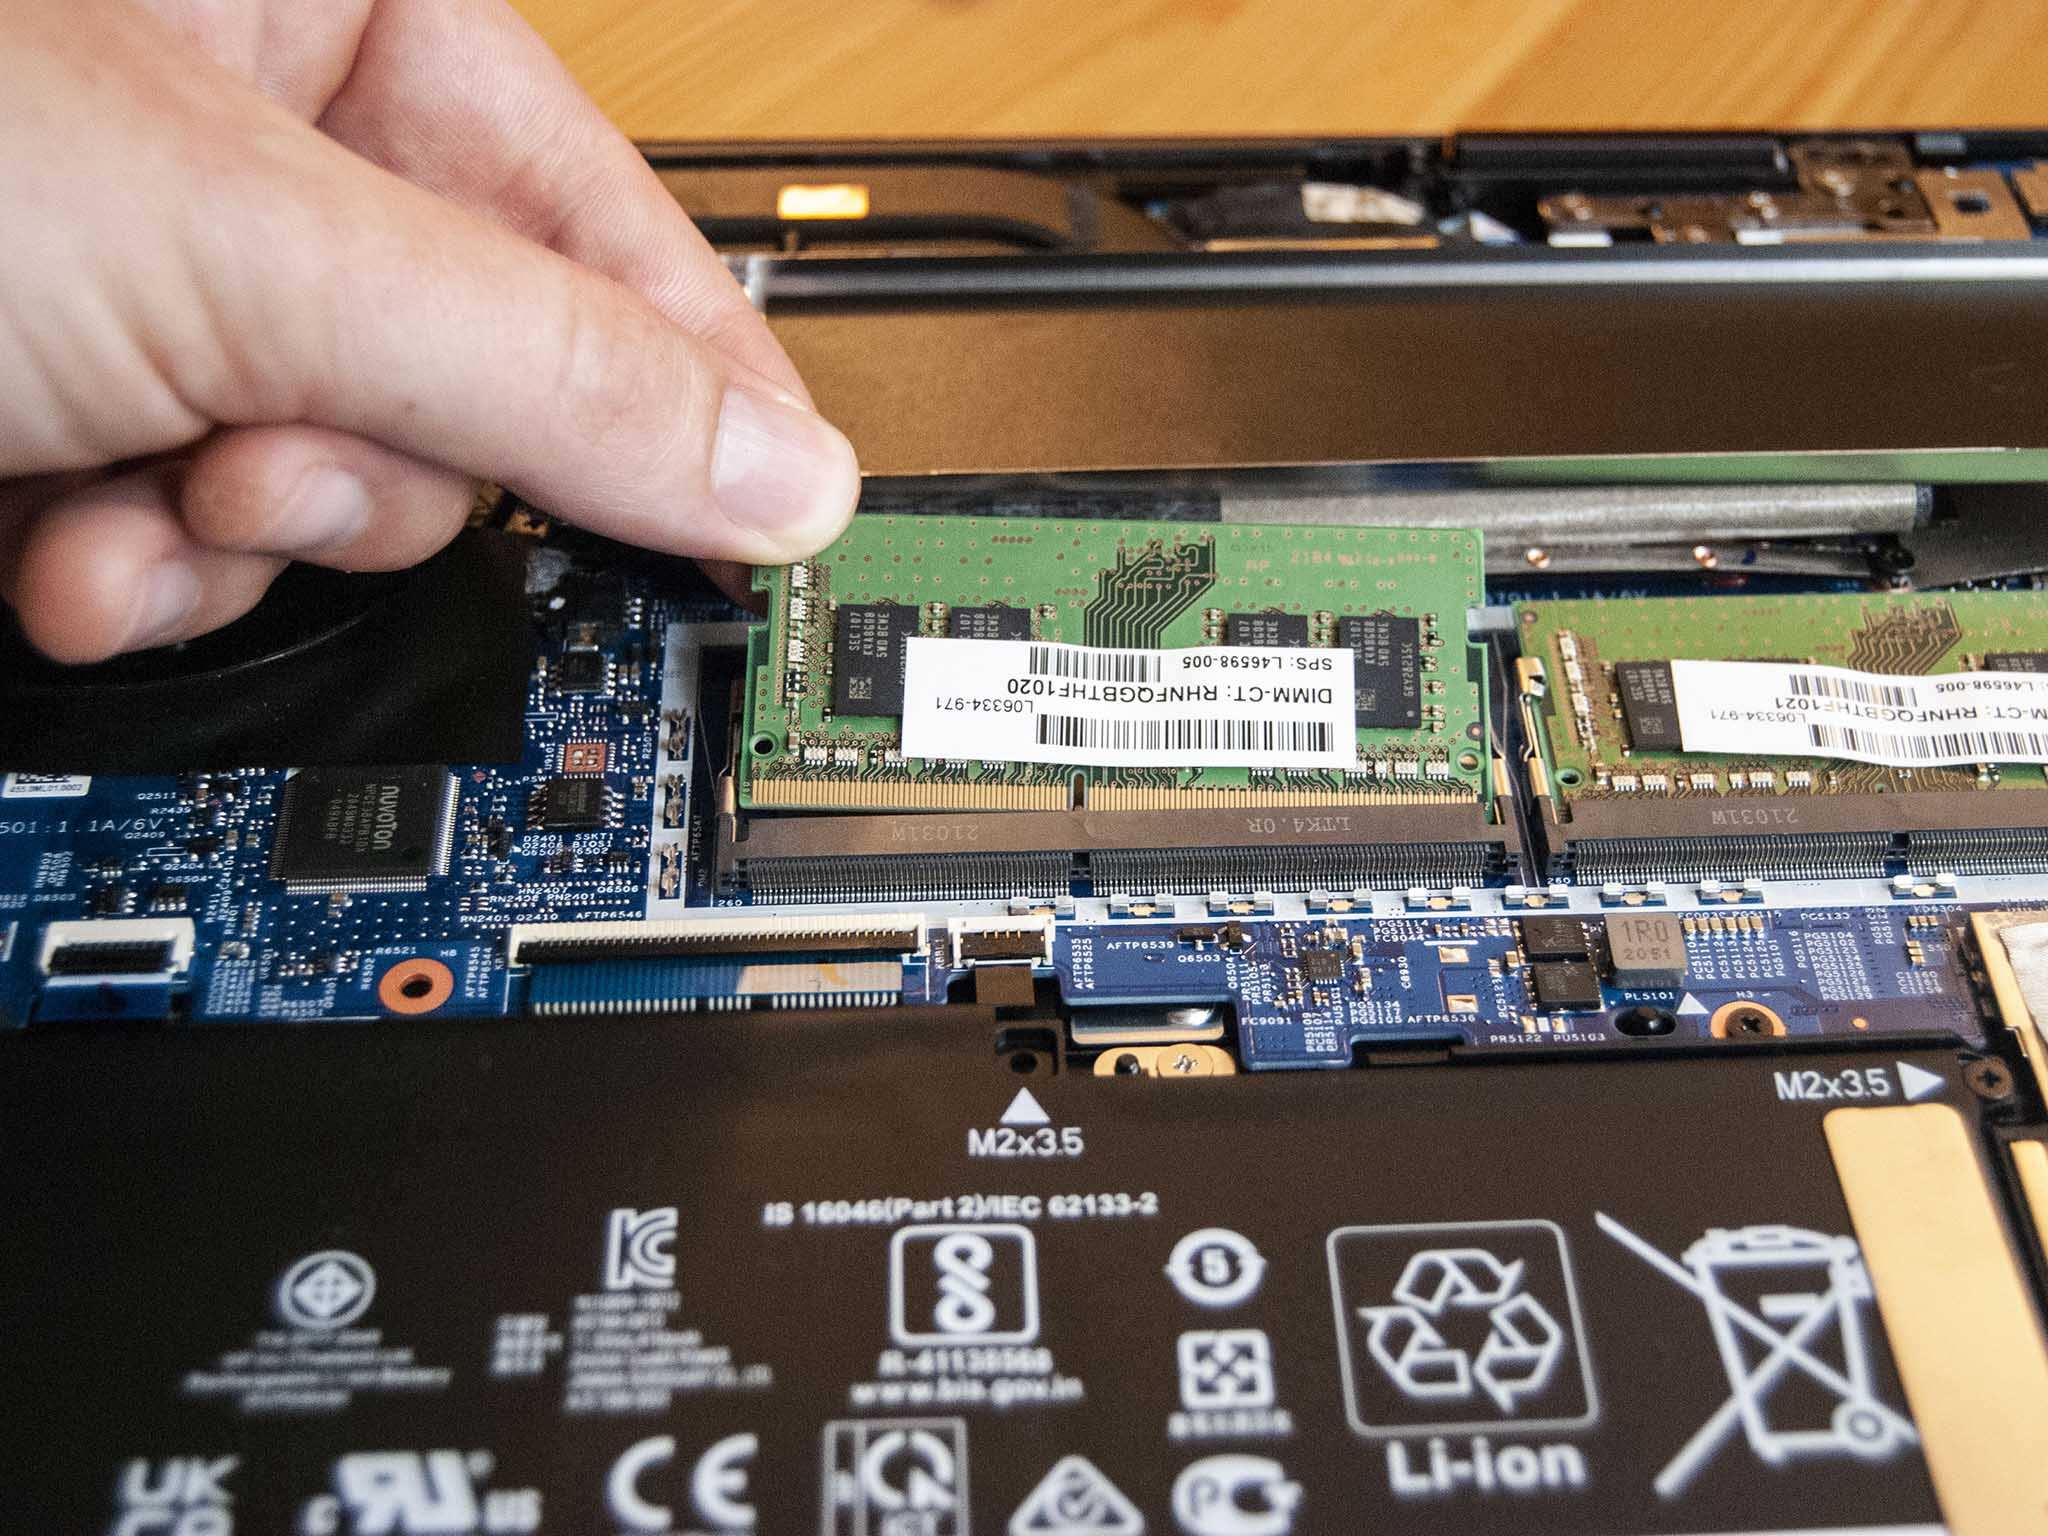
Start by gently spreading apart the retention clips on each side of the RAM module.
These clips are designed to hold the RAM module in place.
Once they are released, the RAM module should pop up at a slight angle.
confirm to exert even pressure on both sides of the module to prevent any bending or damage.
Take a moment to inspect the RAM slot and ensure there are no debris or dust particles.
Its important to note that some laptops may have multiple RAM slots.
Proceed to the next step once you are confident and prepared for the RAM module installation.
Ensure that the retention clips are securely holding the RAM module in place.
Give it a light tug to verify that it is properly seated and not loose.
Ensure that everything is appropriately secured and in its proper place.
The next step is to securelyfasten the new RAM module(s) in placeand reassemble your HP laptop.
Continue reading to learn how to secure the new RAM module(s) and complete the upgrade process.
These clips are designed to hold the module firmly in place.
Once aligned, carefully press down on both sides of the module until you hear a distinct click.
This indicates that the retention clips have securely locked the RAM module in place.
A properly installed RAM module should be secure and not move when gently tugged.
Loose or improperly seated modules can cause instability or even result in data corruption.
Double-check the surrounding area to verify no loose screws or cables are obstructing the RAM compartment.
Any loose objects can potentially cause interference or damage to the RAM modules.
Proceed to the next step to learn how to reassemble your laptop and prepare it for the final step.
Start by carefully aligning the bottom panel of your laptop with the chassis.
Ensure that all the screw holes and clips are properly aligned.
Use a screwdriver or any necessary tools recommended by the manufacturer to securely fasten the screws.
Ensure that everything is back in its proper place and securely connected.
Connect the power adapter to your laptop and plug it into an electrical outlet.
This step is necessary to provide power to your laptop during the final step of the RAM upgrade process.
Continue reading to learn how to power on your laptop and verify the RAM upgrade in the final step.
This final step will ensure that your laptop recognizes and utilizes the new RAM module(s) effectively.
Press the power button on your laptop to turn it on.
Wait for the operating system to load and the desktop or login screen to appear.
This may take a few moments, depending on your laptops specifications.
On macOS, go to the Apple menu, select About This Mac, and hit the Memory tab.
If the displayed amount is incorrect or lower than expected, there may be an issue with the installation.
You have successfully upgraded the RAM on your HP laptop.
Enjoy the improved performance and the ability to handle more demanding tasks and applications with ease.
Thank you for following this step-by-step guide.
We hope it has been helpful and that you have a positive experience with your new RAM upgrade.
Remember to always consult your laptops user manual or the manufacturers website for specific instructions and precautions.
With each step, we have emphasized the importance of compatibility, proper installation, and thorough inspection.
Thank you for following this guide.
We hope it has been informative and helpful in your RAM upgrade endeavor.
