Introduction
Welcome to our guide on how to unscrew a CPU cooler for AMD processors.
Before diving into the details, it is essential to understand the importance of proper cooling for your CPU.
Overheating can lead to performance throttling, decreased lifespan of your components, and even system crashes.
In this guide, we will focus specifically on unscrewing theCPU cooler for AMDprocessors.
Before proceeding to unscrew the CPU cooler, it is important to gather the necessary tools and materials.
Having all the required items ready before starting will help streamline the process and prevent any unnecessary delays.
like note that when dealing with PC components, its crucial to handle them with care.
By following these guidelines, you will minimize the risk of damaging any components and ensure a successful removal.
This will prevent any electrical accidents and ensure your safety during the procedure.
Next, remove the side panel of your box case to pull up the internal components.
Once the side panel is off, familiarize yourself with the CPU cooler assembly.
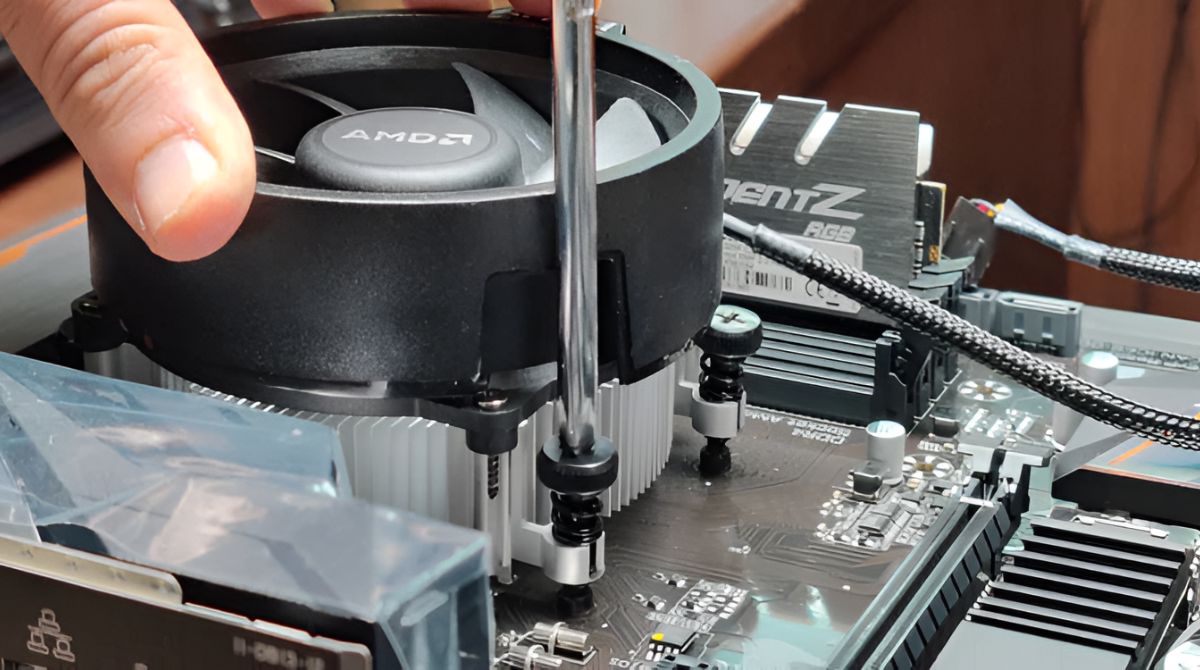
Take note of how it is secured to the motherboard and locate the screws that need to be removed.
Generally, AMD CPU coolers are held in place by a mounting bracket with screws on all four corners.
Identify these screws, as they will be the primary focus during the unscrewing process.
This will ensure that you dont accidentally skip any steps or remove any unnecessary screws.
Before proceeding with the unscrewing process, ensure that you have an appropriate workspace and proper lighting.
Furthermore, its advisable to ground yourself to prevent any static discharge that could damage sensitive components.
you could do this by touching a grounded metal object or by using an anti-static wrist strap.
Just remember to periodically ground yourself throughout the process to maintain a safe working environment for your hardware.
Lets dive in and safely remove the CPU cooler without any complications.
Cleaning these components ensures optimal thermal conductivity and improves the efficiency of heat dissipation.
Lets move on to the next step!
Be sure to read the manufacturers guidelines if they are provided with the thermal paste youre using.
This step will ensure that your CPU is effectively cooled and protected, allowing for optimal system performance.
Lets proceed to the next step!
First, verify that all cables and connectors are properly plugged in and secured.
You have successfully installed a new CPU cooler on your AMD processor.
Remember to regularly clean and maintain your CPU cooler for optimal performance in the long run.
Monitoring the temperatures and ensuring proper cooling will contribute to the stability and longevity of your AMD processor.
Congratulations on successfully installing and testing your new CPU cooler!
Remember, proper cooling plays a vital role in maximizing the performance and lifespan of your AMD processor.
This will ensure a successful installation and minimize the risk of any damage to your hardware.
They can provide valuable guidance and troubleshooting tips to help you overcome any challenges.
Keep in mind that upgrading your CPU cooler is just one aspect of overall system maintenance.
