Introduction
Are you experiencing clogged nozzles with your Ender 3D printer?
Dont worry, youre not alone.
One of the key factors in achieving high-quality 3D prints is a clean and unclogged nozzle.
Identifying the signs of a clogged nozzle is crucial.
Remember, regular nozzle maintenance is key to ensuring smooth and successful 3D printing.
Why does the nozzle get clogged?
One common reason for nozzle clogs is debris buildup.
These blockages obstruct the smooth flow of filament and result in nozzle clogs.
Regular nozzle maintenance, including periodic cleaning, can help prevent debris buildup and keep the nozzle clear.
Another factor that can lead to clogged nozzles is using damaged or dirty filament.
Additionally, storing filament in a dry and dust-free environment can help maintain its quality and prevent clogs.
Improper temperature prefs can also contribute to nozzle clogs.
Finally, filament changes can sometimes cause nozzle clogs.
When switching between different filament types or colors, it is crucial to flush out the old filament completely.
Any remnants of the previous filament can mix or solidify inside the nozzle, leading to clogs.
Perform a proper filament change procedure to ensure a clean transition and prevent clogs.
Here are some common signs to look out for:
1.
The filament may not be flowing smoothly, resulting in uneven extrusion and poor print quality.
These thin strands can significantly impact the overall print quality and may require manual removal.
This can result in weak or incomplete prints, as the printer is not able to deposit enough material.
This skipping can be audible and may result in a grinding noise.
Filament grinding: If the filament is being ground against the extruder gear, it may indicate a clog.
No filament flow: In severe cases of nozzle clogs, no filament will be extruded at all.
This can result in failed prints or objects with missing sections.
Error messages: Some 3D printers are equipped with error detection systems that can detect nozzle clogs.
These systems may display error messages or pause the printing process when a clog is detected.
If you notice any of these signs, it is essential to address the clogged nozzle immediately.
Continuing to print with a clogged nozzle can lead to further issues and potentially damage your printer.
Having these items on hand will enable you to complete the task efficiently and effectively.
Here are the materials you will need:
1.
Heat-resistant gloves will allow you to handle the hot components safely.
The diameter of the needle or tool should match the size of your nozzle for precise cleaning.
There are various commercially available cleaning solutions that are safe to use on brass or stainless steel nozzles.
Alternatively, you’re able to use acetone or a strong isopropyl alcohol solution.
double-check to gather all these materials before you roll the nozzle unclogging process.
Having everything within reach will make the process smoother and more efficient.
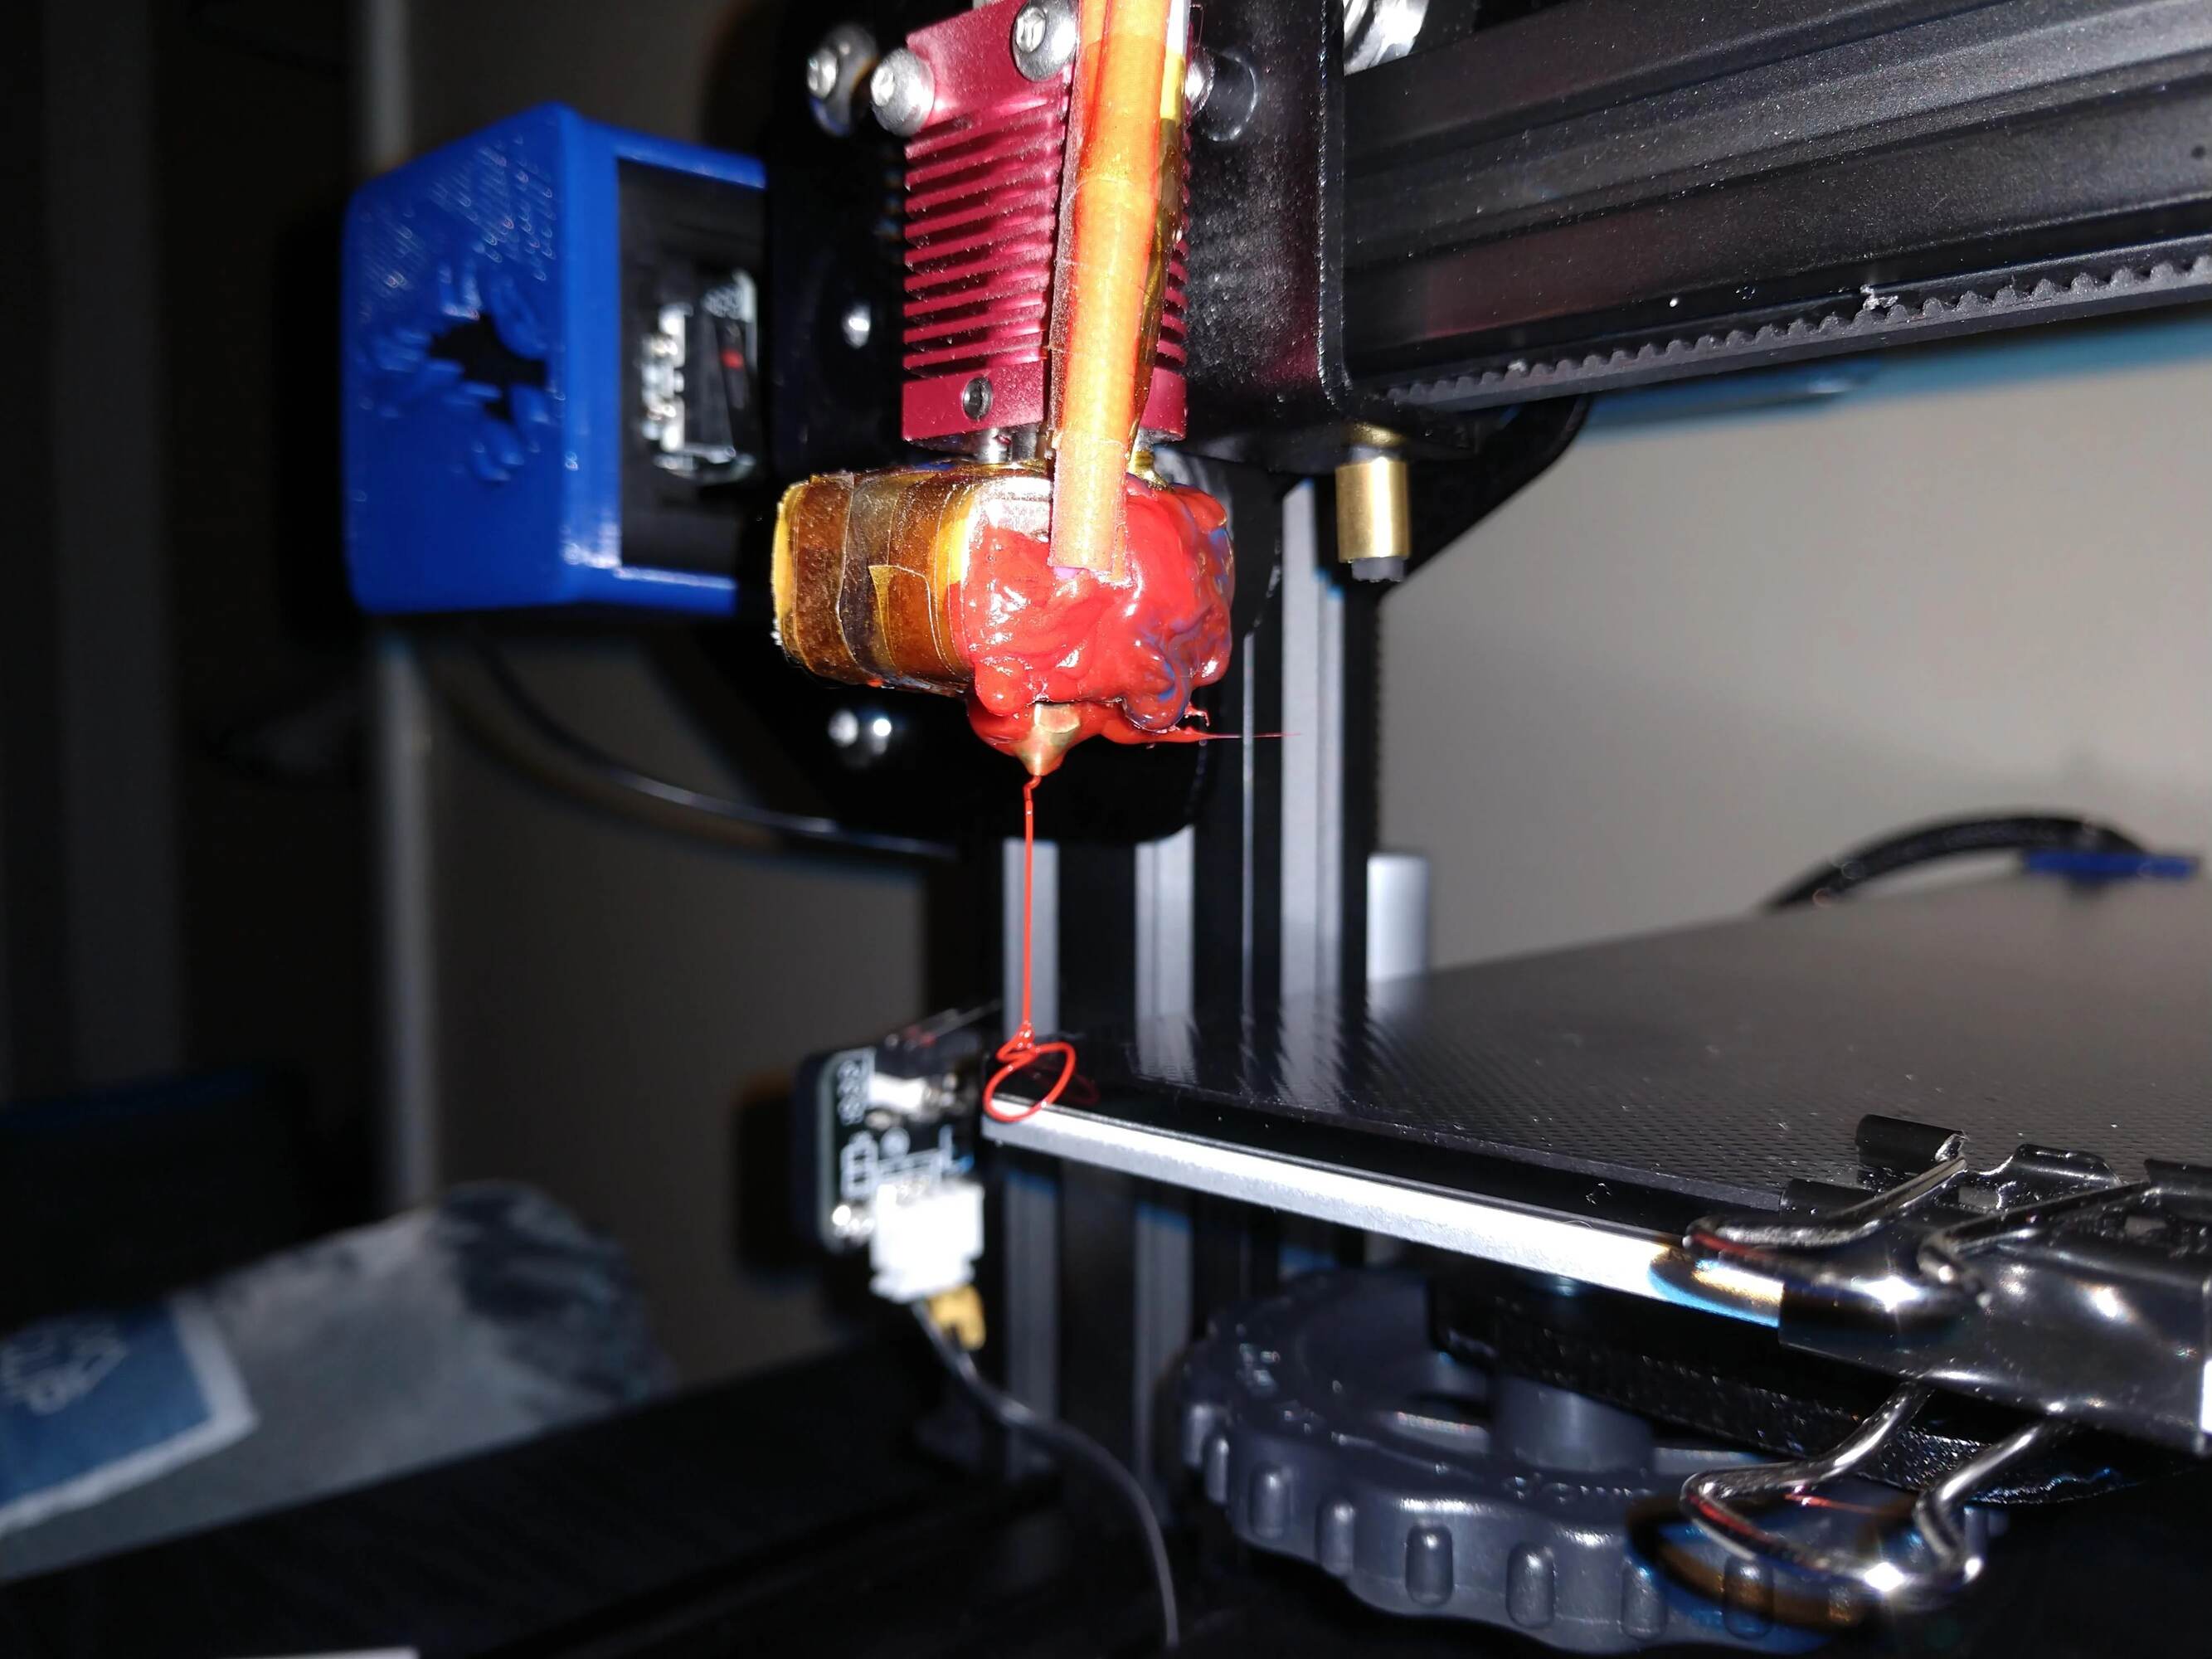
Heating the nozzle will allow the trapped filament to soften and make it easier to clear any blockages.
Heres how to proceed:
1.
Ensure that your printer is turned on and that the filament is loaded into the extruder.
get into the printers menu and navigate to the Preheat or Prepare section.
opt for option to preheat the nozzle.
Wait for the nozzle to reach the desired temperature.
Most printers have an indicator that shows the current nozzle temperature.
This process may take a few minutes, so be patient.
Put on your heat-resistant gloves to protect your hands from the hot nozzle.
Once the nozzle has reached the target temperature, use the appropriate menu option to suspend the stepper motors.
This will allow you to manually move the extruder.
Heating the nozzle is an important step as it helps to soften any clogs or stuck filament inside.
Lets move on to the next step once the nozzle has reached the desired temperature.
Step 2: Removing the filament
1.
This will allow the filament to be pulled out smoothly.
Slowly and steadily pull the filament out of the extruder.
if you stumble on resistance, stop pulling and check for any obstructions.
Continue pulling the filament until it is completely removed from the extruder and nozzle.
You may need to apply a slight twisting motion to help loosen any stuck filament.
Inspect the removed filament for any signs of clogs or deformities.
Dispose of the removed filament if it appears damaged or contaminated.
Using a fresh, clean filament is crucial in preventing future clogs and achieving high-quality prints.
Proceed to the next step to begin clearing the nozzle using a needle or precision cleaning tool.
Step 3: Clearing the nozzle with a needle
1.
Ensure that you have a fine needle or a suitable precision cleaning tool ready.
The diameter of the needle or tool should match the size of your nozzle for effective cleaning.
With the heated nozzle still in place, gently insert the needle or tool into the nozzle opening.
Be careful not to apply excessive force or damage the nozzle.
Gently move the needle or tool in a circular motion inside the nozzle.
This will help dislodge any blockages and wipe the pathway for filament flow.
Avoid pushing too hard to prevent any nozzle damage.
Take a moment to inspect the removed debris for any signs of a clog or filament residue.
This will enable you to reuse the needle or tool for further cleaning, if needed.
However, keep in mind that this method may not always be sufficient for stubborn or severe clogs.
In such cases, you may need to proceed to the next steps to completely scrub the nozzle.
Step 4: Soaking the nozzle in cleaning solution
1.
Prepare a cleaning solution suitable for 3D printer nozzles.
There are various commercially available cleaning solutions specifically designed for this purpose.
With the nozzle still heated, take the nozzle and submerge it in the cleaning solution.
verify to completely immerse the nozzle but avoid submerging any other parts of the printer.
Allow the nozzle to soak in the cleaning solution for about 20-30 minutes.
This will give the solution enough time to dissolve any stubborn clogs or filament residue.
While the nozzle is soaking, gently agitate it from time to time.
This can help to loosen any remaining debris and enhance the cleaning process.
ensure to remove any traces of the cleaning solution and dry the nozzle thoroughly.
By soaking the nozzle in a cleaning solution, you ensure a more comprehensive cleaning process.
Keep in mind that this step may not be necessary for every clog.
Step 5: Clearing any remaining debris
1.
With the nozzle completely dry and still heated, inspect the opening for any visible debris.
Use a clean needle or a precision cleaning tool to gently remove any remaining obstructions.
Avoid applying excessive force to prevent damaging the nozzle.
Continue to clean and scrape until the nozzle opening is clear of any remaining debris.
Take your time and be thorough in this step to ensure optimal performance.
Take a moment to inspect the removed debris for any signs of remaining clogs or filament residue.
By clearing any remaining debris, you ensure that the nozzle is fully unclogged and ready for reassembly.
Properly clearing the nozzle guarantees smooth and consistent filament flow, resulting in high-quality prints.
Note that stubborn clogs may require additional cleaning or maintenance steps.
If youre facing persistent issues, its recommended to consult the manufacturers instructions or seek professional assistance.
Any residual moisture can negatively impact the printing process.
Carefully insert the nozzle back into the heater block.
Reattach the heating element and thermistor to the heater block, making sure they are properly seated and secured.
Double-check that all connections are secure and snug.
Ensure that it is properly aligned and tightened to maintain thermal stability.
Once all components are reassembled, double-check all connections and tighten any loose screws or fittings if necessary.
Its important to have a secure nozzle assembly to prevent any leaks or misalignments.
Take your time and be mindful of the alignment and tightening of each part.
Step 7: Testing the nozzle
1.
Heat up the nozzle to the appropriate temperature for the filament you are using.
This information can typically be found in the filament manufacturers guidelines or the 3D printers user manual.
Once the nozzle is heated, load a small amount of filament into the extruder.
Observe the extrusion to ensure that it is smooth and consistent without any signs of under-extrusion or clogs.
Adjust the extrusion flow rate if necessary.
This can be done through the printers options menu or using software such as slicing programs.
Ensure that the extruded filament matches the desired flow rate for optimal printing results.
Monitor the print closely to identify any issues, such as inconsistent extrusion or print defects.
Pay attention to the first few layers of the test print.
These layers are critical in ensuring proper adhesion and layer bonding.
Continue to monitor the print throughout its duration, checking for any signs of clogging or other print defects.
in case you find any issues, take note of them and troubleshoot accordingly.
Remember to regularly maintain and clean your nozzle to prevent future clogs and maintain optimal printing performance.
Proper nozzle maintenance is essential for producing consistent and accurate 3D prints.
You have successfully unclogged the nozzle of your Ender 3D printer and tested it for proper functionality.
Enjoy your 3D printing adventures with a clear and unclogged nozzle!
Recognizing the signs of a clogged nozzle is crucial in addressing the issue promptly, preventing further printing problems.
Regular nozzle maintenance is key to preventing future clogs and ensuring consistent and high-quality 3D prints.
