Introduction
Welcome to the era of online meetings and video conferences!
Testing Zoom may sound like a tedious task, but its a crucial step to guarantee a successful meeting.
Zoom supports Windows, macOS, Linux, iOS, and Android.
2.Processor and RAM:Check the minimum processor and RAM requirements for your operating system.
Generally, a dual-core processor and at least 4GB of RAM are recommended for optimal performance.
3.Internet Connection:A stable and high-speed internet connection is crucial for video conferencing.
Zoom is compatible with popular browsers such as Google Chrome, Mozilla Firefox, Microsoft Edge, and Safari.
you’re able to download the Zoom client directly from the official Zoom website.
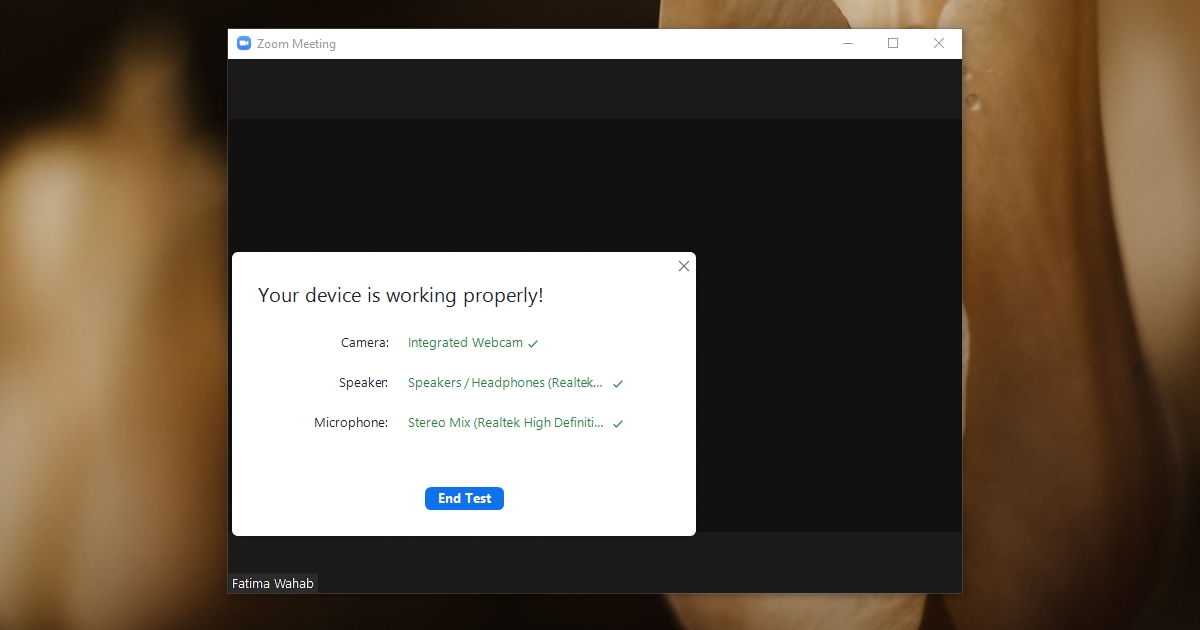
6.Audio and Video Devices:Test your speakers, microphone, and camera to ensure they are functioning correctly.
Connect any external devices and check their compatibility with Zoom.
By verifying these system requirements, you could avoid potential technical issues during your Zoom meeting.
Remember, checking system requirements is the first step towards ensuring a smooth Zoom experience.
Lets move on to the next section to learn how to test your web link connection.
Checking data pipe Connection
A stable and reliable internet connection is crucial for a successful Zoom meeting.
The recommended minimum speed for video conferencing is 1.5 Mbps download and upload.
If your internet speed is below this threshold, consider upgrading your connection or switching to a different internet.
2.Bandwidth Usage:Close any unnecessary applications or programs that might consume a significant amount of bandwidth.
Applications like file-sharing programs or video streaming services can negatively impact your web link performance during a meeting.
3.Wired or Wi-Fi Connection:If possible, connect your setup directly to your router using an Ethernet cable.
4.Signal Strength:If youre using Wi-Fi, check the signal strength on your gadget.
Ensure that youre close to your router or access point for a stronger and more stable connection.
Consider repositioning your machine or using a Wi-Fi signal booster if youre experiencing weak signals.
These activities can cause online grid congestion and lead to poor audio and video quality during your Zoom meeting.
If necessary, add Zoom to the list of trusted applications in your firewall controls.
If you face consistent connection connectivity issues, consider reaching out to your internet service provider for assistance.
Now that youve checked your internet connection, lets move on to testing your audio and microphone prefs.
Testing Audio and Microphone
Clear and uninterrupted audio is essential for effective communication during a Zoom meeting.
Its crucial to test your audio and microphone options to ensure that everyone can hear you clearly.
double-check the volume is set to an appropriate level and adjust it if necessary.
4.Audio configs Adjustment:Zoom provides various audio configs options to enhance your audio quality.
5.Audio Test Meeting:Zoom offers a feature called Audio Test Meeting in the prefs menu.
This will allow you to make any necessary adjustments to improve the audio quality.
Remember to be mindful of your surroundings, minimize background noise, and speak clearly to ensure effective communication.
Ensure that its not obstructed or covered by any objects.
If youre using an external camera, confirm its plugged in and recognized by your rig.
Navigate to the Video section to access your camera options.
Select your preferred camera rig from the options available.
3.Video Preview:you could preview your video feed in the Zoom tweaks to check the cameras functionality.
If you could see yourself clearly in the preview, it indicates that your camera is working properly.
4.Appearance and Lighting:Pay attention to your appearance and the lighting in the room.
Ensure that you are well-lit and that the lighting does not cause shadows or overexposure in the video feed.
Consider adjusting the positioning of lights or using natural light sources for better visibility.
Position the camera at eye level and ensure that your face is clearly visible within the frame.
Maintain eye contact with the camera as much as possible during the meeting.
6.Background:Check your background to ensure its appropriate and clean.
Use a solid colored or appropriate background image for a professional look.
Remember to maintain good posture, have a confident and engaging presence, and avoid any distracting movements.
Before your meeting, its important to test the screen sharing functionality to ensure a smooth and seamless experience.
Navigate to the Screen Sharing section to ensure that screen sharing is enabled and set to the desired configs.
2.Screen Sharing Test:Start a test meeting or join a practice session to test the screen sharing feature.
snag the Share Screen button and snag the specific window, tool, or screen you want to share.
Ensure that the content is displayed correctly to the participants.
3.Annotation Tools:During the screen sharing test, explore the annotation tools available in Zoom.
Familiarize yourself with the options to make your presentations more engaging.
If youre the host, verify that you have the necessary permissions to initiate screen sharing.
see if the audio is being transmitted correctly to the participants and if they can hear it clearly.
Now that youve checked the screen sharing feature, lets move on to testing the recording capabilities of Zoom.
Navigate to the Recording section to configure your recording parameters.
Choose the desired location to stash your recordings and pick the preferred recording format.
2.Start a Test Meeting:Initiate a test meeting or join a practice session to simulate a meeting environment.
Once the meeting has started, press the Record button located at the bottom of the Zoom window.
A red dot signifies that the recording is in progress.
The recording will automatically be saved to the designated location on your gadget.
Before your meeting, its important to test the chat feature to ensure that it is functioning correctly.
Locate the chat window, which is usually located at the bottom of the Zoom meeting screen.
2.Chat Options:Familiarize yourself with the various chat options available.
3.Send Test Messages:Start by sending a test message to the meeting participants.
Verify that your message is delivered and displayed correctly in the chat window.
4.Emojis and Reactions:Explore the emoji and reaction options in the chat feature.
Test the available emojis by sending them in the chat and confirm that they are visible to other participants.
5.File Sharing:Test the file sharing capability in the chat feature.
7.Message Moderation:If youre the meeting host, test the moderation tweaks for the chat feature.
Testing the breakout rooms feature before your meeting ensures that you could successfully create and manage breakout rooms.
Navigate to the Breakout Rooms option in the meeting controls to set up the breakout room feature.
2.Create Breakout Rooms:Create multiple breakout rooms based on the desired number of groups.
Assign participants to each room, either manually or automatically, depending on your preference.
Ensure that participants are allocated correctly to their respective rooms.
Verify that audio, video, and screen sharing are functioning properly within the breakout room.
4.Move Participants:As the host, test your ability to move participants between breakout rooms.
Move yourself or other participants to different rooms to confirm that the feature works as intended.
5.Bring Participants Back:Practice bringing participants back from the breakout rooms to the main meeting.
Ensure that attendees are seamlessly reconnected with the main meeting and can participate again in the larger group discussion.
6.Manage Breakout Rooms:Test your ability to manage breakout rooms as the host.
7.Monitor Breakout Rooms:If youre the host, check your ability to monitor breakout rooms.
This feature is particularly useful for facilitating small group interactions, brainstorming sessions, or collaborative activities among participants.
reach the meeting controls and navigate to the Polls option to create a test poll.
Design a simple poll question and prepare the response options.
2.Launch Poll:During the test meeting, grab the Polls button and launch the test poll.
3.Collect Responses:Monitor the test poll as participants submit their responses.
Verify that the polls results are accurately displayed in real-time, allowing you to gauge participants opinions or preferences.
4.Customize Polls:Explore the options to customize your polls in Zoom.
5.Survey Creation:In addition to polls, test the creation of surveys in Zoom.
dive into the Survey option in the meeting controls and prepare a test survey with relevant questions.
Set appropriate response formats such as multiple choice, rating scales, or open-ended questions.
6.Launch Survey:Similar to polls, launch the test survey during the test meeting.
Participants should be able to see and respond to the survey questions.
Verify that the survey responses are collected accurately and displayed for analysis.
7.Analyze Results:After collecting poll and survey responses, review and analyze the results within Zoom.
Determine how the data can be used to make informed decisions or provide valuable insights.
This helps to enhance participation and make data-driven decisions based on the responses received.
The chat feature simplifies communication during a meeting, and breakout rooms facilitate small group discussions or activities.
Lastly, the polls and surveys feature enhances engagement and enables gathering valuable feedback from participants.
Additionally, familiarizing yourself with Zooms features and options allows you to maximize its potential for collaboration and productivity.
