In this guide, we will walk you through the step-by-step process of taking apart yourLogitech M570mouse.
We will cover everything from removing the battery cover to detaching the buttons and cleaning the components.
Before we begin, its important to note that disassembling your Logitech M570 mouse may void the warranty.
Removing the battery cover allows you to get into the internal components of the Logitech M570 mouse.
Heres how:
Its important to handle the battery with care to prevent damage.
Step 3: Removing the Trackball
Be cautious while removing the trackball to avoid applying excessive force.
It should come out easily once its unlocked and lifted.
if you stumble on resistance, double-check that youve twisted it counterclockwise to release it properly.
With the trackball removed, you have better access to the internal components of the mouse.
This brings us to the next step: removing the top cover of the Logitech M570 mouse.
Take your time and use gentle pressure while prying launch the cover.
if you bump into any resistance, double-check that you have removed all the screws securing the top cover.
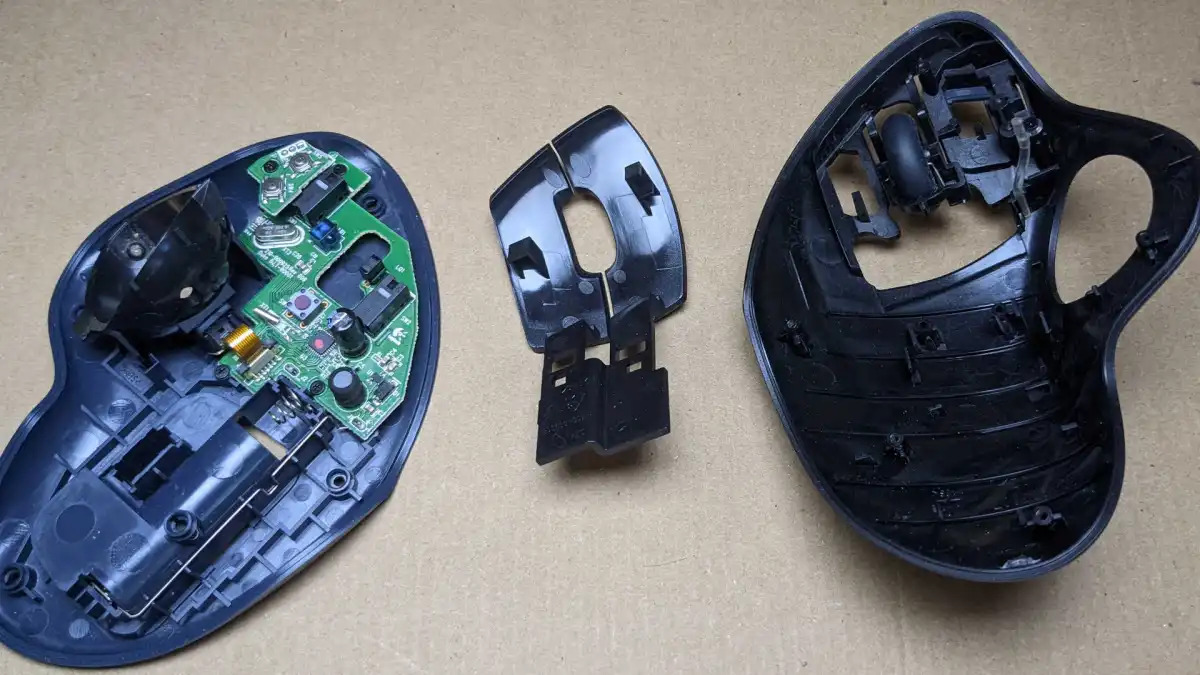
With the top cover removed, you gain access to the circuit board and other internal components.
This brings us to the next step: removing the circuit board from the Logitech M570 mouse.
The goal is to lift it smoothly without causing any damage to the fragile electronic components.
Next, we will move on to step 6: detaching the buttons from the Logitech M570 mouse.
Detaching the buttons allows for individual cleaning or replacement, if necessary.
Always handle the components with care to avoid any unnecessary damage during the cleaning process.
Ensure that all the buttons and the trackball move smoothly without any restrictions before considering the reassembly complete.
With the mouse reassembled, youre now ready to enjoy your Logitech M570 in its renewed state.
Remember to test the buttons, trackball, and overall functionality to ensure everything works as expected.
if you catch any issues, double-check the reassembly steps or consider seeking further assistance.
Congratulations on successfully disassembling, cleaning, and reassembling your Logitech M570 mouse!
Regular cleaning and maintenance will help keep your Logitech M570 functioning smoothly for many more hours of productive use.
Regular maintenance and cleaning not only enhance the performance of your mouse but also prolong its lifespan.
Remember to exercise caution and handle the components gently to avoid any damage during the disassembly and reassembly process.
Use a lint-free cloth, cotton swabs, and rubbing alcohol to remove dirt, grime, and residue.
Ensure that all the components are dry before reassembling the mouse.
When reassembling the mouse, take your time to align the components properly and securely fasten the screws.
Once the mouse is back together, test its functionality to ensure everything is in working order.
So, go ahead and disassemble your Logitech M570 mouse to give it a thorough cleaning.
Enjoy the smooth and precise movements that come with a refreshed and well-maintained mouse!
