Introduction
The Logitech G502 is a popular gaming mouse known for its advanced features and ergonomic design.
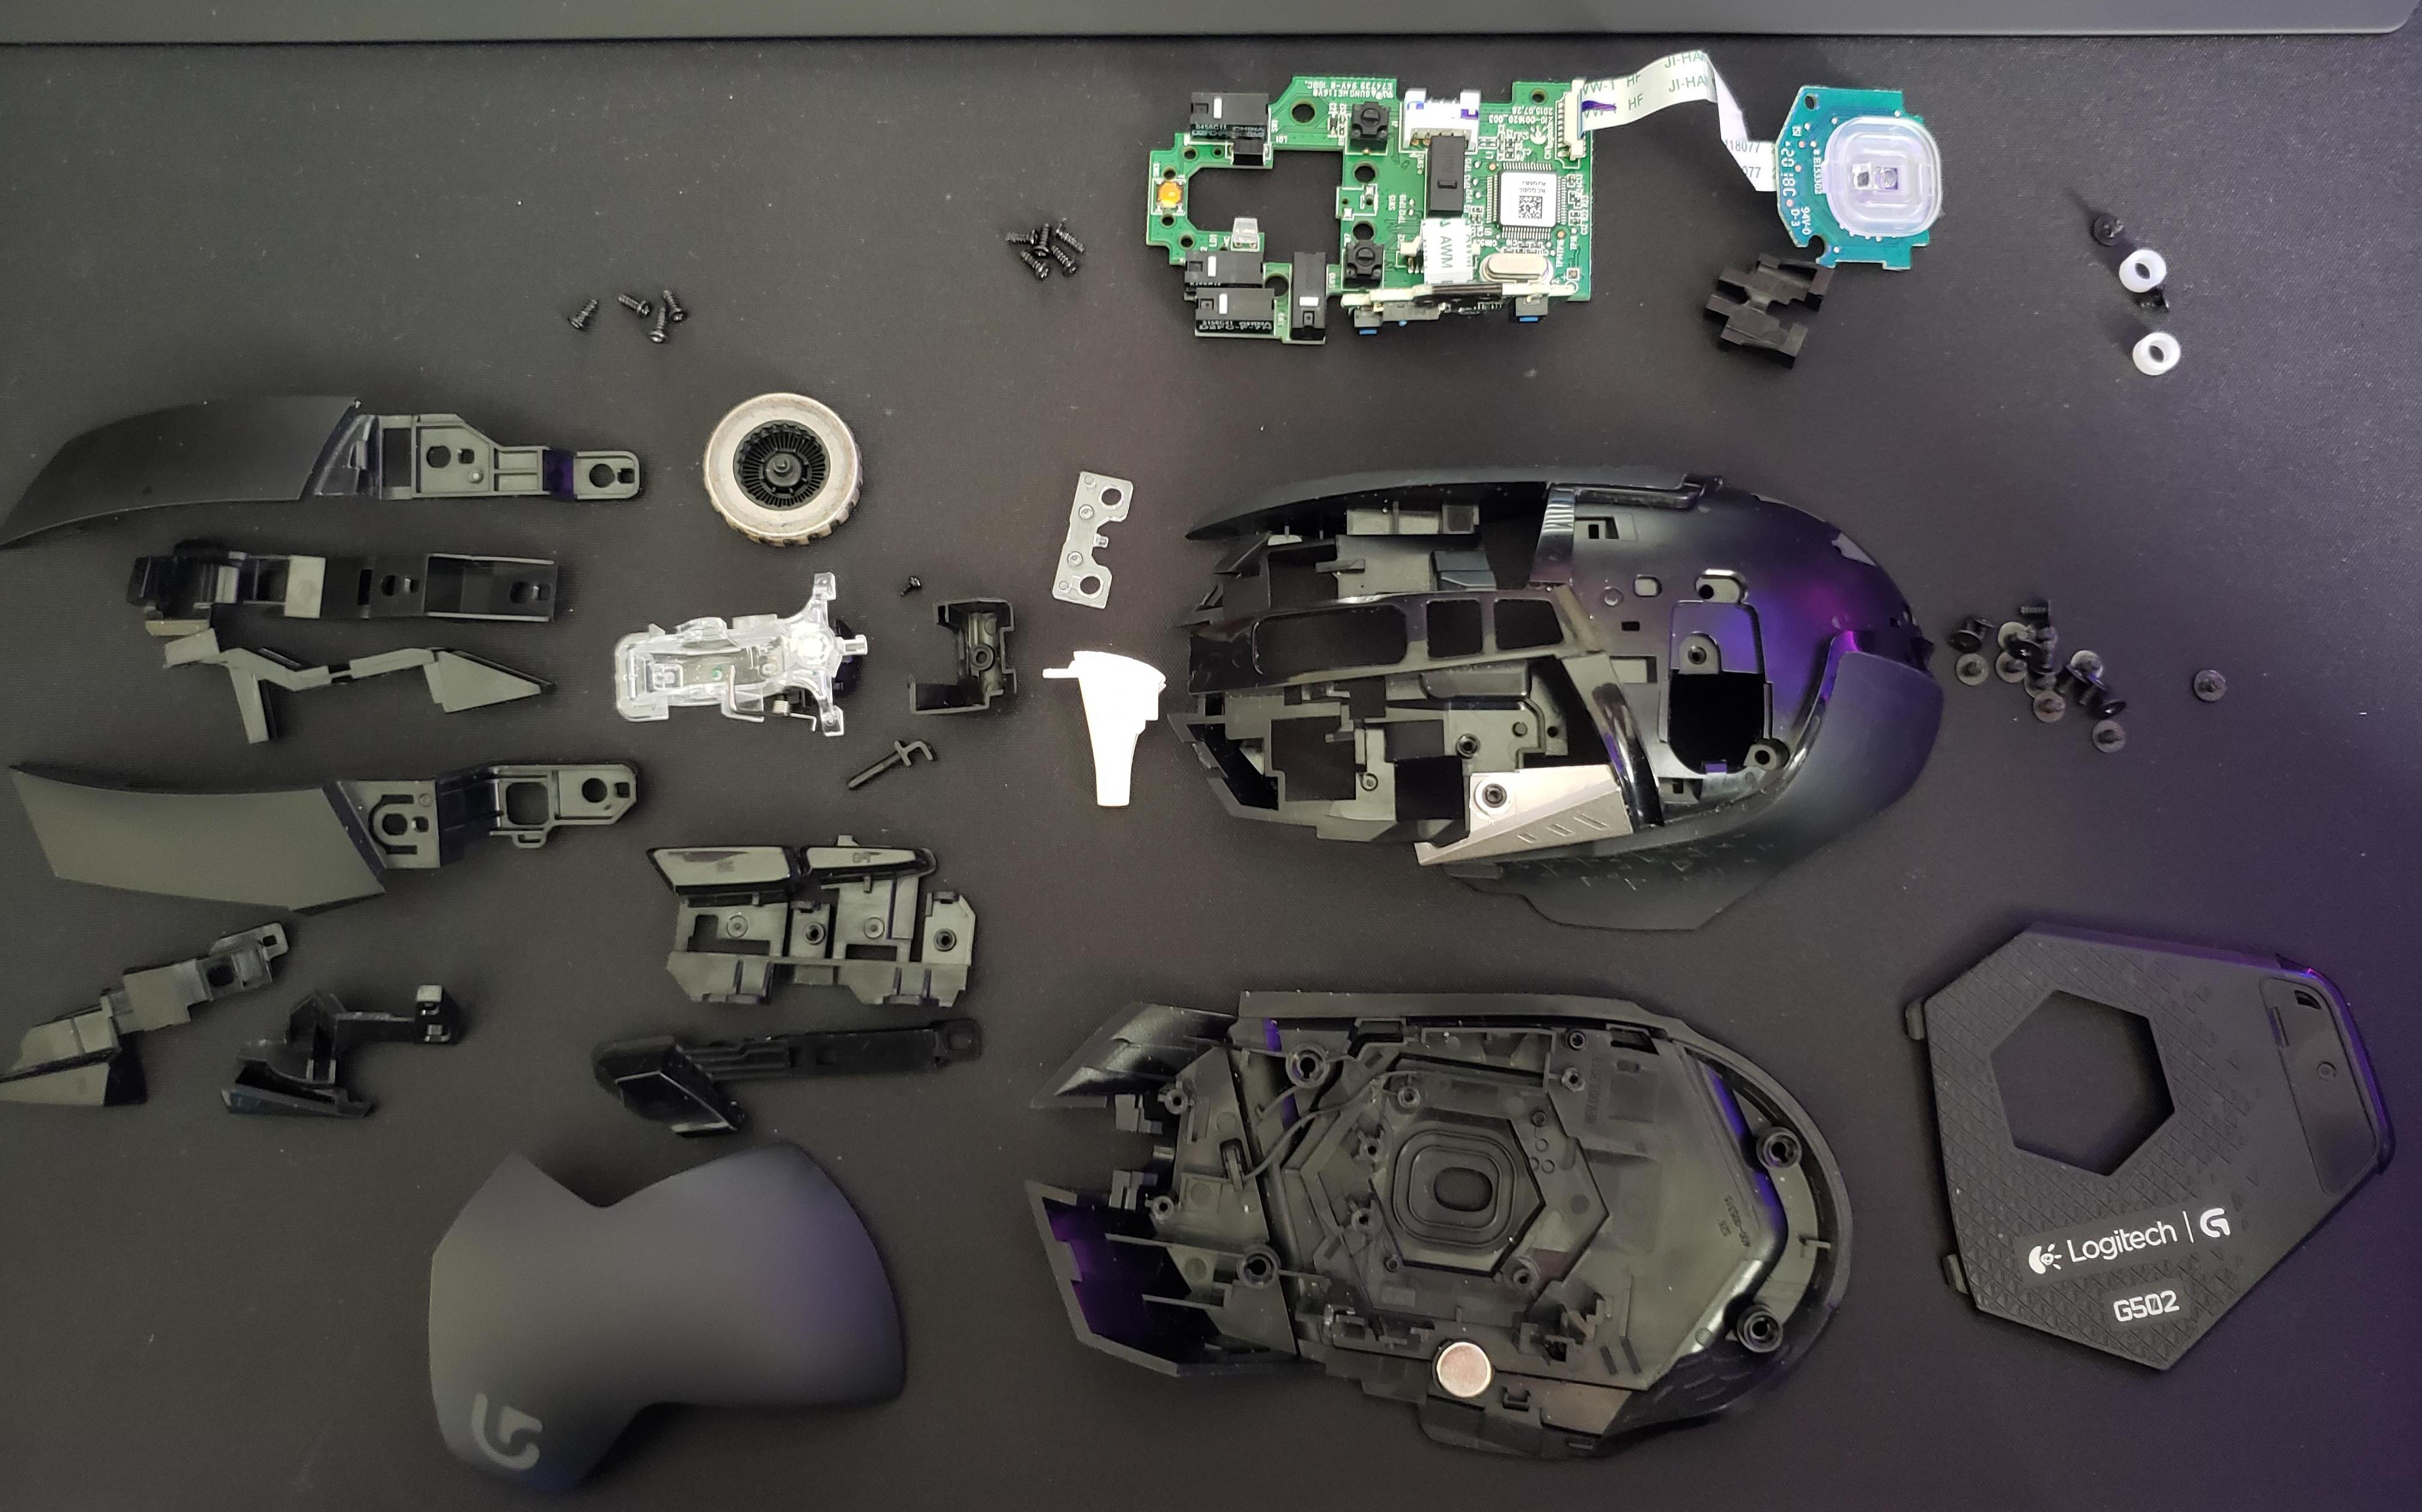
In this guide, we will walk you through the step-by-step process of taking apart aLogitech G502 mouse.
Before we get started, it is important to note that disassembling yourLogitech G502mouse may void any existing warranty.
Proceed with caution, and be aware of any potential risks involved.
Now, lets dive into the tools you will need to have prepared before starting the disassembly process.
Remember to handle the tools and mouse components with care to avoid any accidental damage.
Replacement mouse feet can typically be purchased online or from computer hardware retailers.
In the next step, we will guide you through accessing these screws to continue with the disassembly process.
This can provide better access to the screws.
However, exercise caution not to apply too much force, as it could lead to unintended damage.
It is worth mentioning that some Logitech G502 models may have additional screws hidden beneath labels or rubber plugs.
Carefully inspect the mouses exterior to ensure you have accessed all the screws before proceeding to the next step.
Keeping them organized will save you time and ensure a smooth reassembly process later on.
Take a moment to inspect the cable for any signs of damage or wear.
This will help ensure proper reassembly later on.
Pay attention to any small springs or mechanisms that may be present.
Take note of the positioning and order of these components for easier reassembly later on.
This will allow for easier cleaning or customization, as well as facilitate the reassembly process.
Take care not to put unnecessary stress on these components to avoid causing any damage.
This will allow for easier cleaning or replacement of components, if necessary.
Take your time to ensure a thorough yet gentle cleaning process.
Additionally, verify to follow any specific cleaning instructions provided by Logitech for your particular mouse model.
In the next step, we will outline the process of reassembling the mouse for use.
This will help avoid any potential issues or malfunctions during use.
Move the mouse around and hit the buttons to ensure that all components are working correctly.
You have successfully disassembled,cleaned, and reassembled your Logitech G502 mouse.
Enjoy using your clean and refreshed mouse for improved gaming or productivity experiences.
Regular cleaning of your Logitech G502 mouse is essential to maintain optimal functionality and performance.
Ensure that all components are working correctly before engaging in intense gaming sessions or demanding tasks.
Enjoy the improved performance and reliability of your refreshed mouse.
