Whether youre a casual user or a power user, weve got you covered.
This built-in tool provides a user-friendly interface and a range of options for capturing screenshots.
Simply click and drag the mouse to snag the desired region.
Once you release the mouse button, the captured screenshot will be displayed in a small preview window.
If you prefer capturing full-screen screenshots or specific windows, Snip & Sketch offers those options as well.
Simply choose the desired option and follow the on-screen instructions to capture the screenshot.
The Snip & Sketch tool in Windows 11 offers a seamless and intuitive way to capture and edit screenshots.
This traditional method has been around for a long time and is still widely used by many users.
To capture a screenshot using the Print Screen key, simply locate the key on your keyboard.
Press the key, and without any visible indication, Windows saves the screenshot to the clipboard.
Next, open a program like Paint or Word and press Ctrl + V to paste the screenshot.
Once pasted, you could crop, resize, or make any other edits to the screenshot as needed.
Finally, save the edited screenshot to your preferred location.
This can be useful when you want to capture a specific window without any surrounding distractions.
The Print Screen method is straightforward and requires no additional software or tools.
Overall, using the Print Screen key is a reliable and accessible method to capture screenshots in Windows 11.
This method allows you to isolate the window you want to capture, eliminating any unnecessary distractions.
This means clicking on it to bring it to the front if its currently behind other windows.
Once the window is selected, use the keyboard shortcut Alt + Print Screen (Alt + PrtScn).
Pressing Alt + Print Screen captures a screenshot of the active window and saves it to the clipboard.
Open your desired program and press Ctrl + V to paste the screenshot.
Once pasted, you might crop, resize, or make any necessary edits to the screenshot.
Finally, save the edited screenshot to your preferred location.
It saves you from the hassle of capturing the entire screen and then cropping out the unwanted areas.
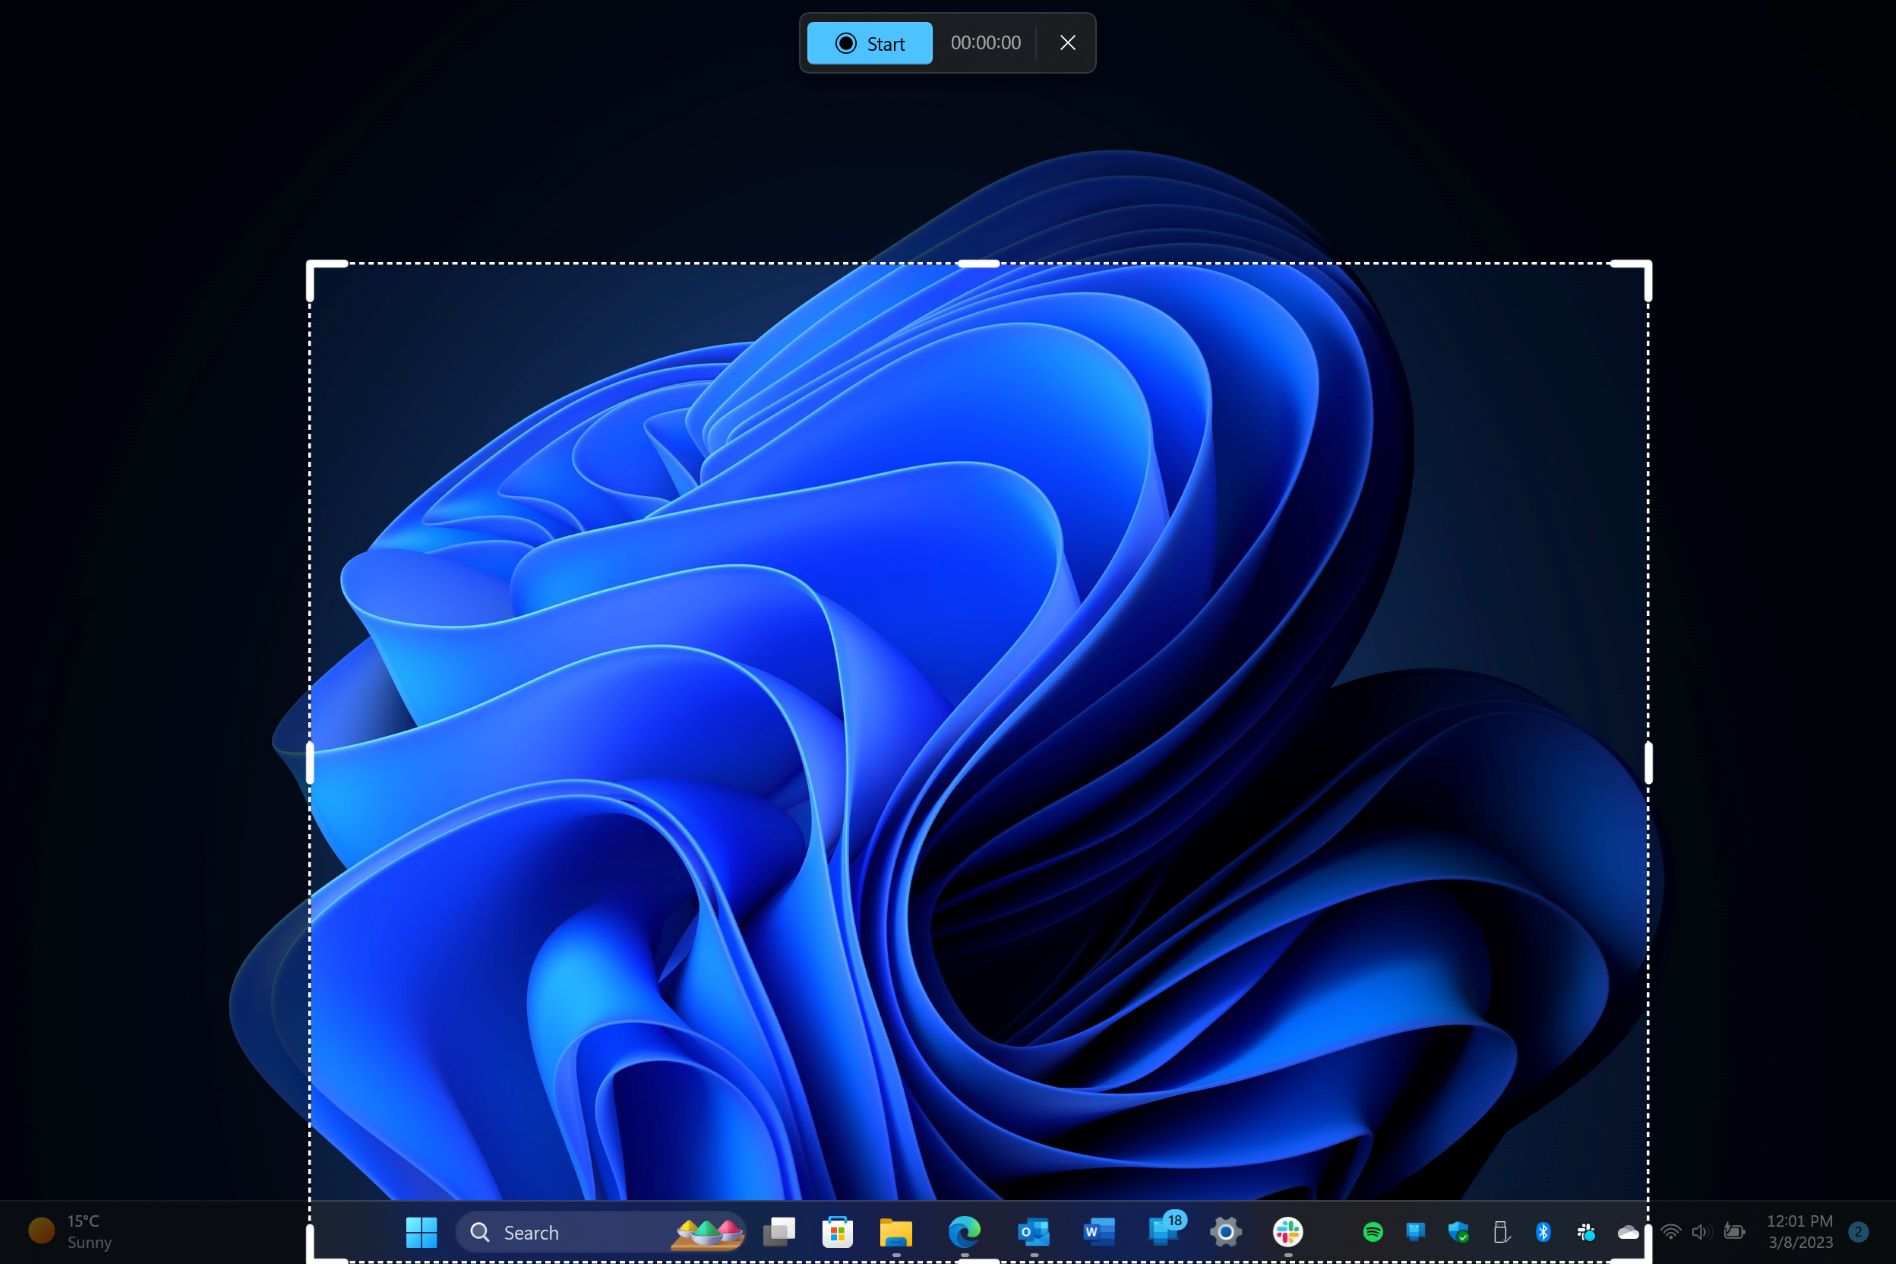
Once the Snip & Sketch toolbar appears at the top of the screen, grab the Rectangular Snip option.
As you drag, youll notice that the selected area is highlighted.
Release the mouse button to capture the screenshot of the selected region.
These editing tools allow you to emphasize key points or draw attention to specific details within the captured region.
It saves you from the hassle of cropping and resizing a full-screen screenshot to focus on the desired region.
To use this shortcut, press the Windows key + Shift + S keys together.
The overlay provides four options: rectangular snip, freeform snip, window snip, and full-screen snip.
Once you release the mouse button, the screenshot will be automatically copied to the clipboard.
Its worth noting that using this shortcut only copies the screenshot to the clipboard.
You will need to paste it into a program and save it manually.
It streamlines the capturing process and allows you to effortlessly capture and save screenshots without interrupting your workflow.
Then, press the Windows key + G to fire up the Xbox Game Bar overlay.
Within the Xbox Game Bar interface, youll find various widgets and tools.
Look for the Screenshot button, which is represented by a camera icon.
punch this button, and it will capture a screenshot of the entire screen.
Unlike some other methods, the Xbox Game Bar captures and saves the screenshot instantly without any further steps.
The captured screenshot is saved in the Captures folder under your user profiles Videos folder.
Simply press the Windows key + Alt + Print Screen to capture a screenshot of the active window.
The Xbox Game Bar also offers basic editing options to annotate your screenshots.
It provides a quick and straightforward method to capture screenshots without the need for additional software or complex processes.
Its a feature-packed tool that allows you to capture, save, and edit screenshots with ease.
you’re free to dive into the saved screenshots by navigating to This PC > Pictures > Screenshots.
This location is not customizable through the Xbox Game Bar tweaks.
Take advantage of these customization options to keep your screenshots organized and easily accessible whenever you need them.
It helps ensure that the screenshots effectively convey your message or serve their intended purpose.
Take advantage of the editing and annotation features available in Windows 11 to enhance and customize your screenshots.
The most common method is by pressing the Windows key + Volume Down button simultaneously.
This combination imitates the traditional Print Screen function but is adapted for touch-enabled devices.
Another method is by holding down the Windows key and tapping the Power button.
Make the most of these touch-centric features to efficiently capture and enhance your screenshots on your touch screen rig.
Harness the power of screenshots to communicate effectively, troubleshoot easily, or create visually engaging content.
