Introduction
Welcome to the world of gaming!
In this guide, well walk you through the step-by-step process of disassembling your PS3 console.
Why would you want to take your PS3 apart?
There could be several reasons.
Now that everything is in order, lets move on to the first step: preparing the workspace!
Creating an organized and clean environment will make the process smoother and help prevent any damage to your console.
Remember, safety should always be a priority when working with electronic devices.
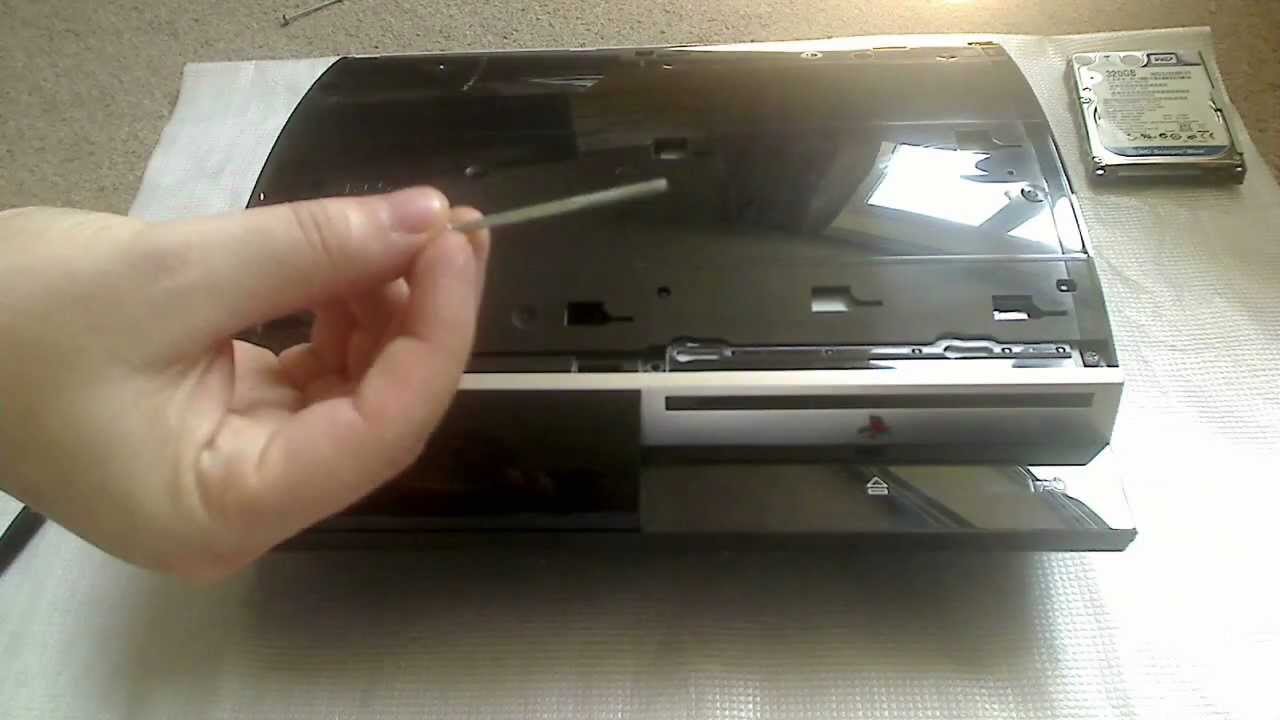
Remember to handle the hard drive with care and avoid touching the exposed circuitry or the connectors.
This will allow you to proceed with the disassembly process more efficiently.
Remember to handle the bottom panel with care and avoid any excessive force that could lead to damage.
Keep the panel in a safe place to avoid misplacement during the disassembly process.
Stay tuned for the following section to continue the disassembly process of your PS3!
If youre cleaning the drive, use a lint-free cloth or compressed air to remove any dust or debris.
If youre replacing it, carefully load the new drive using the reverse steps of this process.
Remember to handle the Blu-ray drive with care, as it contains delicate components.
Avoid touching the laser lens or any exposed connectors to prevent damage.
Stay tuned to continue the disassembly process of your PS3!
If youre replacing it, roll out the new board using the reverse steps of this process.
Avoid touching any exposed circuits or connectors to prevent any mishaps.
Stay tuned for the following section to continue the disassembly process of your PS3!
If youre replacing it, carefully implement the new power supply using the reverse steps of this process.
Remember to handle the power supply with care, as it contains high-voltage components.
Avoid touching any exposed circuits or connectors to prevent any electrical mishaps.
Stay tuned for the following section to continue the disassembly process of your PS3!
If youre replacing it, carefully plant the new motherboard using the reverse steps of this process.
Remember to handle the motherboard with care, as it contains delicate electronic components.
Avoid touching any exposed circuits or connectors to prevent damage.
Stay tuned for the following section to continue the disassembly process of your PS3!
Over time, dust and debris can accumulate on the fan blades and heat sink, reducing their effectiveness.
Use compressed air or a clean, lint-free cloth to carefully remove any dirt or dust.
This helps to ensure optimal heat transfer when reassembling.
Remember to handle the fan and heat sink assembly with care, as it contains delicate components.
Avoid touching the fan blades or any exposed circuits to prevent damage.
Stay tuned for the following section to continue the disassembly process of your PS3!
Carefully set up the new board using the reverse steps of this process.
Ensure that all connectors and cables are properly reattached when reassembling the console.
Double-check to ensure the ribbon cable is securely connected to the power button board.
This ensures proper functionality of the power button and other control buttons.
Remember to handle the power button board with care, as it contains delicate components.
Avoid applying excessive force or bending the ribbon cable to prevent damage.
Stay tuned for the following section to continue the disassembly process of your PS3!
Use compressed air or a clean, lint-free cloth to carefully remove any dirt or dust from these components.
Additionally, inspect the thermal paste between the heat sink and the CPU/GPU.
When reassembling the cooling system, ensure that all screws, brackets, and cables are properly reattached.
Double-check the fan cable connection to the motherboard or power supply board to ensure proper functionality.
Avoid excessive force or bending of any parts to prevent damage.
Stay tuned for the upcoming section to continue the disassembly process of your PS3!
Remember to handle the disc drive motor with care, as it contains delicate internal components.
Avoid applying excessive force or causing any impact to prevent damage.
Stay tuned for the following section to continue the disassembly process of your PS3!
This step allows for easier access to the additional components within the console.
If you plan on reassembling the console, check that to reconnect the power button ribbon securely before proceeding.
Remember to handle the power button ribbon with care, as it is thin and delicate.
Avoid bending or crimping the ribbon to prevent any potential damage.
Stay tuned for the upcoming section to continue the disassembly process of your PS3!
If youre replacing the power supply, ensure you acquire the correct replacement part specific to your PS3 model.
Remember to handle the power supply with care, as it contains delicate electronics.
Avoid applying excessive force or causing any impact to prevent damage.
Stay tuned for the following section to continue the disassembly process of your PS3!
This step allows for a clearer path when removing the motherboard and ensures a smoother disassembly process.
Remember to handle the cables with care and avoid any excessive bending or tugging that could potentially damage them.
Stay tuned for the upcoming section to continue the disassembly process of your PS3!
Avoid using excessive force or scratching the surfaces to prevent damage to the CPU and GPU.
With the thermal paste removed, ensure both the CPU and GPU are clean and free of any residue.
This will allow for a fresh software of thermal paste when reassembling your PS3 console.
Stay tuned for the upcoming section to continue the disassembly process of your PS3!
Tampering with these components can be dangerous and may pose a risk of electric shock.
Modifying or repairing the power supply without proper knowledge or tools can be hazardous and may void your warranty.
Remember to exercise caution when handling the power supply, as it contains high-voltage components.
Avoid touching any internal components and always prioritize your safety.
Stay tuned for the upcoming section to continue the disassembly process of your PS3!
This step allows for easier access to individual components for cleaning, repair, or replacement.
Carefully align the motherboard with the appropriate slots and guides before gently pressing it back into position.
Remember to handle the motherboard with care, as it contains delicate circuitry and sensitive components.
Avoid applying excessive force or dropping it, as this may cause irreparable damage.
Stay tuned for the upcoming section to continue the disassembly process of your PS3!
The proper cleaning and reassembly process ensures optimal performance, longevity, and reliability of your console.
Regular maintenance will help prolong the lifespan of your PS3 and maintain its performance.
Congratulations on successfully cleaning and reassembling your PS3!
Get ready to experience countless hours of gaming enjoyment.
In the reassembly stage, you carefully connected cables, secured screws, and ensured proper alignment of components.
Your newly acquired knowledge can also be applied to future cleaning and maintenance of your PS3.
Enjoy your gaming adventures with your newly cleaned and reassembled PlayStation 3!
