This issue can lead to failed prints and wasted materials, causing frustration and delays for users.
In this article, we will explore the causes of warping and provide strategies to mitigate this issue.
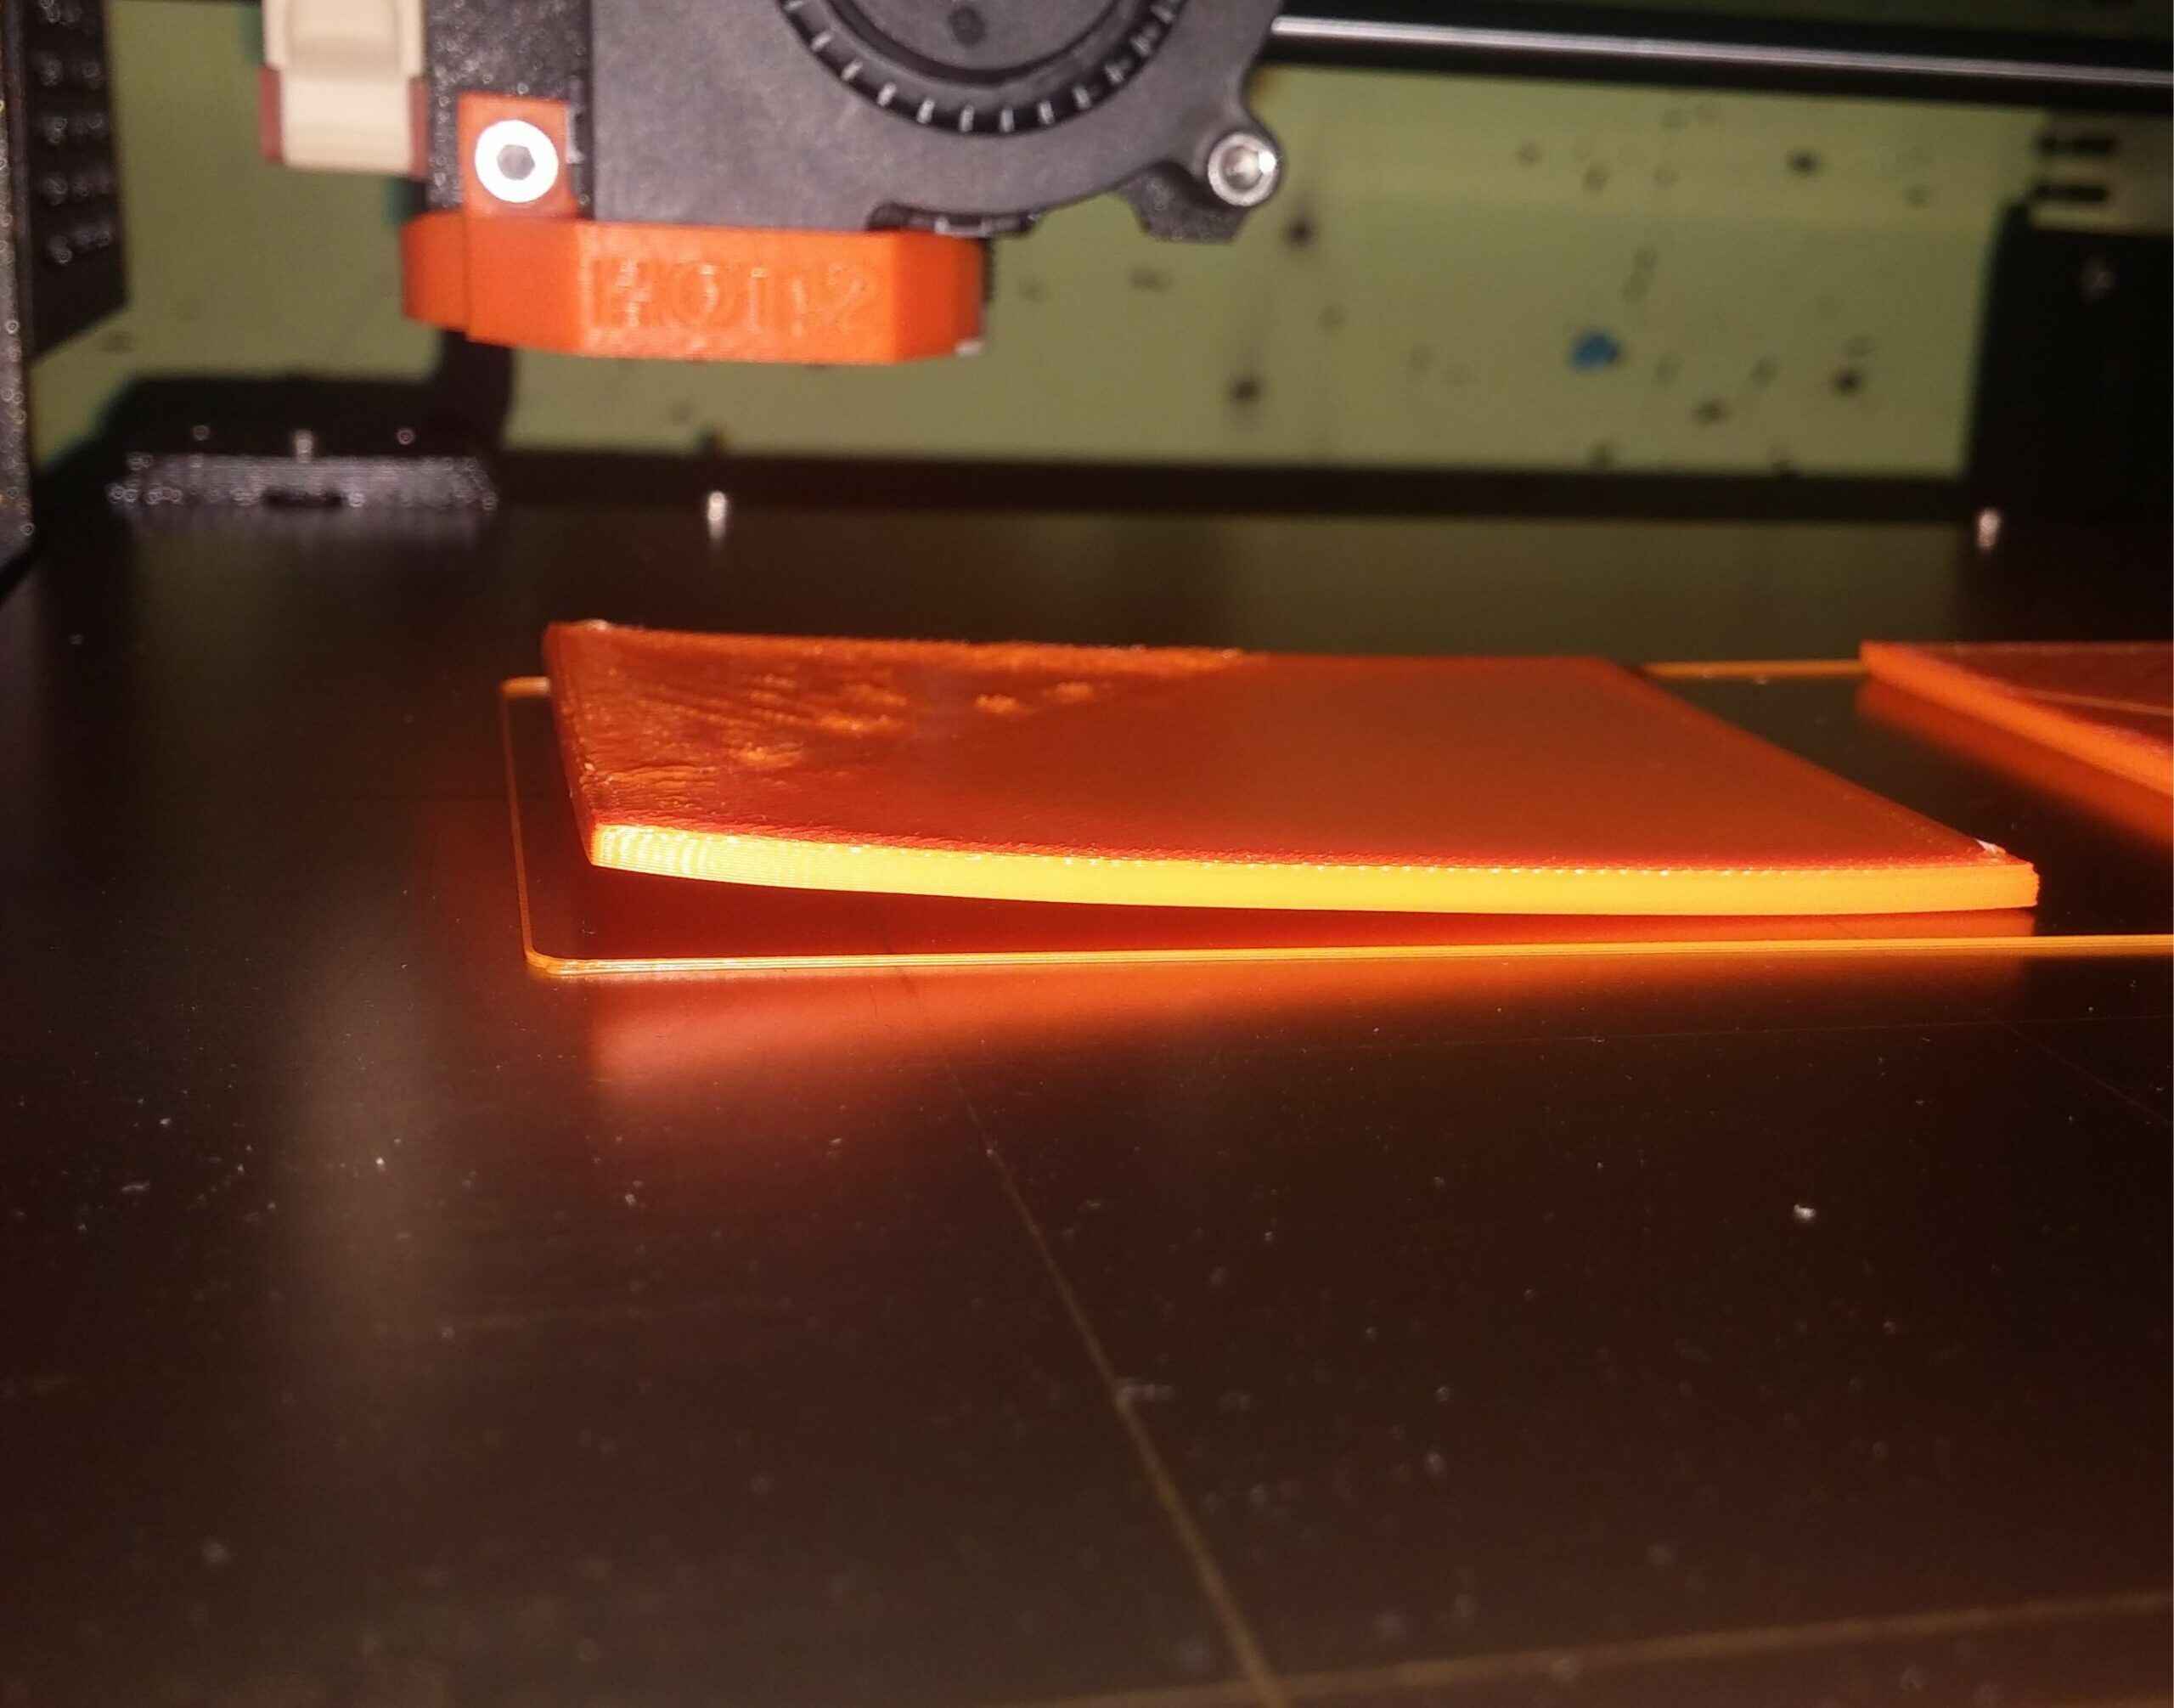
Warping primarily occurs due to the difference in cooling rates between the layers of filament during the printing process.
Additionally, inadequate bed adhesion and incorrect bed and nozzle temperatures can exacerbate the problem.
This can result in distorted or failed prints, leading to frustration for users.
To effectively prevent warping, it is essential to understand the underlying causes of this issue.
One of the primary factors contributing to warping is the difference in cooling rates between the layers of filament.
This is especially prominent in materials such as ABS, which tends to have higher shrinkage rates.
Another cause of warping is inadequate bed adhesion.
Furthermore, incorrect bed and nozzle temperatures can also contribute to warping.
Remember, successful 3D printing requires careful attention to detail and a thorough understanding of the materials being used.
Factors that Contribute to Warping
Several factors can contribute to warping in 3D printing.
One of the primary factors is the cooling rate of the printed layers.
As each layer cools at a different rate, the contraction can create forces that lead to warping.
Another factor is improper bed adhesion.
Ensuring proper bed adhesion is critical to preventing warping.
The choice of bed surface also plays a significant role.
Different filaments require different bed surfaces to achieve optimal adhesion.
Using the right bed surface for the filament being used can greatly reduce the chances of warping.
Another key factor is the nozzle and bed temperatures.
If the bed temperature is too low, the printed part may cool unevenly, leading to warping.
Finding the optimal temperature parameters for your specific filament is crucial to minimize warping issues.
Humidity and moisture absorption by filaments can also contribute to warping.
Proper storage of filaments in sealed containers with desiccant can help prevent moisture-related warping.
Finally, the geometry and design of the printed object can influence the occurrence of warping.
Large, flat surfaces that cool at different rates are more prone to warping.
Adding support structures, chamfers, or fillets to sharp corners can help alleviate stress and reduce warping tendencies.
One popular and widely used bed surface is glass.
Glass provides a smooth and flat surface that allows for excellent adhesion with materials like PLA.
Another common bed surface is BuildTak or similar adhesive sheets.
These sheets have a textured surface that helps filament adhere more effectively.
BuildTak is particularly popular for printing materials like ABS, PETG, or flexible filaments.
Applying the sheet to your print bed provides a reliable and consistent surface for preventing warping.
Painters tape is also a viable option for certain filaments.
It provides a slightly rough surface that promotes adhesion with materials like ABS.
However, keep in mind that the tape should be replaced regularly to maintain its adhesion properties.
PEI offers exceptional adhesion and can withstand higher printing temperatures.
It provides a reliable grip for challenging materials that are prone to warping.
Its worth noting that each bed surface may require specific setup or maintenance.
For example, glass beds may need to be cleaned or lightly sanded to ensure optimal adhesion.
Adhesive sheets like BuildTak can wear out over time and might need replacement.
Experimentation and testing may be necessary to determine which bed surface works best for your specific materials and prints.
One commonly used method is a leveled bed.
A leveled bed ensures that the print surface is flat and parallel to the printers nozzle.
This not only promotes proper bed adhesion but also helps in achieving consistent print quality.
Regularly check and adjust the bed leveling to maintain optimal adhesion.
Another technique is achieving the right first layer height.
The first layer plays a significant role in establishing adhesion and should be squished slightly onto the build surface.
Applying adhesives to the bed surface is another effective technique.
It is important to apply a thin and even layer to avoid excessive buildup or uneven adhesion.
Choosing the right bed temperature is crucial in ensuring proper adhesion.
Different materials require different bed temperatures for optimal bonding.
Additionally, adjusting the printing speed for the first few layers can contribute to better bed adhesion.
Regularly cleaning the build surface is essential to maintain proper bed adhesion.
Oil, debris, or residue can interfere with adhesion and lead to warping.
By applying these bed adhesion techniques, you could significantly reduce the occurrence of warping in your 3D prints.
Experimentation and finding the right combination of techniques for your specific filament and printer setup may be necessary.
Adjusting Bed and Nozzle Temperature
Proper temperature control is essential in preventing warping during 3D printing.
Adjusting both the bed and nozzle temperatures can significantly impact adhesion and minimize the chances of warping.
The bed temperature plays a crucial role in ensuring proper adhesion between the printed object and the build surface.
Different materials have specific temperature requirements for optimal bonding.
For materials like PLA, it is generally recommended to set the bed temperature between 40-60C.
Lower bed temperatures can help improve cooling and minimize warping.
When adjusting the bed temperature, it is important to consider the ambient temperature in the printing environment.
In colder environments, increasing the bed temperature slightly can compensate for the temperature difference and improve adhesion.
Conversely, in warmer environments, lowering the bed temperature may be necessary to prevent excessive heating and warping.
Similarly, the nozzle temperature plays a vital role in preventing warping.
The nozzle temperature affects the melt viscosity of the filament and can impact adhesion and layer bonding.
Each filament has its specific temperature range for optimal printing.
It is important to consult the filament manufacturers recommendations or conduct calibration prints to determine the appropriate nozzle temperature.
For most filaments, nozzle temperatures between 180-230C are common.
It is worth mentioning that simply adjusting the bed and nozzle temperatures does not guarantee the elimination of warping.
That said, fine-tuning the temperature options in combination with other strategies can significantly contribute to reducing warping issues.
A brim is a thin layer of filament printed around the base of the object.
It extends the footprint of the print, increasing the contact area with the build surface.
The brim acts as a sacrificial layer that provides better adhesion and stability during the printing process.
Once the print is complete, the brim can be easily removed, leaving behind the desired object.
Rafts, on the other hand, are larger structures printed at the base of the object.
Unlike a brim, a raft covers the entire footprint of the print.
Rafts are particularly useful when printing with materials known for their high shrinkage rates, such as ABS.
When using brims or rafts, it is important to consider their impact on print time and material usage.
Both techniques require additional filament and, consequently, slightly increase the overall printing time.
However, the benefits in terms of improved adhesion and reduced warping outweigh this trade-off in most cases.
Most slicing software allows for easy configuration of brim or raft prefs.
These techniques provide additional support and stability during the printing process, ensuring successful outcomes and high-quality prints.
An enclosure is a structure that surrounds the 3D printer, creating a contained space.
It helps retain heat within the printing area, creating a more consistent temperature throughout the print.
This thermal stability minimizes the temperature differential between the printed layers, reducing the chances of warping.
The enclosure should be well-ventilated to ensure sufficient airflow and prevent excessive heat buildup.
Additionally, installing a temperature monitor within the enclosure can help ensure that the desired temperature range is maintained.
In addition to enclosures, covers can also be used to shield the print from drafts or external airflows.
Drafts can cause abrupt temperature changes, leading to uneven cooling rates and potential warping.
However, its important to note that not all prints or materials require enclosures or covers.
To minimize these issues, it is important to store your filament in a dry and controlled environment.
One effective way to store filament is in airtight containers with desiccant packs.
These containers help keep out moisture and maintain a stable humidity level around the filament spools.
Desiccant packs, such as silica gel or desiccant pouches, absorb any moisture present in the storage container.
Some filament manufacturers provide vacuum-sealed packaging for their products.
Once opened, transfer the filament to an airtight container to help preserve its quality.
Avoid storing filament in areas with high humidity or temperature fluctuations, such as basements or near windows.
Direct exposure to sunlight or heat sources can also deteriorate filament quality and increase the chances of warping.
When printing, it is best to use filament that has been properly stored.
If you notice excessive warping or poor print quality, consider checking the moisture content of the filament.
Some filament brands offer moisture-testing indicators that change color when the filament has absorbed too much moisture.
Using a filament dry box or an oven specifically designed for filament drying can help remove moisture effectively.
However, be cautious and follow the manufacturers guidelines to avoid overheating or damaging the filament.
Consistently dry filament leads to improved print quality, better layer adhesion, and reduced chances of print failures.
Remember to check and maintain the storage conditions of your filament regularly.
Proper filament storage is an essential aspect ofpreventing warping and achieving successful 3D prints.
One of the primary methods to control cooling is by adjusting the cooling fan speed.
The cooling fan blows cool air onto the printed layers, facilitating faster and more uniform cooling.
However, its important to strike a balance between cooling and adhesion.
Monitoring the fan speed and adjusting it based on the material being used is key.
Most slicing software allows for customized cooling controls.
Experimentation and adjustments may be necessary to determine the optimal cooling controls for your specific prints and filament types.
These features help minimize internal stresses and reduce the chances of warping or deformation.
These structures are intentionally printed separately from the main object and serve as a benchmark to evaluate cooling effectiveness.
Its important to note that different materials have specific cooling requirements.
PLA, for example, benefits from relatively higher fan speeds to ensure efficient cooling and minimize warping.
Regular maintenance of the cooling fan is essential as well.
ensure it operates smoothly without any obstructions or debris that might affect the airflow.
Cleaning the fan periodically to remove dust and dirt buildup ensures optimal performance during the printing process.
By implementing effective cooling strategies, you might achieve better print quality and reduce the occurrence of warping.
A well-managed cooling process promotes even cooling rates and helps preserve the integrity of your prints.
Troubleshooting Common Warping Issues
Despite taking precautionary measures, warping can still occur during 3D printing.
Lets explore some common warping issues and their potential solutions.
Adding fillets or chamfers to sharp edges can also help distribute stress and reduce warping tendencies.
To mitigate this issue, adequate cooling and optimized fan prefs are crucial.
you could also consider incorporating designs with internal structures or infill patterns that provide better stability and reduce warping.
Additionally, slower print speeds and optimizing cooling tweaks can help prevent warping due to rapid temperature changes.
Adjusting fan and cooling tweaks can help in managing cooling rates and enhancing overhang or bridging performance.
Insufficient Bed Adhesion: Poor bed adhesion can lead to warping as the print layers fail to adhere properly.
Remember, troubleshooting warping issues may require a combination of different strategies and adjustments to various parameters.
Conclusion
Warping can be a frustrating issue that affects the success of 3D prints.
In this article, we explored various techniques to prevent warping on a 3D printer.
Additionally, we provided troubleshooting tips for common warping issues.
It is essential to remember that each print and filament combination may require different approaches and adjustments.
