Introduction
Welcome to the world of Ethernet cables, where seamless internet connections are made.
In todays technological era, having a reliable and efficient internet connection is paramount.
However, there may be instances where you find yourself in need of splicing anEthernet cable.
Before we dive into the practicalities, its important to understand what splicing actually entails.
So, why would you should probably splice an Ethernet cable in the first place?
Well, there are several scenarios that may require you to do so.
It could be that you better extend the reach of your existing cable to connect devices in distant locations.
Alternatively, you might encounter a damaged Ethernet cable that needs repair.
What is splicing?
Splicing is the process of joining two or moreEthernet cablestogether to create an uninterrupted connection.
There are different methods of splicing, including mechanical splicing and fusion splicing.
When it comes to Ethernet cables, the most common method of splicing is using connectors.
This ensures that the connection is secure and reliable.
Its important to note that splicing an Ethernet cable should only be done when necessary.
However, unforeseen circumstances such as relocation or cable damage may require splicing.
Proper splicing is essential to maintain the integrity and performance of the Ethernet cable.
Additionally, its crucial to ensure that the cables being spliced are of the same category.
Mixing cables of different categories can lead to compatibility issues and degraded web connection performance.
In summary, splicing is the process of joining Ethernet cables together to create a continuous and reliable connection.
It involves aligning and securing the wires inside the cables using connectors or adapters.
Proper splicing techniques and using cables of the same category are vital to ensure optimal connection performance.
Why would you oughta splice an Ethernet cable?
There are various situations where you might find yourself in need of splicing an Ethernet cable.
One common reason to splice an Ethernet cable is when you better extend the reach of your web link.
This can help in situations where running a completely new cable is impractical or inconvenient.
Another scenario where splicing is required is when a cable becomes damaged.
Instead of replacing the entire cable, splicing can be a cost-effective solution.
Excess cable length can be unsightly and even pose a tripping hazard.
Splicing an Ethernet cable can also be necessary when installing data pipe equipment in challenging environments.
Get a set of RJ-45 connectors that match the category of your Ethernet cable.
These connectors have slots where the wires from each cable will be inserted and crimped.
A cable crimper is an essential tool for securing the connectors onto the Ethernet cable.
It allows you to crimp the connector, ensuring a tight and reliable connection.
A cable cutter will be needed to trim the excess cable length.
double-check you have a sharp and clean-cutting cable cutter to ensure accurate and precise cuts.
A cable stripper is used to remove the insulation from the Ethernet cable, exposing the individual wires inside.
It ensures a clean and accurate strip without damaging the wires.
A wire stripper is required to remove the insulation from the individual wires within the Ethernet cable.
It helps in preparing the wires for proper alignment and insertion into the connector slots.
It allows you to verify the continuity and integrity of the connection.
Ensure that you have all these tools and materials ready before you roll splicing the Ethernet cable.
Having them at hand will make the process more convenient and ensure a successful splicing outcome.
This involves inspecting the cable, determining the desired length, and making necessary markings for cutting.
Its important to ensure that the cable is in good condition and suitable for splicing.
Decide on the desired length for the spliced Ethernet cable.
Ensure that you measure accurately and that the markings are visible even when you start the cutting process.
Its recommended to leave a bit of extra cable length beyond the desired length.
This allowance will come in handy during the splicing process, as it allows room for error and adjustments.
By properly preparing the Ethernet cable, you set the foundation for a successful splicing process.
Cutting the cable properly ensures that the ends are clean and ready for stripping and inserting into the connectors.
Ensure that it is tangle-free and not twisted to avoid any issues during the cutting process.
Double-check the measurements to ensure accuracy.
Once confirmed, make a clear and visible mark on the cable at this point.
Hold the cable firmly with one hand while using a sharp cable cutter with the other hand.
Position the cutter on the marked spot and apply enough pressure to cut through the cable.
Using a cable cutter with clean and sharp blades will help achieve a clean cut.
This will ensure easier wire stripping and proper insertion into the connectors.
Stripping the cable exposes the individual wires inside, allowing for proper alignment and insertion into the connectors.
Here is how to strip the cable:
Ensure you have a cable stripper and/or a wire stripper handy.
These tools are specifically designed to safely and efficiently remove the outer insulation from the Ethernet cable.
Hold the cable firmly, and locate the cable stripper in a position that aligns with the cut end.
Using the cable stripper, gently rotate it around the cable in a full circle, applying moderate pressure.
The blades of the stripper will score the outer insulation without damaging the internal wires.
Repeat this process a few times to ensure a clean cut.
With a smooth and steady motion, the outer insulation should come off, leaving the inner wires exposed.
After stripping the cable, take a moment to inspect the wires.
confirm they are intact, smooth, and free from any frayed or damaged sections.
If any wire feels like compromised, it may be necessary to start with a fresh cut and strip.
Untangling the wires allows for a clean and organized connection, reducing the chances of crossed or misplaced wires.
Familiarize yourself with these color codes to ensure correct wire placement during the untangling process.
Gently separate the wires from each other by carefully stretching them apart.
Take your time to ensure that each wire remains straight and untangled.
As you untangle the wires, take a moment to inspect each one.
Look for any signs of damage, such as fraying or broken sections.
Its important to have all the wires in good condition for a secure and reliable connection.
Straighten each wire individually by running your fingers along its length, removing any kinks or bends.
This will ensure that the wires are in their optimal shape for proper alignment and insertion into the connectors.
Arrange the wires according to the specific wiring diagram or standard you are following.
However, double-check to refer to the appropriate guidelines for your specific splicing project.
Properly aligning the wires ensures a secure and accurate connection, allowing for efficient data transmission.
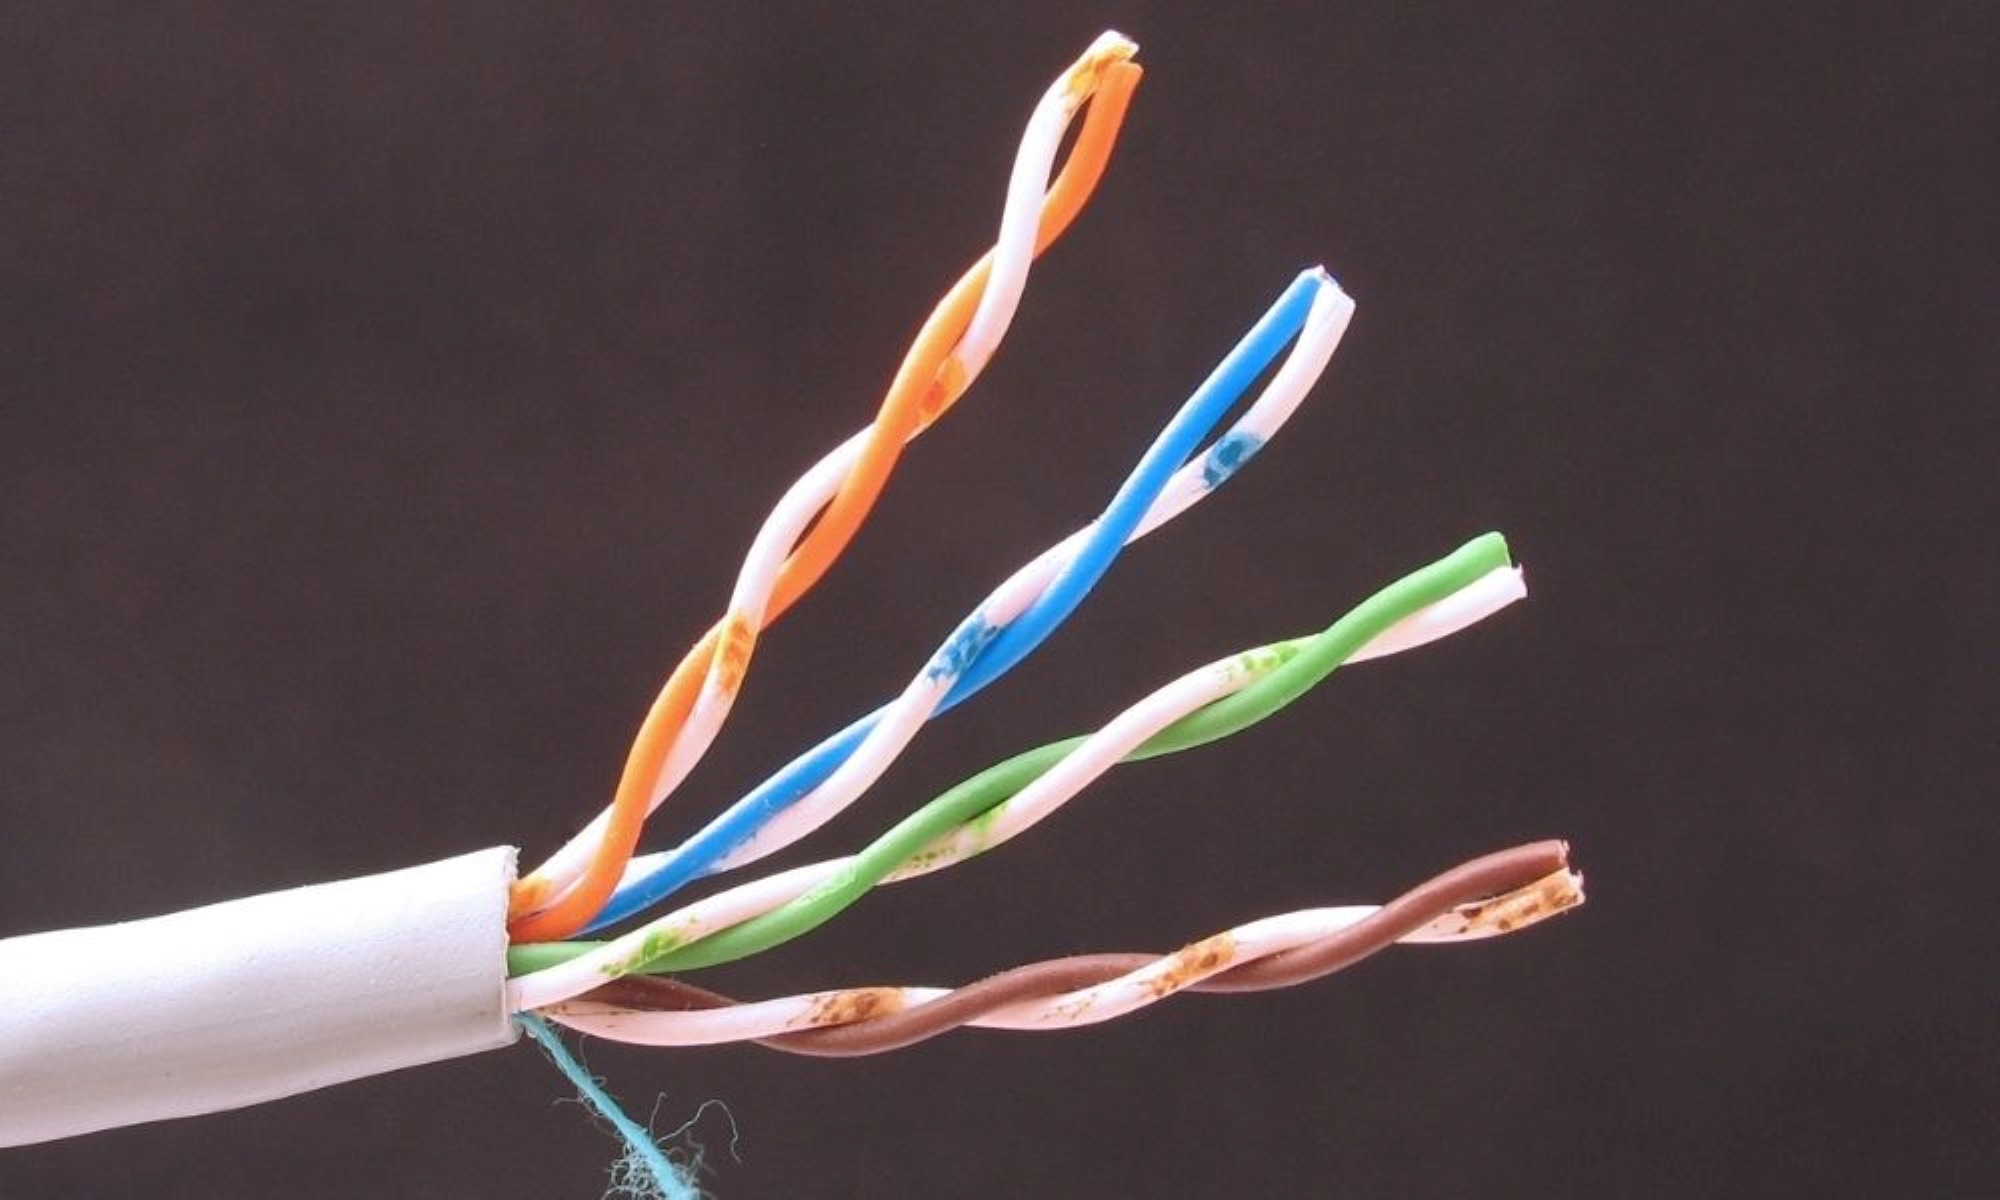
The most common wiring standard is the TIA/EIA-568-B, which provides a color-coded guide for arranging the wires.
Ethernet cables consist of four wire pairs.
Each pair is composed of a solid color wire and a white stripe wire of the same color.
Identify and match these pairs to facilitate the arrangement process.
Align the wire pairs according to the designated pin configuration.
This helps ensure a precise insertion into the connector slots, reducing the risk of crossed or misaligned wires.
Gently hold the wire bundle together, ensuring that the wires maintain their proper alignment.
This will prevent them from shifting or becoming uneven during the trimming process.
Using wire cutters or scissors, carefully trim the ends of the wires to the desired length.
Its important to have clean-cut ends to ensure a reliable and secure connection.
If any of the trimmed ends appear crooked or bent, use your fingers to straighten them out.
This will ensure that the wires fit properly into the connector slots and establish a reliable connection.
By trimming the wires to the correct length, you ensure a precise and secure connection within the connector.
This is the standard orientation for aligning the wires properly within the connector.
Take the wire bundle and carefully insert it into the connector.
Ensure that each wire matches its corresponding pin based on the wiring diagram or standard you are following.
Confirm that the wires are fully seated within the connector and aligned in the correct order.
Using your fingertips, gently straighten and arrange the wires within the connector.
Before proceeding to the next step, visually verify the alignment of the wires within the connector.
Ensure that the wires are properly aligned and straightened within the connector.
This ensures that the wires are ready for insertion into the connector.
Apply even pressure to ensure all the wires are fully inserted and make direct contact with the pins.
The wires should go in smoothly without any resistance.
Ensure that each wire goes into its designated slot without crossing or overlapping any others.
Double-check the connection, visually inspecting the wires to verify that they are all securely inserted into the connector.
Confirm that none of the wires are pulled out or misaligned.
To ensure a reliable connection, perform a gentle tug test.
If the wires remain securely in place, your connection is likely stable.
By carefully inserting the wires into the connector, you create a secure and dependable connection.
Familiarize yourself with the tool and its functions to ensure proper usage.
This prevents any movement or misalignment during the crimping process.
Carefully position the connector, ensuring that it is fully inserted into the designated crimping slot of the tool.
The connector should fit snugly and securely within the tool to ensure proper crimping.
With the connector in the crimping tool, apply even and steady pressure to the handles of the tool.
Carefully remove the crimped connector from the tool to avoid any damage or disturbance to the wires.
After crimping, visually inspect the crimped connector to ensure that it is securely attached to the wires.
Check for any signs of loose or misaligned wires.
If necessary, use the crimping tool again to reposition and recrimp any wires that require adjustment.
A securely crimped connector provides a stable and long-lasting spliced Ethernet cable that can effectively transmit data without interruption.
Testing the connection verifies the integrity of the spliced cable and ensures that data transmission is reliable and error-free.
Ensure that the cable is firmly inserted into the Ethernet port of the gear.
Observe the rig where the cable is connected and check for the link status LED indicators.
These indicators typically show a solid light or a blinking pattern to indicate a successful connection.
If required, measure the data transfer speed using appropriate web link diagnostic tools.
This will help confirm that the spliced Ethernet cable is capable of delivering the expected speed and performance.
This test ensures that there are no breaks or interruptions in the wires.
Double-check all physical connections, including both ends of the spliced Ethernet cable, to verify they are secure.
A loose or improperly inserted cable can result in intermittent connectivity or degraded performance.
Testing is essential to identify any potential issues and ensure that your internet setup is functioning optimally.
Testing the connection is the final and most important step.
This will ensure optimal performance and compatibility with your data pipe setup.
