Introduction
Welcome to the exciting world of virtual reality gaming with PlayStation VR!
If youre a fan of immersive gameplay experiences, then youre in for a treat.
What is PlayStation VR?
PlayStation VR, often abbreviated as PS VR, is a virtual reality headset developed by Sony Interactive Entertainment.
It also incorporates 3D audio technology, which enhances the immersive experience by delivering realistic and directional audio cues.
This tracking technology enables players to have an unprecedented level of control and freedom within virtual reality worlds.
From action-packed adventures to immersive simulations and captivating storytelling, there is something for everyone.
PlayStation VR is designed to be user-friendly and accessible to both hardcore gamers and casual players.
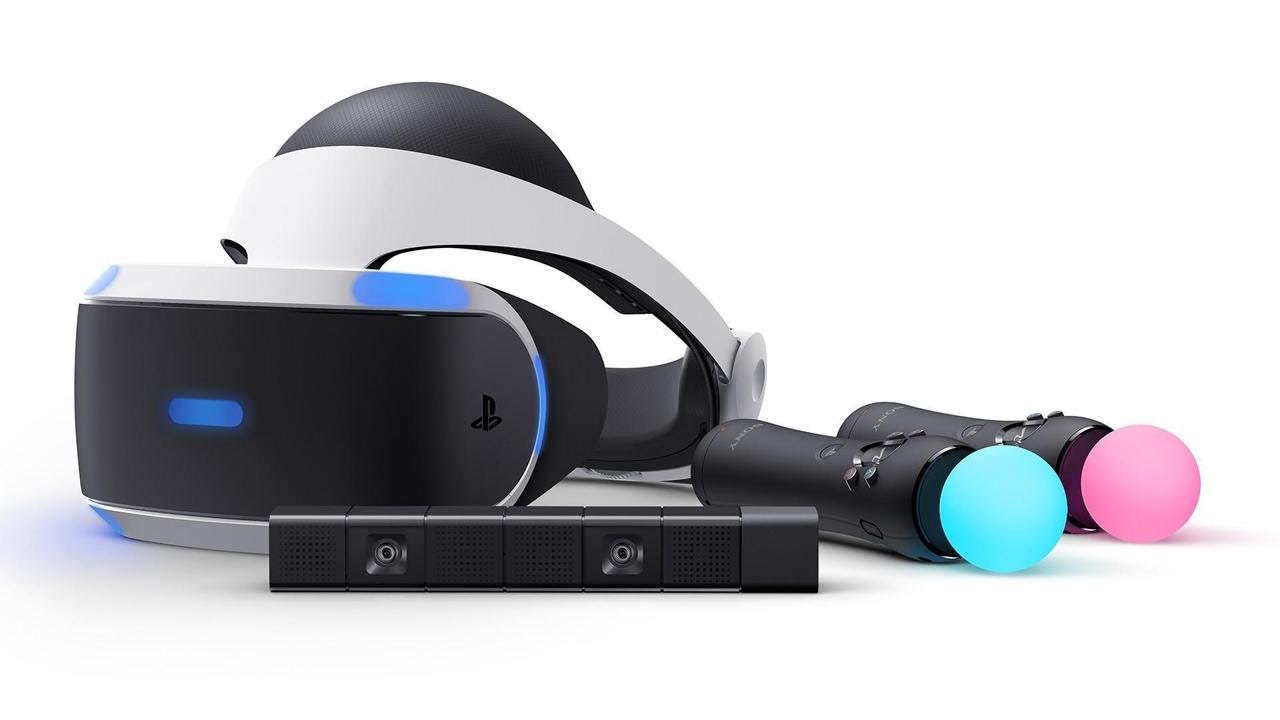
PlayStation 4 Console:PlayStation VR is designed to work with PlayStation 4 and PlayStation 4 Pro consoles.
see to it you have a compatible console before proceeding with the setup.
The bundle ensures you have all the necessary hardware to enjoy virtual reality gaming.
PlayStation Camera:The PlayStation Camera is an essential component of the PS VR setup.
Ensure that you have the PlayStation Camera before setting up PS VR.
Some games rely on motion controls, and having PlayStation Move controllers can enhance your overall gaming experience.
Adequate Space:VR gaming requires some physical space to move around comfortably and safely.
confirm you have enough room in your gaming area to move freely without bumping into furniture or obstacles.
Clearing the space beforehand will prevent any accidents or interruptions during gameplay.
Ensure that your PlayStation console is connected to a reliable internet connection.
Patience and Time:Setting up PlayStation VR requires some time and patience.
It is important to carefully follow the setup instructions provided with the rig.
With these necessary prerequisites in place, youre now ready to embark on your PS VR journey.
Heres a step-by-step guide to help you get started:
1.
Unboxing the PlayStation VR:bring up the PlayStation VR box and carefully remove all the components.
You should find the PS VR headset, the processing unit, cables, and other accessories.
Assembling the PS VR Headset:Gently remove the protective covers from the PS VR headset lenses.
Adjust the headband size to fit comfortably on your head.
Ensure that the cables are not twisted or tangled.
Connecting the Cables:Locate the cable that connects the PS VR headset to the processing unit.
double-check the connections are secure.
Connect the other end of the cable to the HDMI port on your PlayStation 4 console.
Plug the other end of the cable into the HDMI port on your TV.
Powering On:Connect the power cable to the processing unit and plug it into a power outlet.
Ensure that all the connections are secure.
When ready, press the power button on the processing unit to turn on the PlayStation VR.
Adjusting the PS VR Headset:Put on the headset and align it properly on your head.
Use the adjustment dial at the back to tighten or loosen the fit.
Adjust the scope of view by sliding the button at the bottom of the visor up or down.
Ensure a comfortable and clear view.
The next section covers how to connect the PlayStation VR headset to complete the setup process.
Connecting the PlayStation VR Processor Unit
1.
Positioning the Processor Unit:Find a suitable location near your PlayStation 4 console to place the Processor Unit.
It should be within reach of the necessary cables and have enough ventilation to prevent overheating.
Plug the other end into a power outlet.
Connecting the HDMI Cables:Locate the HDMI cable that came with the PlayStation VR.
Connect one end of the HDMI cable to the Processor Units HDMI output port labeled TV/AVR.
Connect the other end to an available HDMI input port on your TV or audio/video receiver (AVR).
Connect the free end of this HDMI cable to the Processor Units HDMI input port labeled PS4.
This ensures that the video and audio signals pass through the Processor Unit.
Connecting the USB Cables:Locate the USB cables that came with the PlayStation VR.
Ensure a secure connection.
This cable transmits video and audio signals to the PS VR headset.
Checking the Connections:Double-check all the connections to ensure they are secure and properly inserted.
ensure there are no loose cables or tangled wires that could affect the performance of the PlayStation VR.
Heres how you might set up the PlayStation Camera:
1.
Checking the Camera Position and Angle:Turn on your PlayStation 4 console and reach the controls menu.
Navigate to Devices and select PlayStation Camera.
The console will display a preview of what the camera sees.
Balanced and natural lighting conditions are ideal for accurate tracking.
Verifying Tracking:Test the camera tracking by moving within the play area while wearing the PlayStation VR headset.
Ensure that your movements are accurately reflected in the virtual reality environment.
If you experience any tracking issues, follow the troubleshooting steps provided by Sony to improve the tracking performance.
The next section will guide you through adjusting the PS VR headset for optimal comfort.
Adjusting the PlayStation VR Headset
- confirm the rear adjustment band is positioned at the base of your skull.
The headband should rest comfortably on your head, providing a secure fit without exerting too much pressure.
Adjusting the Interpupillary Distance (IPD):The IPD is the distance between the center of your pupils.
To achieve optimal visual clarity, locate the IPD adjustment button or slider on the underside of the visor.
Move the IPD adjustment mechanism until the virtual reality content appears clear and in focus.
Adjust the headband or visor positioning as necessary to achieve a stable and secure fit.
Adjust the headset to accommodate your glasses comfortably.
Taking Breaks:Virtual reality gaming can be immersive and intense.
Its important to take frequent breaks to rest your eyes and avoid discomfort or fatigue.
Connecting the PlayStation VR Headset
1.
The port is labeled Headset Connection or similar.
Ensure that the connection is secure and snug.
This helps keep the cable organized and prevents it from tangling or getting in the way during gameplay.
ensure the visual clarity is optimal and that the headset rests securely on your head.
This allows for an immersive audio experience during gameplay.
This prevents any interruptions in gameplay and helps maintain a seamless experience.
Heres how to power on PlayStation VR:
1.
Confirm that the power cables are plugged into the appropriate outlets.
Powering on the VR Processor Unit:Locate the power button on the VR Processor Unit.
Press the button to turn it on.
Wait for the console to fully boot up and reach the home screen.
In the prefs menu, locate and select Devices followed by PlayStation VR.
unlock the VR mode to activate the PlayStation VR functionality.
Refer to your TVs user manual for instructions on adjusting display parameters for gaming purposes.
Enjoy the thrilling ride of virtual reality gaming!
Heres a guide to help you get started:
1.
Check for system software updates and install any available updates to ensure your console is running the latest version.
This step is crucial for compatibility and performance.
Search for the PlayStation VR system software and download and install it.
This software provides the necessary drivers and features for PlayStation VR.
This ensures the best visual and audio experience while using PlayStation VR.
This allows each user to personalize prefs and preferences for their gaming experience.
Download and implement the content youre interested in and start exploring the vast world of virtual reality gaming.
Enjoy the incredible adventures and unforgettable moments that await you in the virtual reality realm!
Heres how to revamp your PlayStation 4 system software:
1.
Connect to the Internet:Ensure that your PlayStation 4 console is connected to the internet.
you’re able to connect via a wired Ethernet connection or wirelessly using Wi-Fi.
A stable internet connection is necessary for downloading and installing system software updates.
The options menu contains various options for configuring your PlayStation 4 console.
System Software Update:Within the prefs menu, scroll down and choose the System Software Update option.
This will check for any available updates.
Checking for Updates:After selecting System Software Update, your PlayStation 4 console will check for available updates.
If an update is available, it will be shown on the screen.
It is recommended not to turn off the console during the update process to avoid any potential issues.
Select Restart to complete the update process.
Verify that your PlayStation 4 console is now running the latest system software version.
This software provides the necessary drivers and features to ensure the smooth operation of your PlayStation VR headset.
The PlayStation Store is where you could find and download various content for your console.
Look for the official PlayStation VR system software.
This will take you to the softwares details page.
Download the System Software:On the softwares details page, choose the Download button.
Wait for the download to complete.
Restart the Console:After the installation is complete, your PlayStation 4 console will prompt you to restart.
Select Restart to complete the installation process.
Verify that your PlayStation 4 console is now running the latest version of the PlayStation VR system software.
With the system software installed, youre now one step closer to engaging in unforgettable virtual reality adventures.
Heres how to calibrate your PlayStation VR system:
1.
Positioning:Find a clear play area free from obstacles and ensure adequate lighting conditions.
Power On:Turn on your PlayStation 4 console and allow it to fully start up.
Accessing options:From the PlayStation 4 home screen, navigate to the options menu.
Scroll down and choose the Devices option.
Selecting PlayStation VR:Within the Devices menu, locate and opt for PlayStation VR option.
This is where it’s possible for you to enter the calibration configs for your PlayStation VR system.
Fine-Tuning:After completing the initial calibration, you may have the option to fine-tune certain configs.
Conclusion
Congratulations!
As you dive into virtual reality gaming, dont forget to take breaks and be mindful of your comfort.
From heart-pounding action to awe-inspiring simulations and thought-provoking narratives, PlayStation VR offers something for every gamer.
Lastly, dont forget to share the fun with friends and family.
Introduce them to the wonders of virtual reality gaming and create unforgettable memories together.
