Introduction
Welcome to this guide on how to set up your Amazon Fire Tablet!
By the end, youll have a fully functional and personalized gear thats ready to use.
So, without further ado, lets get started by unboxing and charging your Amazon Fire Tablet!
Take a moment to appreciate the sleek design and compact size of your new unit.
Plug in the Charger: Locate the charger that comes with your Fire Tablet.
Connect one end of the charger to the tablets charging port and the other end to a power outlet.
Ensure a secure connection.
Charge the Tablet: Let your tablet charge for a few hours to ensure a full battery.
Youll see the Amazon logo appear, indicating that the tablet is booting up.
If you do have an account, simply sign in to access your previous Amazon content and configs.
Registering provides access to special offers and ensures that your tablet is fully integrated with your account.
This will help keep your information secure.
You have successfully unboxed and charged your Amazon Fire Tablet.
In the next step, well cover how to connect your tablet to Wi-Fi.
Lets move on to step 2 and get your tablet connected to the internet!
Alternatively, you could enter the prefs app from the home screen by tapping on the gear-shaped icon.
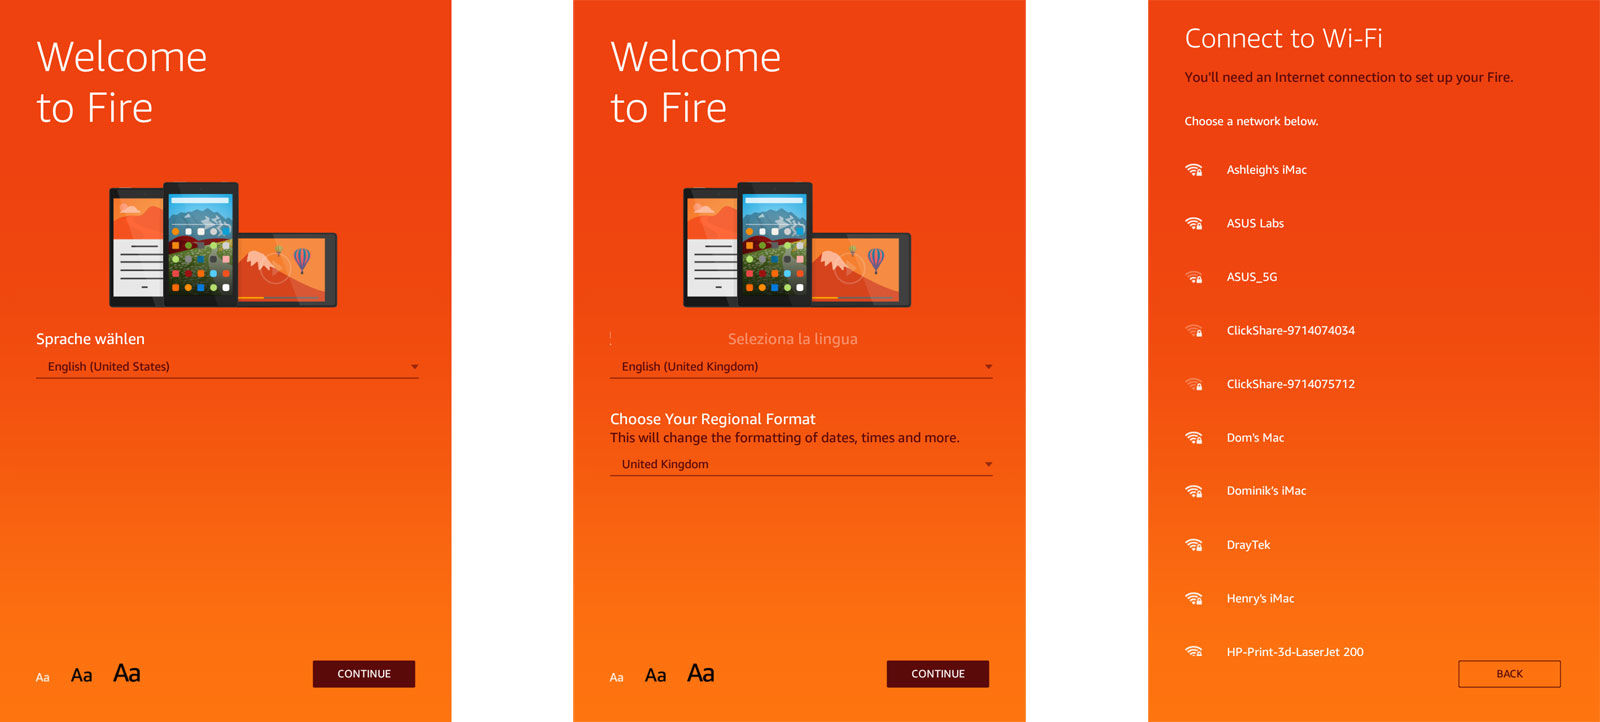
Navigate to Wi-Fi: In the prefs menu, locate and go for the Wi-Fi option.
This will bring up a list of available Wi-Fi networks in your vicinity.
If the online grid is password-protected, youll be prompted to enter the password.
ensure to enter the correct password to establish a successful connection.
Your tablet will try linking to the selected Wi-Fi online grid.
Youll see a checkmark appear next to the web connection name when the connection is successful.
You have successfullyconnected your Amazon Fire Tablet to a Wi-Fi web link.
In the following steps, well cover how to set up an Amazon account and personalize your tablet.
Lets move on to step 3 and get your tablet ready for personalization!
From the drop-down menu, select Start here to create a new account.
pop launch the email and punch the verification link to confirm your account.
Sign in to Your Account: Once your account is verified, return to the Amazon website.
choose the Account & Lists tab and select Sign in from the drop-down menu.
input your email address and password to sign in to your newly created Amazon account.
Tap on Register to link your tablet to your Amazon account.
Enter the email address and password associated with your Amazon account.
The tablet will automatically sync your purchased content and display it in the respective apps.
Youve successfully set up an Amazon account and linked it to your Fire Tablet.
In the next step, well explore how to personalize your tablet to suit your preferences.
Lets move on to step 4 and make your Fire Tablet uniquely yours!
Alternatively, you could find the tweaks app on your home screen by tapping the gear-shaped icon.
Customize the Wallpaper: In the parameters menu, locate and choose the Display or Wallpaper option.
Set up a Personalized Lock Screen: In the options menu, select Security & Privacy or Lock Screen.
Install your favorite apps and remove unwanted pre-installed apps to make your tablet more personalized and streamlined.
Take the time to explore the various customization options to make the tablet uniquely yours.
Lets move on to step 5 and discover the world of apps and games!
This will take you to the Amazon Appstore, which is specifically curated for Fire Tablets.
Here, youll find information about the app, user reviews, screenshots, and more.
Tap on the Install button to download and drop in the app on your tablet.
Be cautious when installing apps from unknown sources, as they may pose security risks.
This allows you to share purchased content without the need for individual purchases.
In the next step, well delve into managing controls and notifications on your tablet.
Lets move on to step 6 and customize your tablet to suit your preferences!
Customize Display and Sound: Explore the various options in the Display and Sound sections of the options menu.
Manage App Permissions: In the tweaks menu, go to the Apps & Notifications or Apps section.
From here, you could view a list of installed apps and manage their permissions.
Adjust Notification parameters: Customize how notifications are displayed and managed on your tablet.
This can be done in the Storage or gear section of the tweaks menu.
Clear cache, uninstall unused apps, and transfer media files to external storage to free up space.
Adjust these tweaks to fine-tune your tablets performance and functionality.
In the next step, well discuss how to add media and content to your tablet.
Lets move on to step 7 and unleash the full potential of your Fire Tablet!
In this step, well explore how to add and manage media on your tablet:
7.1. get into the respective apps to enjoy your purchased content.
Discover new books, movies, TV shows, and music to add to your library.
Navigate to the tablets storage and copy or drag and drop your files to the appropriate folders.
Create playlists, add books to your reading list, and customize your viewing preferences.
This allows you to enjoy your favorite content even without an active internet connection.
Lets move on to step 8 and make your tablet family-friendly!
Navigate to Parental Controls: In the prefs menu, locate and pick the Parental Controls option.
This will bring up the parameters and options related to controlling and restricting access for younger users.
check that to choose a password that is not easily guessable by your children.
This includes filtering out explicit books, movies, apps, and websites.
This ensures they dont stumble upon inappropriate material or access sites you deem unsuitable.
Lets move on to step 9 and ensure a smooth user experience!
Release the button and then press it again to power on the unit.
Clear its cache or data, or uninstall and reinstall the app to resolve any issues.
They can provide more specific guidance or arrange for repair or replacement if necessary.
You have successfully completed all the steps to set up and personalize your Amazon Fire Tablet.
Enjoy exploring all the features, apps, and entertainment that your tablet has to offer!
Conclusion
Congratulations!
Youve made it through the step-by-step guide on setting up and personalizing your Amazon Fire Tablet.
Your Amazon Fire Tablet is now fully equipped to meet your entertainment, productivity, and learning needs.
Now its time to embark on your new digital adventure with your Amazon Fire Tablet.
Enjoy the convenience, entertainment, and possibilities that it offers.
