Introduction
Sending an email with an attachment is a fundamental skill in todays digital age.
Throughout this tutorial, well provide you with a step-by-step guide on how tosend an emailwith an attachment.
By the end of this tutorial, youll have the confidence to send emails with attachments effortlessly.
Lets dive in and get started with the first step: composing a new email.
This is where you will enter the recipients email address, subject line, and the message itself.
To begin, open your preferred email client or web-based email service, such as Gmail or Outlook.
press the Compose or New Email button to start a new email.
In the To field, enter the recipients email address.
Double-check the email address to ensure it is correct and free of any typos.
If you are sending the email to multiple recipients, separate their email addresses with commas.
Next, move on to the Subject field.
This is where you briefly summarize the purpose or content of your email.
Choose a descriptive subject that accurately reflects the attachment or the reason for sending the email.
Now, its time to write the email message.
Take a moment to think about what you want to convey to the recipient.
Keep the message concise, clear, and to the point.
you could include any additional information or context related to the attached file.
Remember to maintain a professional tone if you are corresponding with colleagues or clients.
If the email is more personal, feel free to inject your own voice and style into the message.
when you obtain composed the email, take a moment to review it for any errors or omissions.
confirm the email is grammatically correct and free of any spelling mistakes.
Ensure that the tone and content are appropriate for the recipient.
With the email composed, the next step is to attach the file.
In the next section, well guide you through the process of attaching a file to your email.
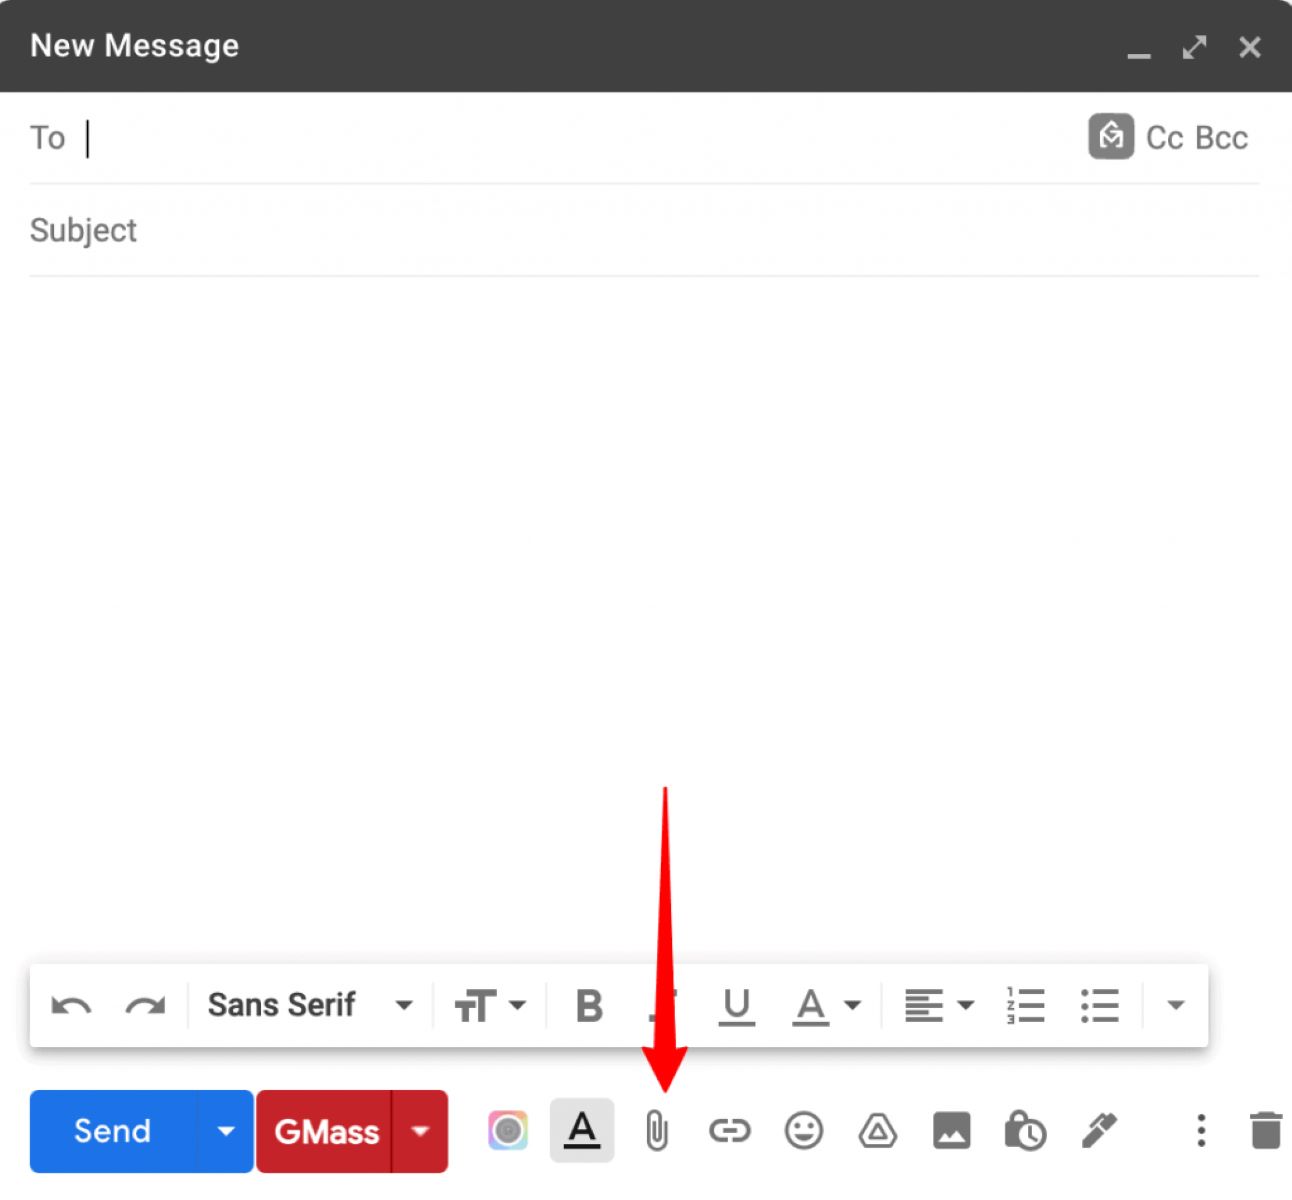
To attach a file, look for the Attach or Attach File button in your email client.
press it, and a file web app window will open.
Navigate to the location on your machine where the file is saved.
The file will then be uploaded and attached to your email.
Depending on your email client or web-based service, you may be able to attach multiple files simultaneously.
Simply repeat the process for each additional file you wish to attach.
Be mindful of file size limitations when attaching files.
Large files can take longer to upload and may exceed the email clients attachment size limit.
Once the file is attached, you may see a progress bar indicating the upload status.
Allow the attachment to finish uploading completely before proceeding to the next step.
Verifying the attachment is an important next step to ensure that the recipient receives the file successfully.
In the next section, well guide you through the process of verifying the attached file.
This step ensures that the recipient will have access to the file you intended to send.
Take a moment to review the email before proceeding.
Look for any indications or icons that confirm the presence of the attached file.
Most email clients will display a paperclip icon or mention the file name near the email subject line.
punch the email to open and review it.
Look for any specific instructions you provided regarding the attachment in the email body.
Double-check that the file name and format are correct, as well as the expected file size.
If there are multiple attachments, double-check all the files you intended to include are present.
you could also verify the attachment by sending a test email to yourself or a trusted contact.
This will allow you to see firsthand how the email and attachment will appear to the recipient.
it’s possible for you to then make any necessary adjustments or corrections.
Remember to remove any test emails from your recipients inbox to avoid confusion or unnecessary clutter.
once you nail verified the attachment, move on to the next step: writing the email content.
In the following section, well guide you through the process of writing a clear and concise email message.
Start by greeting the recipient with a polite and appropriate salutation.
Address them by their name if possible, or use a general greeting such as Dear or Hello.
Be concise and to the point, ensuring that your message is easily understood by the recipient.
If there are specific instructions regarding the attached file, clearly outline them in the email.
Its important to maintain a polite and professional tone throughout the email.
Use proper grammar, punctuation, and spelling to ensure your message is clear and professional-looking.
Use language that is familiar and appropriate for your relationship with the recipient.
Additionally, consider adding a closing statement or a call to actionat the end of the email.
This can be a polite request for feedback or a simple Thank you for the recipients time and attention.
Before sending the email, review the content carefully.
Double-check for any errors, typos, or inconsistencies.
Ensure that you have included all the necessary information and that your message is clear and concise.
With the email content written, its time for the final steps: proofreading and reviewing the email.
In the next section, well guide you through these important steps.
Start by carefully reading through the email from start to finish.
Check for any spelling or grammatical errors, and correct them as needed.
Pay attention to punctuation, sentence structure, and overall clarity of your message.
see to it that the language used is appropriate for the recipient.
Consider their familiarity with technical jargon, acronyms, or industry-specific terms.
Simplify or provide explanations if necessary to ensure the recipient can easily comprehend the email.
Check the formatting of your email as well.
Ensure that the fonts, colors, and any other formatting choices are consistent and visually appealing.
Use bold text or bullet points to highlight important information or key points if necessary.
Take a close look at the emails structure and organization.
Ensure that it flows logically and that the thoughts and ideas are easy to follow.
Consider breaking up longer paragraphs into smaller, more digestible sections.
Ensure that the emails tone and overall message align with your intended purpose.
Avoid any potentially offensive, ambiguous, or confusing language that could lead to misinterpretation.
Remember, a clear and concise email is more likely to be understood and appreciated.
When reviewing the email, also double-check that the attachment is present and accurately mentioned in the email content.
Confirm that all the necessary information and instructions related to the attachment are provided.
In the next section, well guide you through the process of sending your email with the attached file.
Before you hit the Send button, double-check the recipients email address to ensure its accuracy.
Some email clients display a confirmation message once the email has been successfully sent.
Finally, avoid sending multiple follow-up emails unless necessary.
Give the recipient ample time to process and respond to your email before reaching out again.
You have successfully sent an email with an attachment.
Thank you for following this step-by-step guide on how to send an email with an attachment.
We hope this tutorial has been helpful in enhancing your email communication skills.
Conclusion
Sending an email with an attachment is a common and essential task in todays digital world.
Remember to always double-check the recipients email address and verify the attachment to ensure a successful delivery.
Sending emails with attachments can facilitate effective communication, streamline collaboration, and create seamless file sharing experiences.
Embrace the power of technology and leverage this skill to enhance your personal and professional interactions.
