This guide will walk you through the step-by-step instructions to safely remove the Asetek 550LC cooler from your system.
Before we begin, its essential to note that handling computer components requires caution and attention to detail.
Its always a good practice to gather everything youll need before starting to avoid any unnecessary interruptions or delays.
This step ensures your safety and prevents any potential damage to your hardware during the removal process.
Save any work and close all open applications to prevent data loss.
choose the Start menu in Windows or the Apple menu on macOS, and pick the Shut Down option.
Alternatively, you’re free to press and hold the power button until the computer turns off.
Wait for a few moments to ensure that the computer has completely powered down.
Once youre sure that your rig is powered off, unplug the power cord from the power outlet.
Remember to exercise caution and be mindful of electrical hazards while working with your computers internal components.
It is usually positioned at the top or bottom of the case.
Identify the power cables connected to the CPU cooler.
These cables are typically labeled CPU or CPU Power and are connected near the top of the motherboard.
Be cautious not to pull too hard, as this could damage the connectors or the motherboard itself.
Repeat this process for any additional power connectors that are attached to the CPU cooler.
Remember to handle the cables with care and exercise caution to avoid any unnecessary damage to your computers components.
Locate the screws or fasteners securing the side panel to your rig case.
These are typically located at the back or on the rear side of the case.
Using a screwdriver or appropriate tool, carefully remove the screws or fasteners holding the side panel in place.
Set them aside in a safe place to avoid misplacing them.
Once the side panel is free, carefully lift it off and set it aside in a secure location.
Its important to note that different cases may have different mechanisms for removing the side panel.
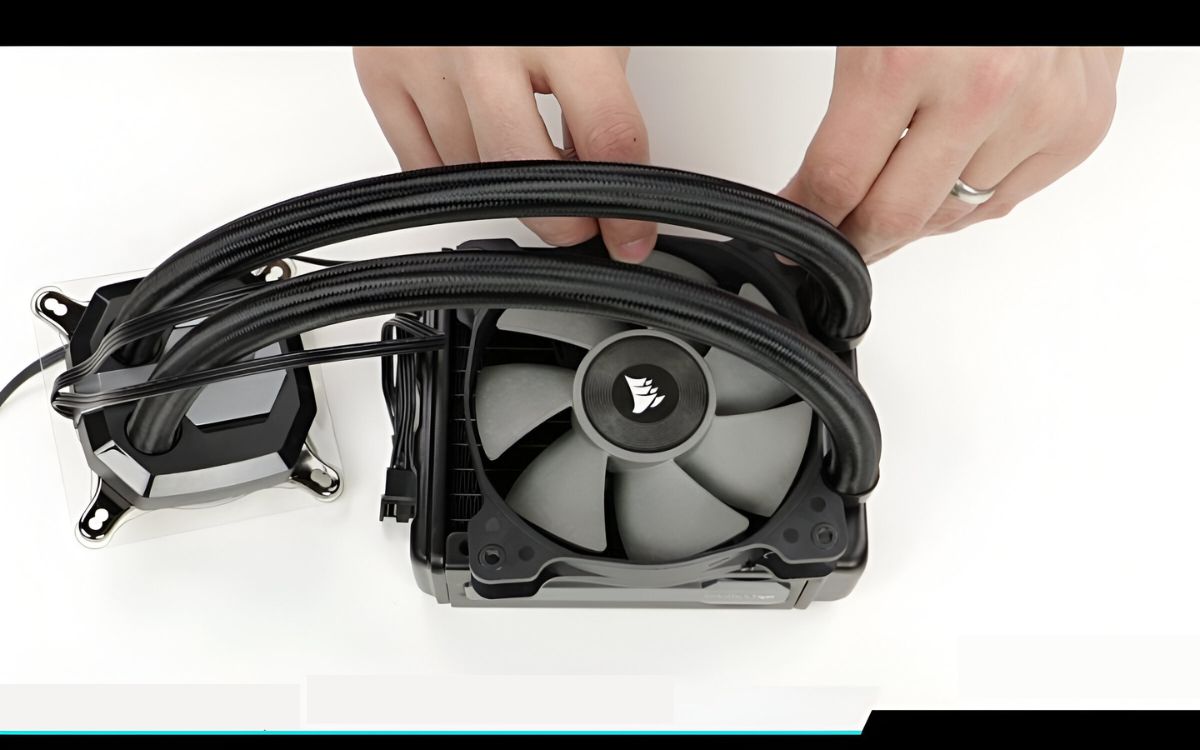
Look for a large radiator with two hoses connected to it.
Trace the hoses from the radiator to the CPU socket on your motherboard.
The CPU socket is usually located near the center of the motherboard and is where the processor is installed.
Identify the pump unit attached to the CPU socket.
The pump unit is a small block or heatsink-like structure with a power cable connector.
It is responsible for circulating the liquid coolant to cool the CPU.
when you land located the Asetek 550LC liquid CPU cooler, familiarize yourself with its positioning and orientation.
Its important to exercise care when handling the Asetek 550LC cooler and its components.
By following these steps, you have successfully located the Asetek 550LC liquid CPU cooler in your setup case.
Understanding its positioning and components will make it easier to proceed with the next steps of the removal process.
It is usually a small, three or four-pin connector.
Gently grip the sides of the fan connector and carefully pull it straight out from the corresponding motherboard header.
Once the fan connector is unplugged, set it aside in a safe place.
Its important to note that the fan connector may be secured with a locking mechanism or clip.
By following these steps, you have successfully unplugged the fan connector from the Asetek 550LC liquid CPU cooler.
This allows for easier removal of the cooler in the subsequent steps of the process.
Ensure that you handle the fan connector with care to avoid any damage.
These tubes are responsible for carrying the liquid coolant to and from the CPU.
Identify the fittings or connectors on the ends of the tubes where they attach to the radiator.
There may be compression fittings, quick-release fittings, or other types of connectors.
Check for any screws, collars, or clips that need to be loosened or removed.
Gently twist or pull the tubes to disconnect them from the radiator.
Take care not to use excessive force, as this could damage the fittings or cause leaks.
you’ve got the option to use paper towels or cloth to catch any drips, if necessary.
Its worth mentioning that liquid may still be present inside the tubes even after disconnecting them.
Take care not to tilt or shake the cooler excessively to avoid any spills or leaks.
By following these steps, you have successfully disconnected the radiator tubes from the Asetek 550LC liquid CPU cooler.
This prepares the cooler for removal in the upcoming steps.
Remember to handle the tubes and fittings with care to prevent any damage or leaks.
These screws are typically positioned around the CPU socket and secure the cooler in place.
Using a screwdriver, carefully loosen and unscrew each mounting screw in a counterclockwise direction.
Support it with your other hand or place it on a stable surface.
Continue to remove each mounting screw until all of them are fully unscrewed and released from the motherboard.
Its important to note that different coolers may have varying numbers and arrangements of mounting screws.
Refer to the manufacturers instructions or documentation for specific details related to your Asetek 550LC cooler.
By following these steps, you have successfully removed the mounting screws from the Asetek 550LC liquid CPU cooler.
We will address the removal of the cooler itself in the next step.
Ensure you have a secure grip to prevent any accidental drops or damage.
Gently lift the cooler straight up from the CPU socket.
Once the cooler is loose, continue to lift it until it is completely detached from the motherboard.
Place it on a clean, dry, and static-free surface.
Avoid touching or spreading the thermal paste as much as possible.
Apply a small amount of thermal paste remover to a clean portion of the cloth or a cotton swab.
Carefully rub the surface of the CPU to remove any remaining traces of thermal paste.
Be thorough but gentle, ensuring that all remnants are removed.
Inspect the surrounding area of the CPU for any thermal paste residue or debris.
Each cooler may have specific requirements and installation steps that need to be followed.
Spread the thermal paste evenly across the surface using a plastic card or a thermal paste spreader.
The goal is to achieve a thin and uniform layer of thermal paste.
Once the cooler is in place, begin securing it by reattaching the mounting screws.
By following these steps, you have successfully installed a new cooler or reapplied thermal paste to the CPU.
This step is critical to maintaining proper heat transfer and ensuring the longevity and performance of your CPU.
Double-check that all screws are tightened, connectors are properly plugged in, and cables are organized.
Ensure a secure connection by firmly pressing them into place.
Secure it with the screws or fasteners that were removed earlier, tightening them in a clockwise direction.
Refer to the labels on the cables or consult the motherboard manual for guidance.
Plug in your rig and power it on.
Listen for any unusual noises or observe any error messages on the screen.
You have completed the process of safely removing and reassembling your computers CPU cooler.
Enjoy the improved cooling performance and the optimized functionality of your system.
your setup will thank you for the improved cooling efficiency, which can lead to better performance and reliability.
