The PSU is a critical component responsible for supplying power to all the internal hardware of the computer.
Over time, PSUs can become faulty or insufficient to meet the power demands of high-performance systems.
In this step-by-step guide, we will walk you through the process of replacing the PSU in your PC.
Before we begin, its vital to note that working with computer components involves handling delicate and sensitive equipment.
This is crucial to ensure your safety and prevent any potential damage to the computer components.
Wait for the computer to completely shut down before proceeding.
Next, locate the power cord connected to the back of the computer.
It is usually a thick cable with a three-pronged plug.
Gently unplug the power cord from the wall outlet and disconnect it from the computer.
Instead, grip the plug firmly and pull it straight out.
This will help discharge any remaining power in the system.
Although modern computers have power surge protection, its better to be safe than sorry.
The exact process of opening the computer case may differ depending on the key in of computer you have.
Begin by locating the screws or latches that secure the side panel of your machine case.
These are typically located on the back of the case.
Once the screws or latches are undone, gently slide or lift off the side panel.
If you are unsure, consult the user manual or manufacturers instructions for your specific computer model.
Remember to handle the case and components with care to avoid any damage or accidental disconnection of other components.
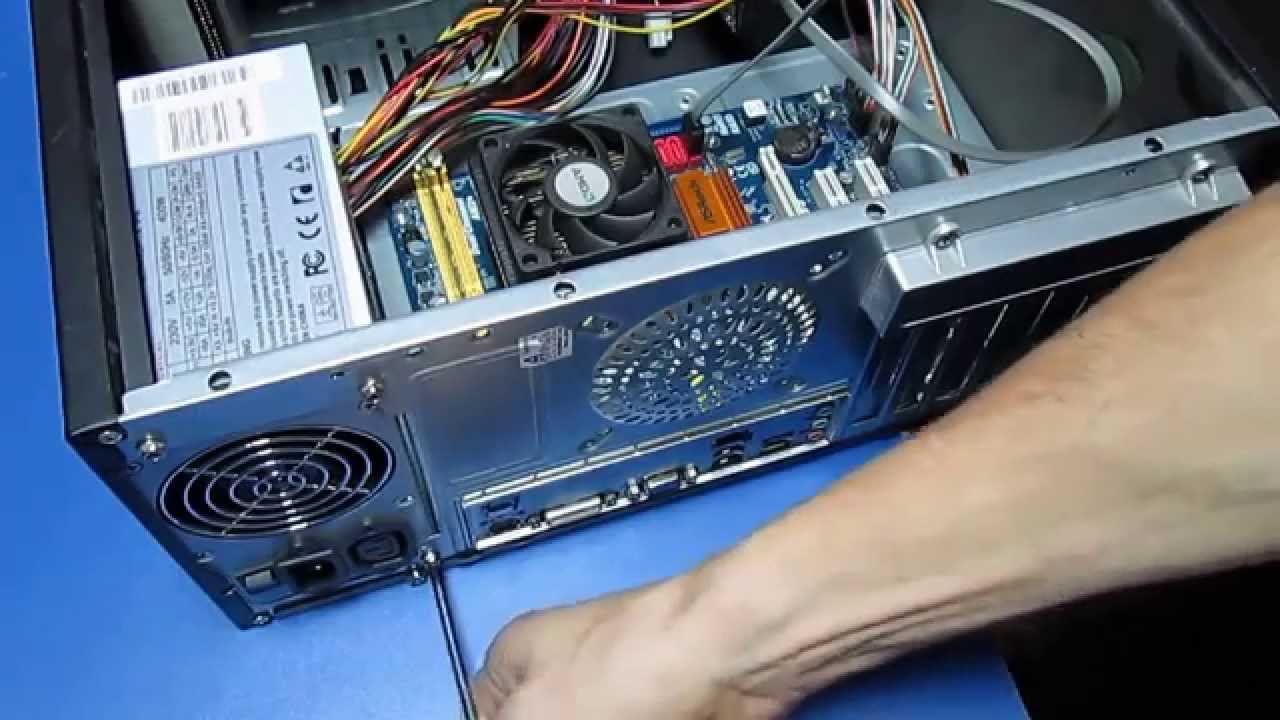
The PSU is a rectangular metal box usually positioned at the top or bottom of the case.
Look for a box-shaped component with a fan mounted on one side.
This fan helps dissipate heat generated by the PSU during operation.
The PSU is typically situated at the rear of the case, where the power cord plugs into it.
Additionally, you’re able to search online for images of PSUs that match your computers specifications.
When identifying the PSU, take note of any cables connected to it.
These cables will need to be disconnected later in the process.
after you grab located the PSU, proceed to the next step to begin the disconnection process.
Start by examining the cables connected to the PSU.
Begin by disconnecting the main motherboard power cable.
This is a large, thick cable that supplies power to the motherboard.
This will release the connector, allowing you to remove it from the PSU.
As you disconnect each cable, you may encounter connectors with different shapes or sizes.
Take your time to ensure all the cables are detached properly before moving on to the next step.
Take a close look at the back of the computer case where the PSU is located.
You should see several screws securing the PSU to the case.
The number of screws may vary depending on thecase and PSUdesign.
Its essential to keep track of the screws you remove so that you could reassemble the new PSU later.
These may be secured by screws as well and will need to be removed along with the mounting screws.
You will need them when installing the new PSU later.
By removing the mounting screws, you are preparing to remove the old PSU from the computer case.
Removing the old PSU allows you to make room for the installation of the new one.
With the screws out, gently pull the old PSU towards you while supporting its weight.
Be cautious not to snag any cables or components inside the case as you remove the PSU.
Sometimes, residual tension from the screws can keep the PSU in place.
Once the old PSU is free from the case, carefully place it in a safe location.
Now, lets move on to installing the new PSU in the next step.
In the next step, we will reconnect the necessary cables to the new PSU.
This step ensures that power is properly distributed to all the components of your system.
Begin by gathering the cables that were disconnected from the old PSU in Step 4.
Take note of their specific connectors and where they need to be plugged into the new PSU.
Its helpful to refer to your computers manual or the manufacturers instructions for proper cable placement.
Start by connecting the main motherboard power cable to the corresponding connector on the new PSU.
Align the connector with the socket on the PSU and firmly push it in until it clicks into place.
Ensure that the connection is secure, as a loose or weakly connected cable may cause power instability.
Next, connect the CPU power cable to the appropriate socket on the new PSU.
This cable provides power to the CPU and is essential for proper functioning.
Again, align the connector with the socket and firmly insert it until it clicks into place.
As you connect each cable, ensure that they are not tangled or obstructing airflow within the case.
Take a final look to verify that all cables are securely connected and properly seated in their respective sockets.
By reconnecting the cables to the new PSU, youre close to completing the replacement process.
In the next step, we will secure the new PSU with the mounting screws.
Retrieve the mounting screws that were removed in Step 5.
Use a screwdriver to tighten the screws gently, ensuring they are snug but not overly tight.
As you tighten the screws, be mindful of the PSUs position and alignment within the case.
Ensure that it is straight and properly seated, ensuring a flush fit against the back of the case.
Avoid overtightening, as it may damage the PSU or strip the threads on the case.
Double-check that all the screws are securely fastened, ensuring that the PSU is firmly attached to the case.
A properly mounted PSU will minimize vibrations and maintain stability during operation.
With the new PSU securely fastened and the cables neatly arranged, you have completed the installation process.
Begin by aligning the side panel with the edges of the computer case.
Take care to line up any tabs or grooves on the panel with their corresponding slots on the case.
Once properly aligned, gently slide or press the side panel back into its original position.
Apply even pressure to ensure that the panel is fully seated and flush with the rest of the case.
Take a moment to ensure that the side panel is securely closed before moving on to the final step.
A properly closed case contributes to the overall stability and protection of your computers internal components.
With the computer case closed, youre almost ready to power on your system once again.
Locate the power cord that came with your rig or the one you had previously disconnected.
Insert one end of the power cord into the power socket on the back of the new PSU.
Ensure that the connection is secure and fits snugly.
Next, plug the power cord into a surge protector or directly into a wall outlet.
Listen for any startup sounds and check for any lights that indicate the system is receiving power.
Also, see to it the power switch on the back of the PSU is in the on position.
Assuming the computer powers on successfully, you have successfully replaced the PSU and restored power to your system.
Take a moment to ensure that all components and fans are functioning properly.
You have successfully replaced the power supply unit in your gear.
