Upgrading yourCPU coolercan improve your computers overall performance and allow for more optimized overclocking capabilities.
This can result in faster processing speeds and smoother multitasking experiences.
In this guide, we will walk you through the step-by-step process of replacing your CPU cooler.
These considerations will ensure that you choose the right CPU cooler for your needs and avoid any compatibility issues.
Lets explore these factors in detail:
1.Compatibility:CPU coolerscome in different sizes and mounting mechanisms.
Its crucial to find out if the cooler you intend to purchase is compatible with yourCPU socketand motherboard.
Refer to the manufacturers specifications or consult online resources to verify compatibility.
2.Heat Dissipation:Consider the cooling performance you need based on your rig usage.
3.Budget:Set a budget for your CPU cooler upgrade.
Prices can vary significantly, from budget-friendly options to high-end cooling solutions.
4.Noise Levels:Consider the noise level produced by the coolers fan.
Some coolers prioritize quieter operation, while others focus on maximizing cooling performance.
Take into account the balance between noise levels and cooling efficiency that suits your preferences and needs.
5.Clearance:Check the clearance in your machine case to ensure that the new cooler will fit properly.
Having everything prepared beforehand will ensure a smooth and efficient installation process.
Cotton swabs or lint-free cloths can be used to apply the alcohol and wipe away the residue.
3.Thermal Paste:High-quality thermal paste is necessary for ensuring proper heat transfer between the CPU and the cooler.
Ensure that it is compatible with your CPU socket and motherboard.
By having everything ready, youll be able to proceed smoothly to the next step without any interruptions.
Remove any objects that might obstruct your movements or accidentally come into contact with delicate components.
2.Static Electricity:Take precautions to prevent static electricity from damaging your components.
Ground yourself by touching a metal object or wearing an anti-static wristband.
Avoid working on carpeted surfaces, as they tend to generate static charges.
3.Well-lit Environment:Ensure that your workspace is adequately lit.
4.Static-free Surface:Find a clean and static-free surface to work on.
Ideally, use an anti-static mat or a wooden table.
Avoid surfaces that can accumulate static charges, such as plastic or glass.
5.Organize Your Tools and Supplies:Arrange your tools and supplies neatly within easy reach.
This will save you time and prevent any accidental spills or damage due to reaching over cluttered areas.
6.Read the Instructions:Take a few minutes to read the installation instructions provided by the CPU cooler manufacturer.
Familiarize yourself with the steps and any specific requirements or precautions mentioned in the manual.
This is a necessary precaution to avoid any electrical shocks or accidents while working on the internal components.
2.Remove the Side Panel:Most computer cases have a removable side panel.
Use your screwdriver to remove the screws or release any latches that secure the panel in place.
Gently slide the panel off to expose the internal components.
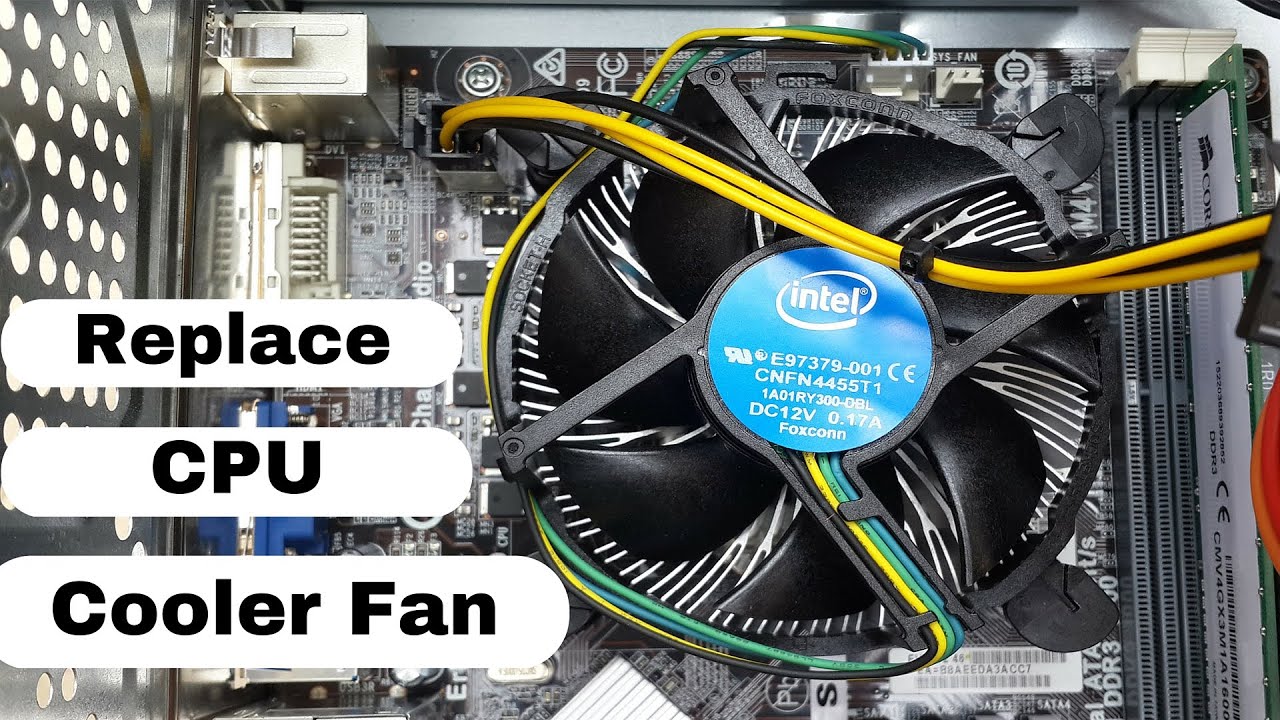
3.Locate the CPU Cooler:The CPU cooler is usually positioned on top of the CPU.
Its a large heatsink with a fan attached to it.
Take a moment to familiarize yourself with its location and how it is secured in place.
4.Disconnect the Fan Power Cable:Carefully locate the fans power cable, which is connected to the motherboard.
Identify the small plastic connector and gently press down on the tab to release it.
Once released, carefully pull the connector away from the motherboard.
Refer to the manufacturers instructions to determine the specific method for your cooler.
Use your screwdriver to carefully remove any screws or release clips to detach the cooler from the CPU socket.
Use a lint-free cloth or cotton swabs dipped in isopropyl alcohol to clean off the old thermal paste.
Gently wipe away any residue until both surfaces are clean.
By carefully following these steps, you will have successfully disconnected the power and removed theold CPU cooler.
Take your time during this process to avoid any damage to the delicate components.
Gently wipe away any remaining thermal paste, dust, or debris.
Be cautious not to apply excessive pressure or scratch the surface.
Ensure that the paste covers the entire CPU surface, creating a thin, uniform layer.
Note: Some CPU coolers may come with pre-applied thermal paste on the base.
If this is the case, you do not need to apply additional paste.
Simply skip this step and proceed to the installation of the new cooler.
This helps prevent overheating and maximizes the efficiency of the cooling system.
Take care not to apply excessive force or misalign the cooler.
Refer to the manufacturers instructions for the specific method for your cooler.
Tighten the screws evenly in a diagonal pattern to ensure even pressure.
This ensures efficient heat transfer.
If needed, gently wiggle the cooler from side to side to help spread the thermal paste evenly.
4.Reconnect Power Cables:Locate the fans power cable that you disconnected earlier.
Reattach it to the appropriate fan header on the motherboard.
Ensure that the connector is firmly seated and secure.
Ensure that the panel is properly aligned and does not apply pressure on any internal components.
With the new CPU cooler installed, you have taken a significant step towards improving your computers cooling performance.
The cooler will efficiently dissipate heat, allowing your CPU to operate at optimal temperatures and prevent thermal throttling.
It is usually labeled CPU Fan or CPU_OPT on the motherboard.
Consult your motherboards manual if you are unsure about the location.
Ensure that the pins or connectors match and gently push them together until they are fully seated.
You may hear a clicking sound or notice a latch securing the connection.
If applicable, connect these cables according to the manufacturers instructions.
Take care not to tangle or obstruct any other components.
confirm all the connections are secure and properly seated.
Allow the system to boot up and reach the desktop or operating system.
These software tools provide real-time temperature readings and other valuable information about your CPU.
3.Observe the Temperature Readings:Launch the monitoring software and observe the CPU temperature readings.
Note the idle temperature, which is the temperature when your machine is not performing any demanding tasks.
Monitor the temperature readings during these activities and take note of the maximum temperature reached.
Excessive temperatures could indicate inadequate cooling or improper installation.
If you notice unusually high temperatures or thermal throttling, recheck the installation of the CPU cooler.
verify it is properly seated, and the thermal paste is evenly spread.
Consider reapplying thermal paste if necessary.
Additionally, monitor the fan speeds and adjust them if your motherboard or cooling software allows for it.
Increasing the fan speed can enhance the cooling performance but may result in increased noise levels.
Proper temperature management helps maintain stable and reliable system operation and prolongs the lifespan of your CPU.
You have now successfully replaced your CPU cooler and tested its performance.
Remember to monitor your CPU temperatures periodically to ensure continued optimal operations.
These considerations help you choose the right CPU cooler for your needs and avoid any compatibility issues.
Regularly monitoring your CPU temperatures is essential for ensuring optimal performance and avoiding overheating issues.
Thank you for following this guide, and good luck with your newly installed CPU cooler!
