However, over time, the battery in your UPS will degrade and may no longer perform optimally.
This guide is designed to assist both novices and experienced individuals in replacing UPS batteries with ease and confidence.
This will help you complete the task efficiently and ensure a smooth transition.
Here are the essential tools and materials you will need:
1.
New UPS battery: confirm you have a compatible replacement battery for your specific UPS model.
it’s possible for you to either purchase it from a reputable vendor or directly from the manufacturer.
Safety gloves and goggles: Its important to prioritize your safety during the replacement process.
Wear protective gloves and goggles to protect yourself from any potential hazards.
It is highly recommended to use one, especially if you are working on a high-end UPS system.
A microfiber cleaning cloth or a soft brush can be useful for this.
User manual or manufacturers documentation: Keep the user manual or any documentation provided by the manufacturer handy.
It may contain specific instructions or precautions related to your UPS model.
This information will help you ensure compatibility and avoid any potential issues during the replacement process.
Here are the steps to identify the UPS model and battery pop in:
1.
Look for any labels or stickers that provide this information.
Write down the model number as you will need it when purchasing the replacement battery.
The manual may also explain how to get into the battery compartment or provide specific instructions for battery replacement.
Look for a section that provides information about the compatible battery types for your UPS model.
They will be able to assist you in determining the required battery for your specific UPS model.
Provide them with the UPS model number to get accurate information.
This helps prevent any electrical hazards and ensures your safety during the battery replacement process.
This ensures that you dont experience any data loss or potential damage due to sudden power loss.
Turn off the UPS: Locate the power switch or button on the UPS.
Depending on the model, it may be on the front or back panel of the equipment.
Switch off the UPS by pressing or toggling the power switch.
Remember, it is important to handle the UPS and its components with care throughout the battery replacement process.
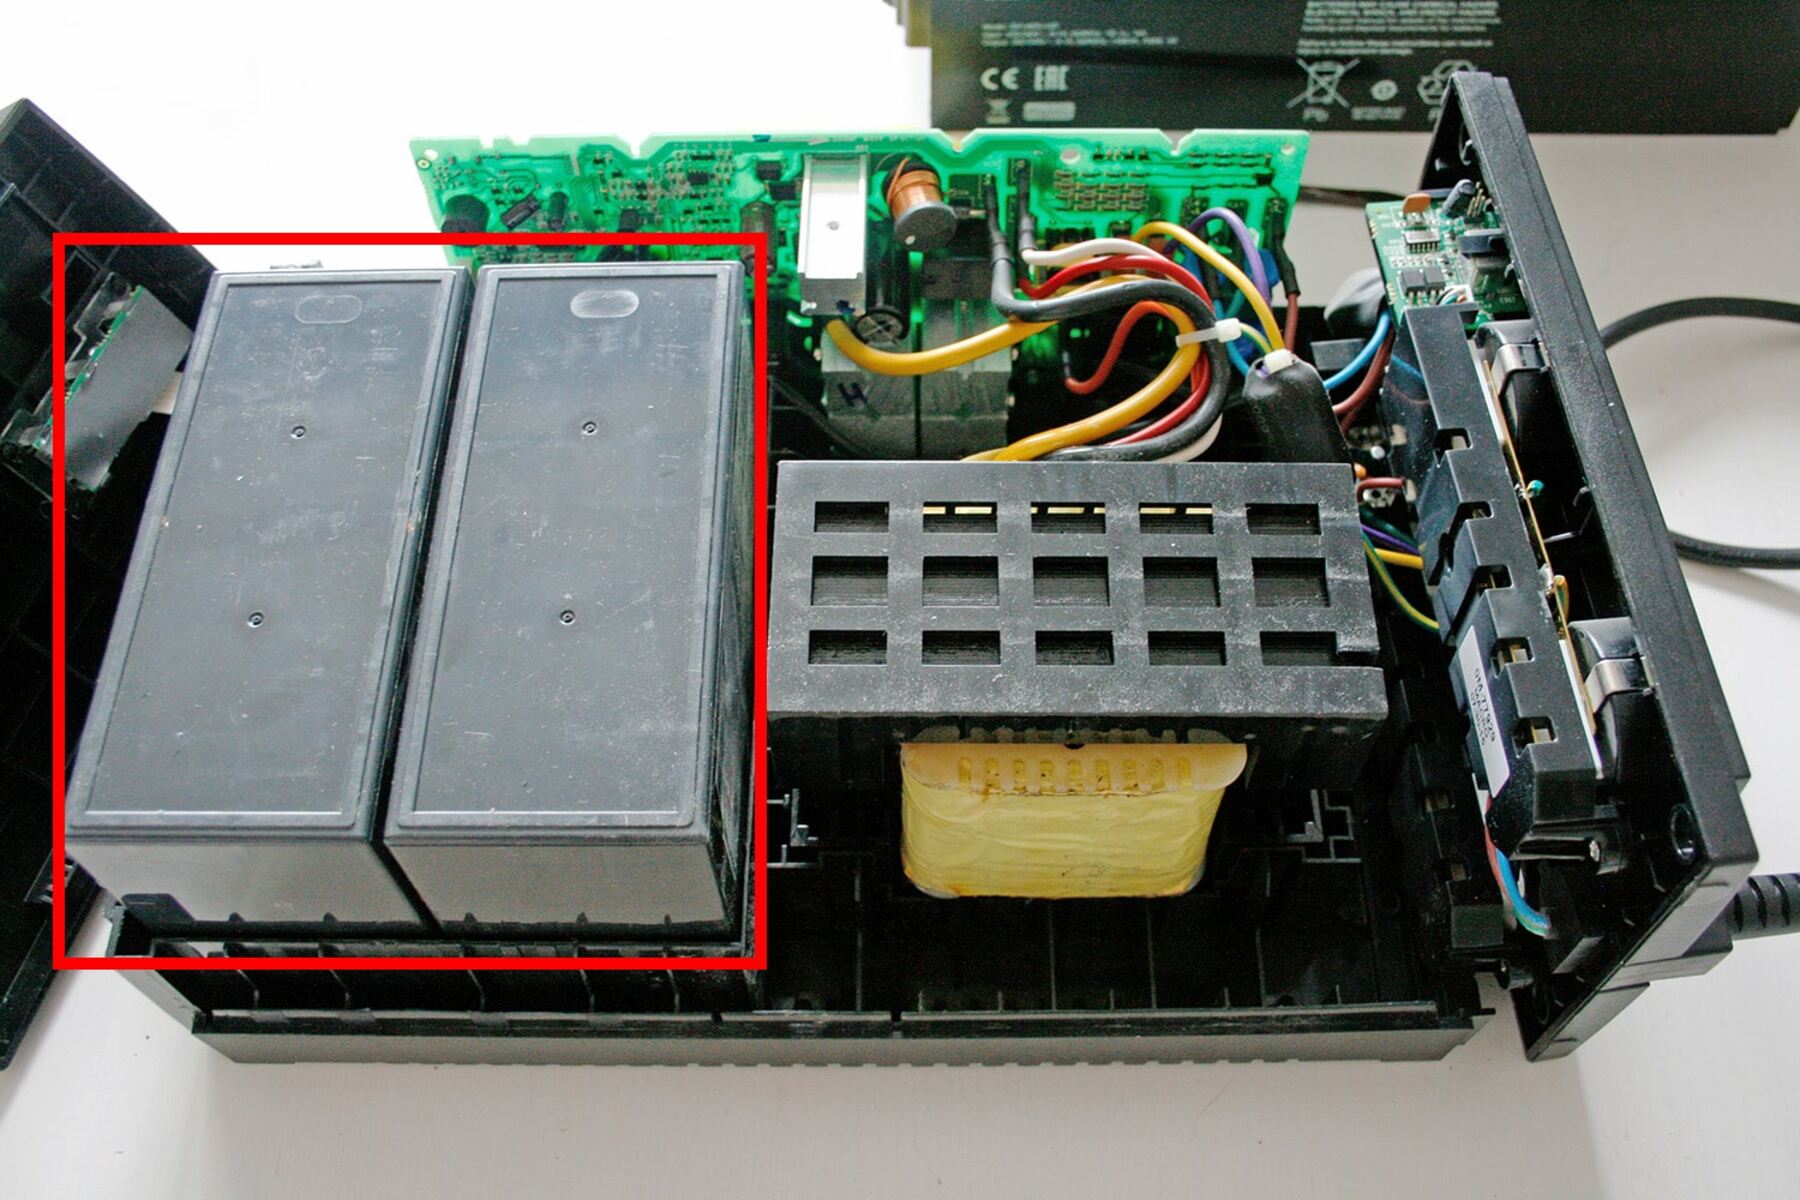
Here are the steps to safely remove the old battery:
1.
Refer to the user manual or manufacturers documentation to identify the exact location.
Carefully set aside the battery cover for later reinstallation.
Usually, there will be two cables one positive and one negative.
Take note of their positions for proper reconnection later.
Be cautious as some batteries may be heavy or have awkward dimensions.
Ensure you have a firm grip on the battery to prevent any accidental drops or damage.
By following these steps, you’re able to safely remove the old battery from your UPS.
Remember to always exercise caution and avoid any direct contact with the battery terminals or exposed wires.
The next step will guide you through the preparation of the new battery for installation.
Step 5: Prepare the new battery for installation
1.
Check for any loose or exposed wires, dents, or leaking fluids.
If you notice any issues, communicate with the vendor or manufacturer for a replacement.
Verify the voltage, capacity, dimensions, and connector jot down to ensure accurate installation.
Step 6: set up the new battery into the UPS
1.
Identify the battery compartment: Locate the battery compartment in your UPS.
Refer to the user manual or manufacturers documentation if youre unsure about its exact location.
Position the new battery: Carefully position the new battery in the battery compartment.
Ensure that it aligns correctly with the terminals and connectors in the UPS.
Connect the battery cables: Take note of the cable positions recorded during the removal of the old battery.
Connect the positive (+) cable to the corresponding terminal of the new battery and secure it tightly.
Repeat this step for the negative (-) cable.
Verify the connections: Double-check the connections to ensure they are secure and properly seated.
Secure it using the appropriate screws or fasteners, ensuring a snug fit.
Plug the UPS back into the power source and switch it on using the power switch or button.
Allow the UPS to charge: Give the UPS ample time to charge the new battery fully.
This may take a few hours, depending on the UPS model and the batterys capacity.
Its important to note that some UPS models may have specific instructions or additional steps for installation.
Therefore, always consult the user manual or manufacturers documentation for precise guidelines tailored to your UPS model.
In the next step, we will cover how to reconnect and power up your UPS system.
Step 7: Reconnect and power up the UPS
1.
Ensure that all the necessary devices are properly connected to the UPS via the appropriate power cables.
Power on the UPS: Press or toggle the power switch on the UPS to turn it on.
The UPS may go through a brief startup sequence, initializing and checking the new battery.
Monitor the UPS indicators: Keep a close eye on the UPS indicators or display panel.
Observe the runtime and ensure that it meets your expectations.
If you notice any significant deviations or issues, consult the manufacturers documentation or contact customer support for assistance.
Its important to periodically test your UPS and monitor its battery performance to ensure ongoing reliability.
In the final step, we will provide some closing remarks to conclude the UPS battery replacement process.
Step 8: Test the new battery and monitor performance
1.
Compare this runtime to the expected backup time stated in the UPS specifications or user manual.
These signs may indicate battery or system issues that require attention.
If you notice anything unusual, refer to the manufacturers documentation or contact customer support for guidance.
Remember to consult the user manual or manufacturers documentation specific to your UPS model for detailed instructions and precautions.
