Introduction
Welcome to this guide on how to replace a projector bulb.
Over time, projector bulbs experience wear and tear, and their brightness and performance start to degrade.
Replacing a projector bulb may seem like a daunting task, especially if you have never done it before.
However, with the right tools and instructions, it can be a straightforward process that anyone can accomplish.
In this article, we will walk you through the step-by-step process of replacing a projector bulb.
Having everything ready will streamline the process and ensure you have everything you need at your fingertips.
Having them ready will make the process smoother and help you avoid any unnecessary delays or interruptions.
Now that you have everything prepared, lets move on to the step-by-step instructions on replacing the projector bulb.
Remember, safety should always be your top priority when handling any electronic machine, including projectors.
This will help prevent any potential injuries or damage because of touching a hot bulb.
The cooling time can vary depending on the projector model and how long it has been in use.
Doing so can result in burns or other injuries.
Its best to exercise patience and wait for the projector to reach a safe temperature for handling.
This will ensure that you are fully prepared when the projector is ready for the next steps.
By allowing the projector to cool down adequately, you protect both yourself and the equipment from potential harm.
Its always better to be safe than sorry, so take the necessary time and precautions during this step.
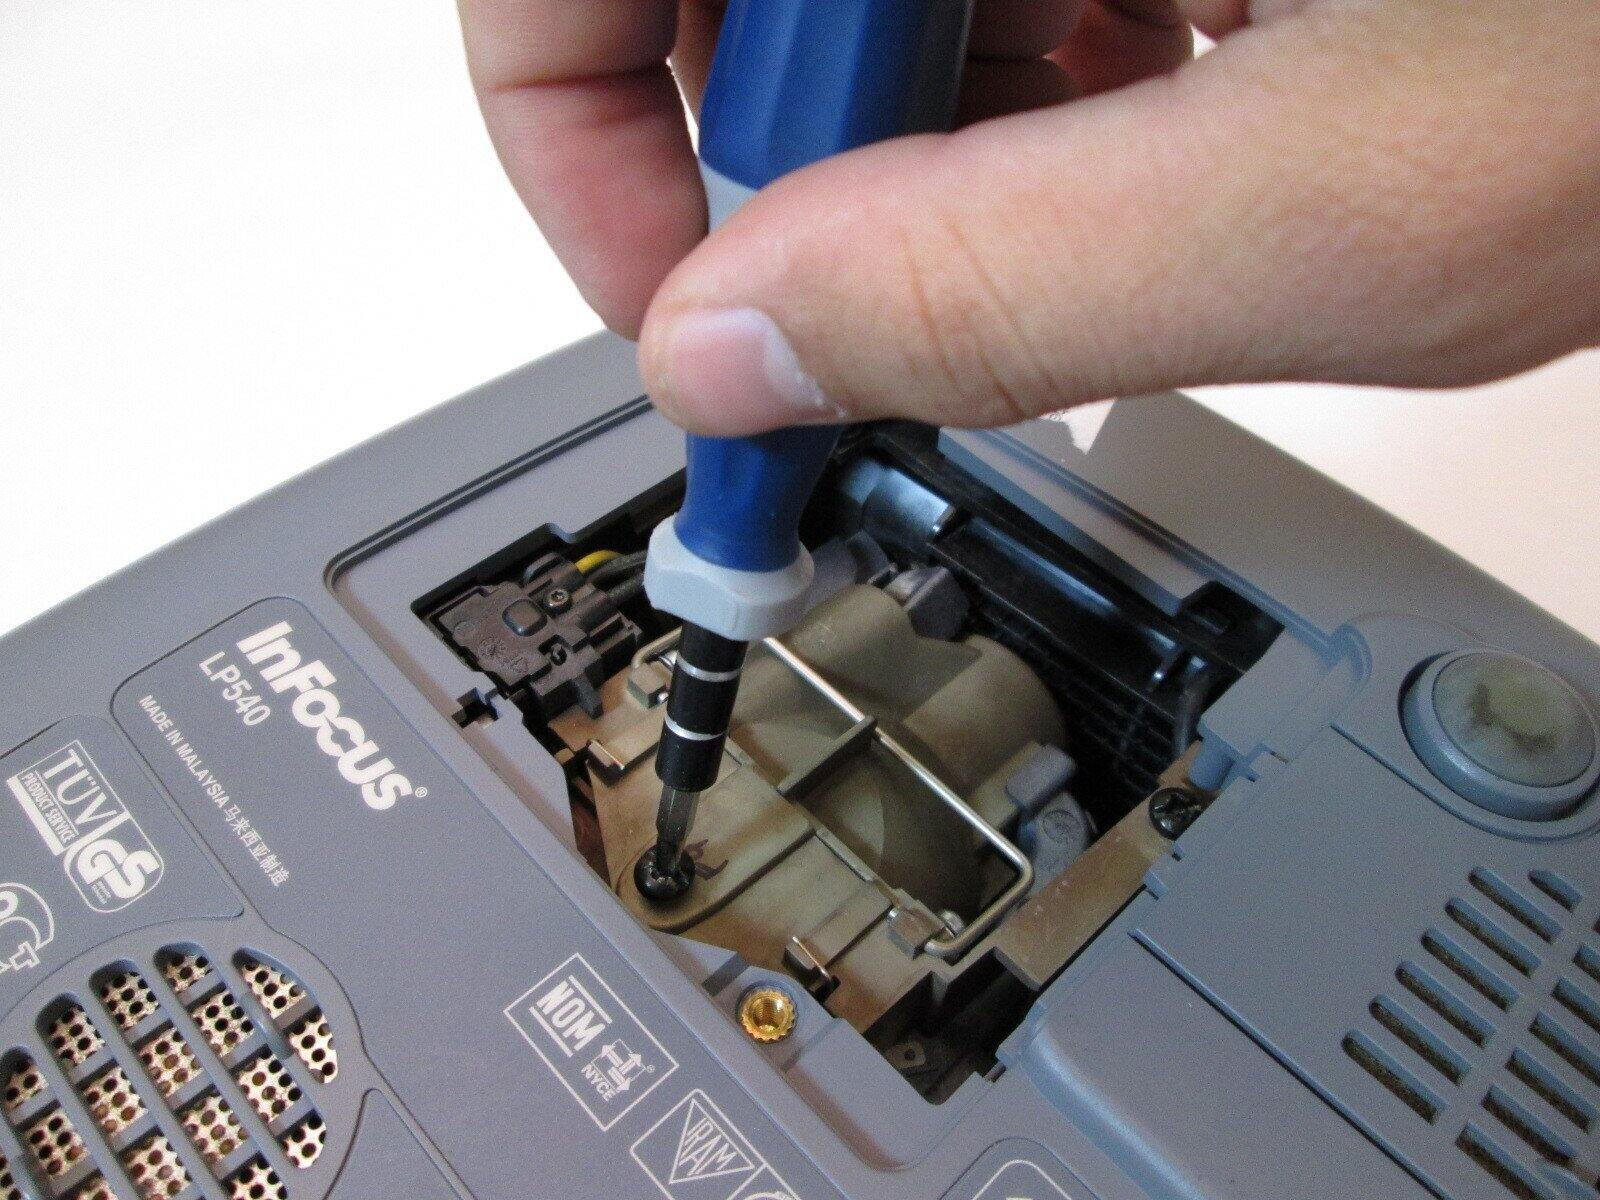
This panel provides you with access to the bulb compartment for replacement.
Remember, its essential to handle the projector with care during this step.
Avoid applying excessive force or pressure to prevent damaging the projector or its components.
Proceed to the next step for instructions on removing the access panel safely.
By successfully removing the access panel, you have now gained access to the old projector bulb.
The next step will guide you through the process of safely removing the old bulb from the projector.
This ensures that the new bulb remains protected inside the projector and allows for proper functioning.
By properly replacing the access panel, you have completed an essential step in the projector bulb replacement process.
Proceed to the next step to learn about resetting the projector lamp timer.
Remember, the specific steps to reset the lamp timer may vary depending on the projector model and manufacturer.
If the new bulb is displaying a clear and bright image without any problems, congratulations!
Remember, its important to handle projector bulbs with care and take your time during the replacement process.
With this guide, you now have the knowledge and confidence to replace a projector bulb on your own.
So go ahead and enjoy your projectors captivating visuals once again!
