Introduction
Welcome to this step-by-step guide on how to remove a unit from Logitech Unifying.
However, there may come a time when it’s crucial that you remove a gear from this configuration.
This guide will walk you through the process, ensuring a hassle-free experience.
Logitech Unifying Software is the key tool for managing your Logitech Unifying devices.
By using this software, you might easily identify and remove unwanted devices.
Before we dive into the step-by-step instructions, verify you have the Logitech Unifying Software installed on your setup.
If you do not have it, dont worry we will cover the installation process in the next step.
This software will provide you with the necessary tools and functionalities to manage your Logitech Unifying devices.
You are now ready to proceed to the next step in the equipment removal process.
Its worth noting that Logitech Unifying Software is compatible with a wide range of Logitech devices.
This step is crucial to ensure that you remove the correct equipment without accidentally disconnecting other devices.
This step ensures that you remove the desired unit without accidentally disconnecting other devices.
It is important to exercise caution and double-check before proceeding to the next step.
Lets continue with the next step to remove the equipment from Logitech Unifying.
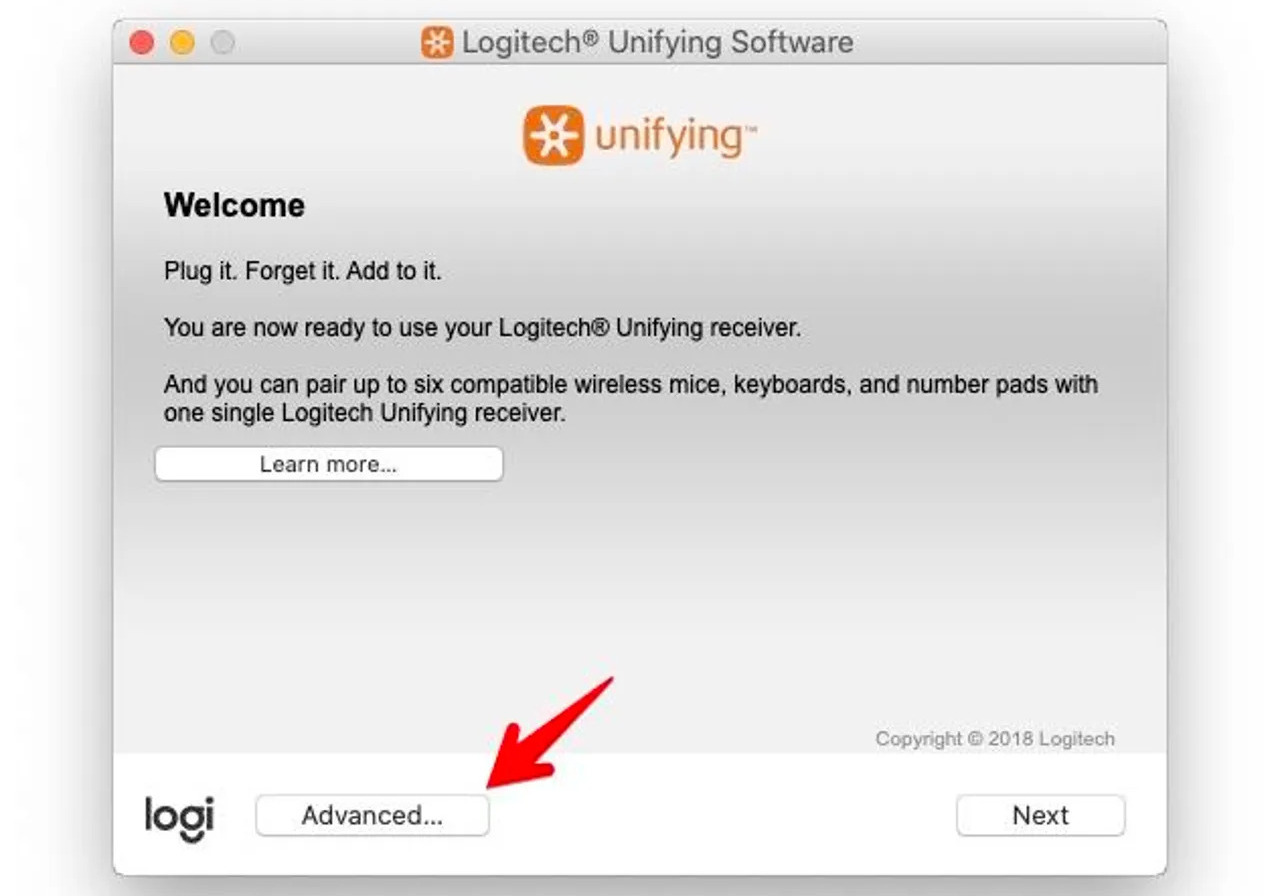
This will allow you to initiate the removal process for the gadget.
The Advanced button may only be accessible when a unit is selected in the software interface.
This step will allow you to disconnect the rig from the receiver and remove it from your configuration.
Lets move on to Step 5 to learn how to do this.
Double-check the devices identification and verify it matches the equipment you want to remove.
Removing the wrong equipment can lead to unintended consequences and may disrupt the functionality of your Logitech devices.
Lets proceed to Step 6 for further instructions.
This step will disconnect the equipment from the receiver and remove it from your Logitech Unifying setup.
This confirmation step is important to ensure that you dont accidentally remove a gadget.
Lets proceed to Step 7 for further instructions.
This step is crucial to ensure that you intentionally remove the gadget and prevent accidental removals.
This helps prevent accidental removals, maintaining the stability and functionality of your Logitech Unifying setup.
The gear will no longer be connected to your Logitech Unifying receiver.
Lets move on to Step 8 for further instructions.
Restarting your setup allows the operating system to refresh and recognize the updated configuration without any conflicts.
Keep in mind that not all rig removals will require a computer restart.
In some cases, the removal process may be applied immediately, and a restart may not be necessary.
With the final step completed, you have successfully removed the gadget from your Logitech Unifying configuration.
you’ve got the option to now enjoy the optimized setup and connect other devices as needed.
Identifying the specific gadget you want to remove is crucial in avoiding any unintended disconnections.
Confirming the unit removal is a crucial step to ensure that the process is intentional and deliberate.
