We will go through the necessary tools, step-by-step instructions, and precautions to take along the way.
Having the right tools on hand will ensure a smooth and efficient process.
Here are the tools you will need:
double-check all the tools are within reach before beginning the process.
This will save you time and make the overall experience more efficient.
Additionally, its always a good idea to work on a clean and well-lit workspace to avoid any mishaps.
This step ensures your safety and prevents any potential damage to your gear components.
Opening the computer case is a crucial step in the process of removing the CPU cooler.
Be gentle when handling the case and avoid putting excessive pressure on any components.
By following these steps, youll be one step closer to safely removing and cleaning your CPU cooler.
The mounting bracket holds the CPU cooler in place and allows for secure installation.
By following these steps, youll be able to locate the CPU cooler mounting bracket and remove it safely.
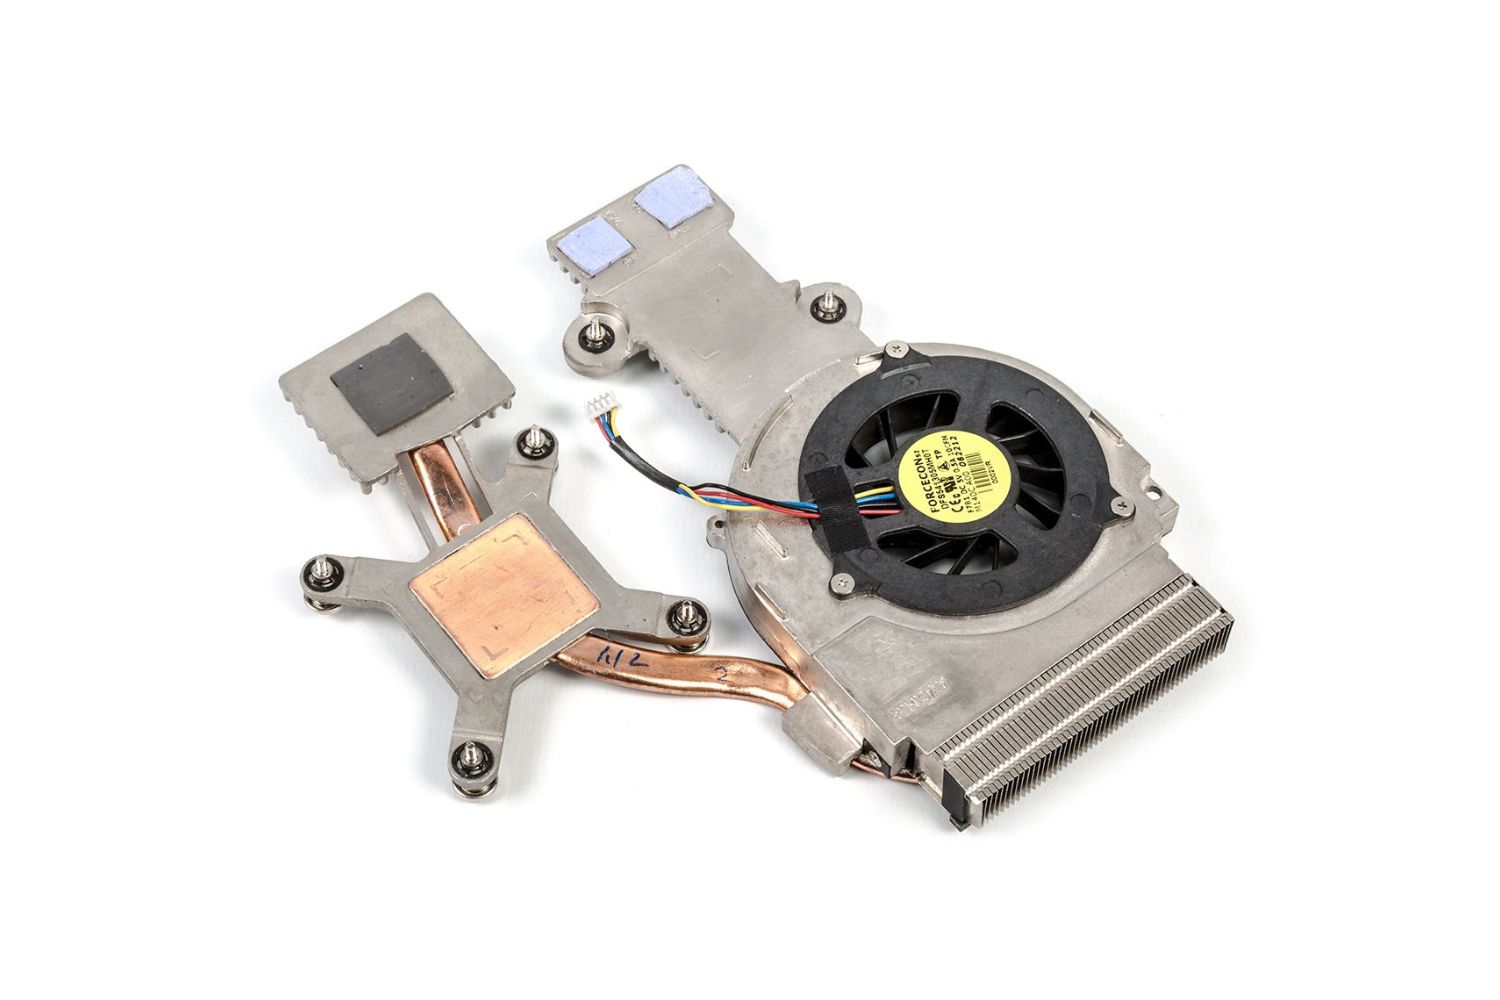
The CPU cooler is responsible for dissipating heat from the CPU to keep it running at optimal temperatures.
Take your time and be gentle throughout the process.
By following these steps, you could safely remove the CPU cooler from your Dell Studio computer.
Cleaning the CPU involves removing old thermal paste residue and ensuring a clean surface for optimal heat transfer.
Applying the right amount of thermal paste is key to achieving optimal cooling.
By following these steps, you might effectively clean the CPU and apply a fresh layer of thermal paste.
This will help to improve the heat dissipation and overall performance of your Dell Studio computer.
Installing a new CPU cooler is crucial for maintaining optimal cooling performance and preventing overheating.
This will ensure proper installation and prevent any damage to the cooler or other components.
With the new cooler in place, you will experience improved cooling performance and a more stable computing experience.
Conclusion
Congratulations!
You have successfully learned how to remove the CPU cooler from your Dell Studio computer.
If you are unsure or uncomfortable with performing these tasks, it is always recommended to seek professional assistance.
verify to periodically clean and inspect your CPU cooler to ensure optimal cooling.
With proper maintenance, your machine will continue to run smoothly for years to come.
Thank you for following this guide, and happy computing!
