Introduction
Welcome to this step-by-step guide on how to remove a partition on an external hard drive.
In this guide, we will walk you through the process of removing a partition safely and efficiently.
Taking this precautionary measure will help protect your valuable data from being lost forever.
When you plug in an external hard drive, it usually comes with one or more pre-configured partitions.
These partitions may already contain data or be allocated for specific functions.
Its important to note that removing a partition will permanently erase all the data stored within it.
Understanding partitions will help you make informed decisions when managing your storage space.
So, lets move on to the next step: backing up your data before proceeding with partition removal.
This precautionary step ensures that you dont lose any valuable files during the partition removal process.
This built-in Windows utility allows you to manage your hard drive partitions effectively.
Lets move on to Step 2 and begin the partition removal process.
This method provides a quick way to open Disk Management without having to jot down in a search query.
This step will allow you to identify the partition you wish to remove.
Lets move on to Step 3 and continue the partition removal process.
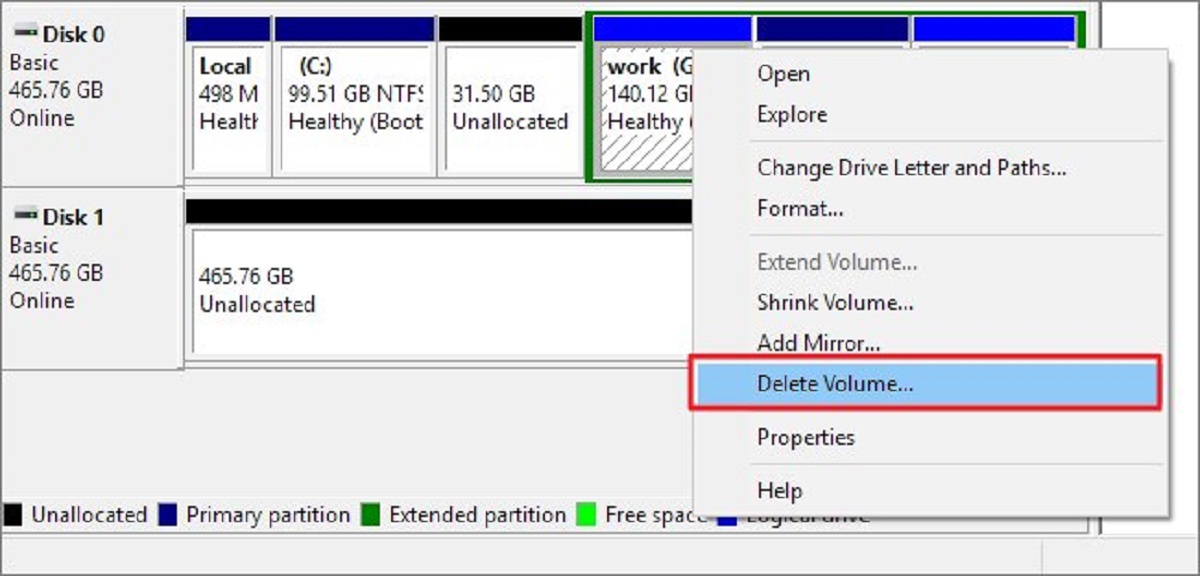
when you obtain identified the correct drive, you’re free to proceed with removing the desired partition.
This will involve permanently removing the selected partition from your external hard drive.
Lets proceed to Step 4 and continue with the partition removal process.
This indicates that the partition has been successfully removed.
However, the allocated storage space that was previously occupied by the partition will now be marked as Unallocated.
You have successfully deleted the partition on your external hard drive.
Lets move on to Step 5 and complete the partition removal process.
Lets move on to Step 6 and explore the process of creating a new partition (optional).
double-check to manage your partitions efficiently and consider your storage needs when creating new partitions.
Properly managing your partitions will contribute to a more efficient and organized storage system.
We began by emphasizing the importance of backing up your data before proceeding with partition removal.
This crucial step ensures that your important files are protected and can be easily restored if needed.
Confirming the deletion provides reassurance that the partition has been successfully removed.
Creating a new partition allows for better organization and efficient utilization of your external hard drives storage space.
Enjoy the freedom to organize, manage, and optimize your storage space according to your needs and preferences.
