Introduction
Welcome to our guide on how to reformat your smartphone.
When reformatting yoursmartphone, its crucial to follow the correct steps to ensure a successful reset.
However, the general principles outlined in this guide should apply to most smartphones.
The easiest way to back up your data is by using your smartphones built-in backup and restore feature.
Both Android and iOS devices offer options to back up your data to the cloud or external storage.
For Android devices, go to the parameters menu and look for the Backup & Reset or System section.
If you have an iPhone, you’re able to back up your data using iCloud.
Navigate to the prefs app and tap on your Apple ID at the top.
Then, select iCloud and iCloud Backup.
double-check you have enough storage space on your iCloud account to accommodate the backup.
Remember to double-check that your backup is complete and up-to-date before proceeding with the reformat.
Once ejected, gently remove the SD card from the slot.
Handle it with care and avoid touching the metal contacts to prevent any damage.
Factory Reset
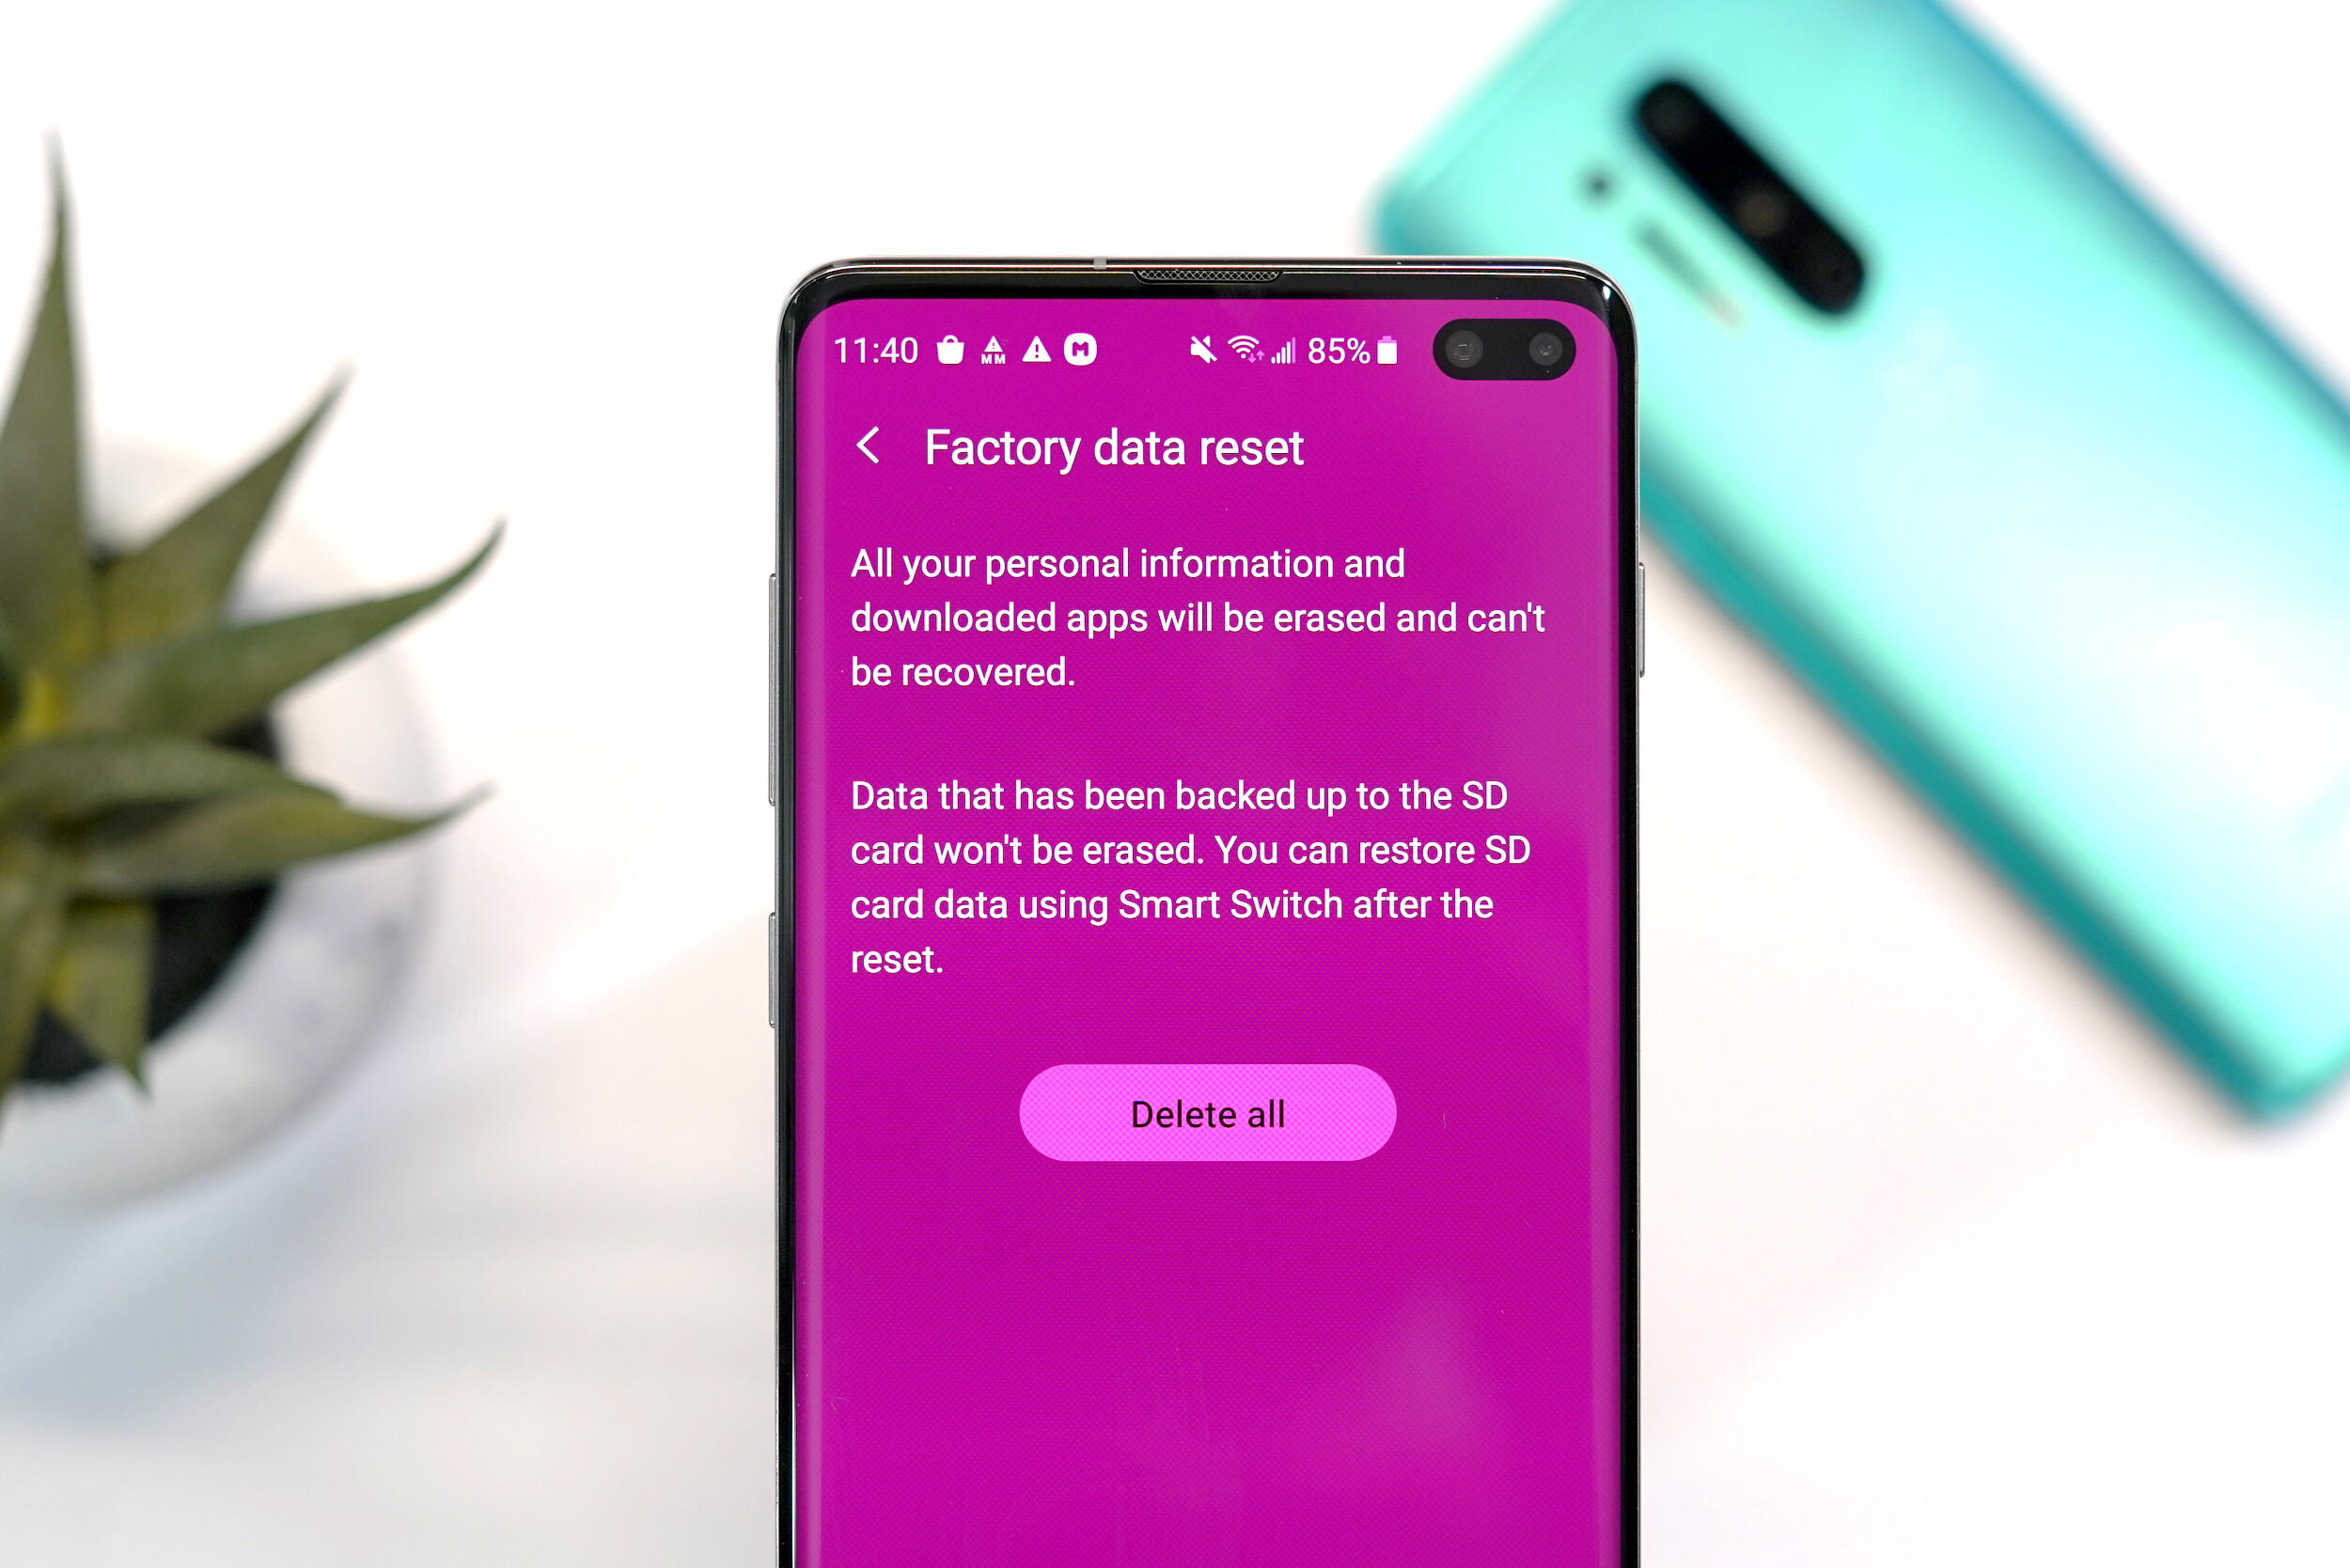
Performing a factory reset is a crucial step in reformatting your smartphone.
The exact steps to perform a factory reset may vary depending on the make and model of your smartphone.
Once you are ready to proceed, go for the Factory Data Reset or Reset Phone option.
You may be prompted to input your gadget password or PIN to confirm the reset.
Its essential to allow the factory reset process to finish without interrupting it.
At this point, your smartphone has been reformatted and is ready for further setup.
This is necessary to ensure that your personal information and account credentials are fully removed from the equipment.
Then, go for the Google account you want to remove and tap on it.
From there, you might choose to remove the account by selecting the Remove Account option.
Within this menu, youll find the option to manage your Samsung account.
opt for Samsung account and choose the Remove Account or Sign Out option to remove it from your gear.
Removing your Samsung account may affect certain Samsung-specific features and services.
Its important to note that removing your Google or Samsung account will not delete the account itself.
To remove the SIM card, locate the SIM card tray on your smartphone.
The location of the tray may vary depending on the make and model of your unit.
Most modern smartphones have a SIM card tray on the side or at the top of the gadget.
The tray should pop out, allowing you to remove it completely.
If your smartphone has a drawer-bang out SIM card tray, gently pull the tray out using your fingers.
Once the tray is removed, carefullytake out the SIM cardand set it aside in a safe place.
If your smartphone has an SD card slot, you will also need to remove the SD card.
Similar to the SIM card, the location of the SD card slot may vary depending on the rig.
Look for a small slot or tray that accommodates the SD card.
Then, carefully slide the SD card out of the slot and store it in a secure place.
Take care not to touch the metal contacts on the SD card to prevent any damage.
Rebooting your gear will finalize the reformatting process and ensure that all previous prefs and data have been cleared.
From there, choose the Restart or Reboot option.
During the reboot process, your smartphone will power down and then power back on.
This can take a few seconds or up to a minute, depending on your gadget.
Its important to note that after rebooting, you will not have access to your previous apps or data.
grab the Restore option, and your unit will begin the process of restoring your data.
Once signed in, choose the option to restore your gear from an iCloud backup.
Most backup solutions have an option to restore data, either through an app or a separate restoration tool.
Interrupting the restoration process may result in incomplete or incorrect data restoration.
Conclusion
Congratulations!
You have successfully reformatted your smartphone, erasing all data and returning it to its original factory tweaks.
Therefore, always see to it to back up your data before proceeding.
Explore your unit, install apps, and personalize your tweaks to suit your needs.
Thank you for following this guide, and we wish you a seamless smartphone experience!
