Introduction
Welcome to the world of technology, where the need for efficient storage solutions is ever-increasing.
By creating separate partitions for Mac and PC, you might format the partitions accordingly, enabling smooth compatibility.
By following these instructions, you will be able to use your drive on both platforms hassle-free.
So, lets get started and unlock the full potential of your external hard drive!
Why Partitioning?
Partitioning an external hard drive offers numerous benefits and can greatly enhance your workflow and organization.
Remember to eject the drive properly before disconnecting it to avoid data loss.
Lets move on to Step 2: Open Disk Utility.
Once the Disk Utility icon appears, press Enter or choose the icon to launch the utility.
You are now ready to proceed to the next step: selecting the external hard drive in Disk Utility.
double-check to choose the correct equipment to avoid any accidental data loss or partitioning of the wrong drive.
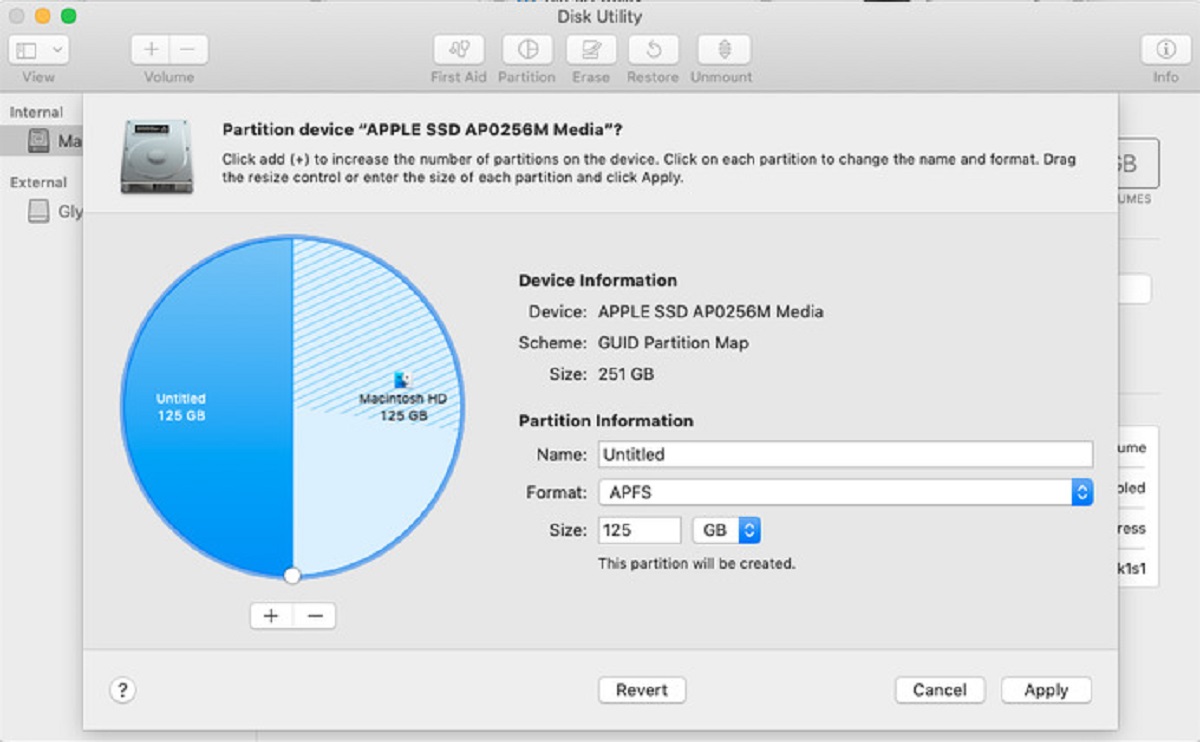
This step is crucial for customizing the way you want to divide your external hard drive into separate partitions.
Next, we will proceed to Step 5: snag the number of partitions and adjust their sizes.
This will enable you to define the specific partition layout that best suits your requirements.
This allows you to allocate specific space for different purposes, applications, or operating systems.
This customization ensures that you have sufficient room for specific data, applications, or operating systems.
This will determine the compatibility and functionality of the partitions on your Mac system.
It is essential to ensure a secure and proper connection to proceed with the next steps.
The available options in the context menu may vary depending on the current state and configuration of the drive.
Windows will calculate the maximum amount of space that can be shrunk from the selected partition.
The assigned drive letter acts as a unique identifier for the partition on your PC.
This step ensures the partition is fully functional and compliant with the selected file system format.
Once the format is complete, the new partition will be ready for use.
This step triggers the actual formatting process, configuring the partition for data storage and retrieval.
Conclusion
Congratulations!
You have successfully partitioned your external hard drive for both Mac and PC systems.
This ensures that your external hard drive can be used effortlessly on your Mac system.
These steps enable seamless utilization of the external hard drive on your PC.
Store files, transfer data, and manage your information seamlessly between your Mac and PC systems.
Thank you for following this guide.
Now, go ahead and make the most of your partitioned external hard drive!
