Introduction
Welcome to the exciting world of monitor overclocking!
So, what exactly ismonitoroverclocking?
In simple terms, it refers to increasing the refresh rate of your monitor beyond its default setting.
The refresh rate indicates how many times the display updates per second.
There are several benefits to monitor overclocking.
First and foremost, it can greatly enhance your gaming experience.
A higher refresh rate allows for more fluid and responsive gameplay, providing a competitive edge in fast-paced games.
Additionally, it can improve the clarity of motion in videos, making them appear more lifelike and immersive.
However, its important to note that monitor overclocking does come with its fair share of risks and drawbacks.
Overclocking can put additional stress on your monitor, potentially leading to increased heat generation and reduced lifespan.
In some cases, it may also void your warranty.
We will cover everything from checking if your monitor is capable of overclocking to troubleshooting common issues.
Additionally, we will provide tips and tricks to ensure optimal performance and stability.
What is monitor overclocking?
Monitor overclocking is the process of increasing the refresh rate of your monitor beyond its default parameters.
The refresh rate refers to how many times the display updates per second.
However, some monitors have higher default refresh rates, such as 144Hz or even 240Hz.
By overclocking your monitor, you’re free to push its refresh rate beyond the factory specifications.
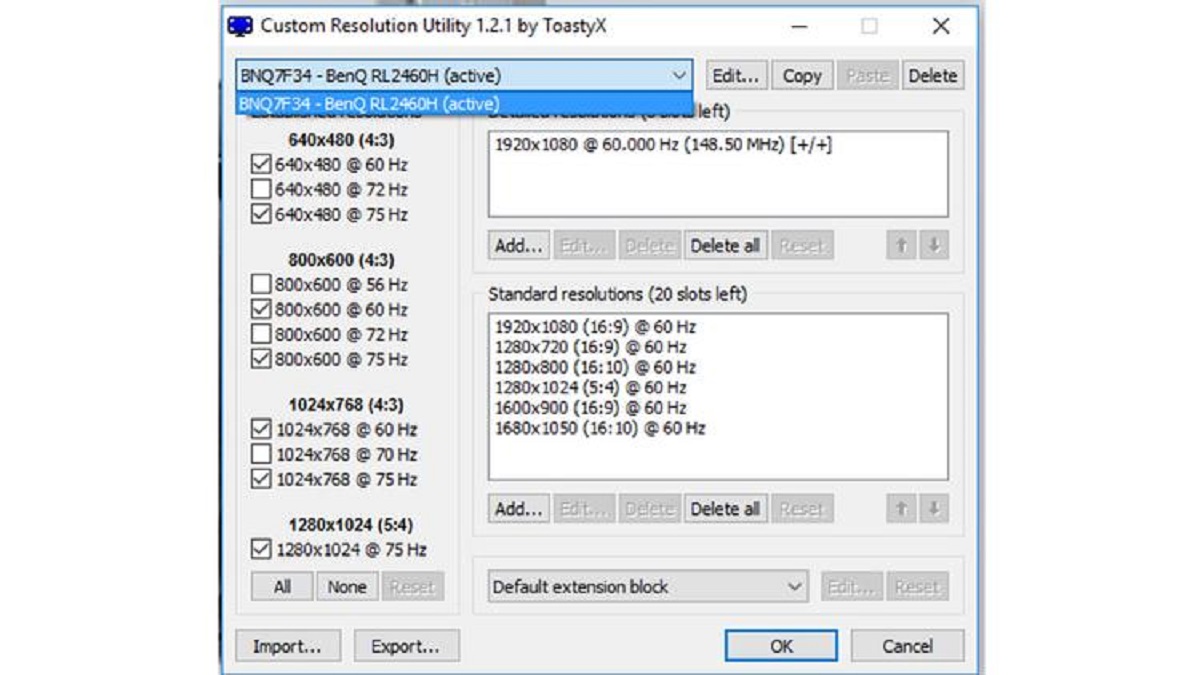
To overclock a monitor, you typically need to create a custom resolution and adjust the refresh rate options.
This can be done through specialized software provided by the manufacturer or third-party applications.
The ability to overclock depends on the hardware capabilities of your specific monitor model.
Excessive overclocking can potentially damage your monitor or lead to instability.
So, lets proceed with the exciting journey of unlocking the full potential of your monitor!
Monitoring the temperatures of your monitor during overclocking is crucial to prevent overheating and potential damage.
In the next section, we will guide you step-by-step through the process of overclocking your monitor.
Well cover creating a custom resolution and adjusting the refresh rate options to achieve the desired overclock.
Stay tuned for a detailed walkthrough of the overclocking process!
While some monitors are designed with overclocking in mind, others may not support this feature.
These tools will help you adjust the refresh rate prefs and achieve the desired overclock.
Read user reviews and forums to get insights into the softwares reliability and ease of use.
Stay tuned for the upcoming sections where we will guide you through the step-by-step process of overclocking your monitor!
It is measured in Hertz (Hz).
These higher refresh rates are particularly beneficial in fast-paced gaming where quick reactions are essential.
Overclocking basics:Overclocking a monitor involves increasing the refresh rate beyond its default parameters.
Cautionary considerations:It is crucial to exercise caution when overclocking your monitor.
It is essential to find the optimal balance between a higher refresh rate and stability.
The output capabilities of your graphics card should match or exceed the targeted refresh rate.
Mismatched refresh rates between the graphics card and monitor can lead to syncing issues and visual inconsistencies.
Testing and monitoring:After overclocking your monitor, its important to test and monitor its performance.
Use benchmarking software or specific monitor testing tools to evaluate the stability and visual quality of your overclocked monitor.
Keep an eye out for any abnormalities, such as flickering, artifacting, or screen tearing.
So, stay tuned and get ready to unleash the full potential of your monitor!
This customized resolution and refresh rate will allow you to push your monitor beyond its default specifications.
Stay tuned as we continue with the step-by-step guide to overclocking your monitor!
This step is crucial in ensuring that your monitor is running at the desired overclocked refresh rate.
In the next step, we will discuss how to thoroughly test your overclocked monitor for stability and performance.
Stay tuned for the upcoming section where we guide you through the testing process!
Stay tuned for the upcoming section!
Its essential to be prepared to troubleshoot these issues effectively.
It may take several attempts to find the optimal overclocked configs that provide both performance and stability.
Be patient and open to adjusting the controls as necessary.
They can provide specific guidance based on your monitor model and offer additional troubleshooting tips.
Stay vigilant and adjust the configs as needed to achieve a stable and optimal overclocked experience with your monitor.
So, stay tuned for the upcoming section!
Remember that stability, safety, and visual quality should be priorities throughout the process.
With these recommendations in mind, you are ready to embark on the journey of overclocking your monitor.
Stay tuned for the upcoming section!
This maximum refresh rate will vary depending on the specific model and hardware configuration.
Thus, its important to understand the specifications and limitations of your specific monitor model.
Stay tuned for the upcoming section!
Calibrating your monitor ensures that the colors and properties of the displayed content are accurate and consistent.
Experiment with different options and reference images to find the calibration that best suits your needs.
Conclusion
Congratulations!
You have now learned the ins and outs of overclocking your monitor.
However, its important to approach monitor overclocking with caution and prioritize stability and safety throughout the process.
Overclocking your monitor can be a thrilling and rewarding endeavor, offering a smoother and more immersive visual experience.
However, its crucial to balance performance gains with the limitations and capabilities of your specific monitor.
Now, armed with this knowledge, go ahead and unlock the full potential of your monitor.
