Additionally, proceed with caution and take your time when handling delicate components to avoid causing any unintended damage.
Having the right tools on hand will make the disassembly and reassembly process much smoother.
you should gather all the necessary tools prior to beginning the disassembly process.
This will help you avoid delays or interruptions during the procedure.
This step ensures your safety and prevents any potential damage to the internal components.
Heres how to power off your Galaxy S6:
1.
Locate the power button on the right side of your unit.
It is typically situated below the volume buttons.2.
Press and hold the power button until the power menu appears on the screen.3.
On the power menu, tap Power off to initiate the shutdown process.4.
The Galaxy S6 will display a confirmation prompt.
Tap OK to confirm the power-off action.5.
Wait for the gear to completely power down.
you could verify this by ensuring that the screen is blank and no LED lights are lit.
It is crucial to power off your unit before proceeding with any repair or disassembly work.
This prevents any accidental data loss or damage to internal components.
Take your time to ensure that the equipment is completely powered off before moving on to the next step.
Remember, safety should be your priority throughout the entire process.
Step 2: Remove the SIM Card Tray
1.
Locate the SIM card tray slot on the top edge of your Galaxy S6.
This slot is usually situated on the right side of the gear.2.
Apply gentle pressure to push the tool into the hole until the tray pops out slightly.4.
Pull out the SIM card tray using your fingers or gently remove it with the tool.5.
It is important to handle the SIM card tray with care to avoid any damage.
Removing the SIM card tray is a straightforward and crucial step in the disassembly process.
Step 3: Remove the Back Cover
1.
Place your Galaxy S6 face down on a clean and flat surface.
This will prevent any scratches or damage to the screen.2.
Locate the small notch on the bottom left corner of the devices back cover.
This is where you will start the removal process.3.
Take your time and be patient, as excessive force may damage the cover or other components.6.
Once the back cover is loosened, lift it off the rig completely and set it aside.
It is common for the back cover to be held in place with adhesive tape or adhesive strips.
Gently sliding the prying tool underneath the cover can help to separate it from the equipment.
Take care not to damage any of the small ribbon cables that may be attached to the cover.
Removing the back cover is an important step in accessing the internal components of your Samsung Galaxy S6.
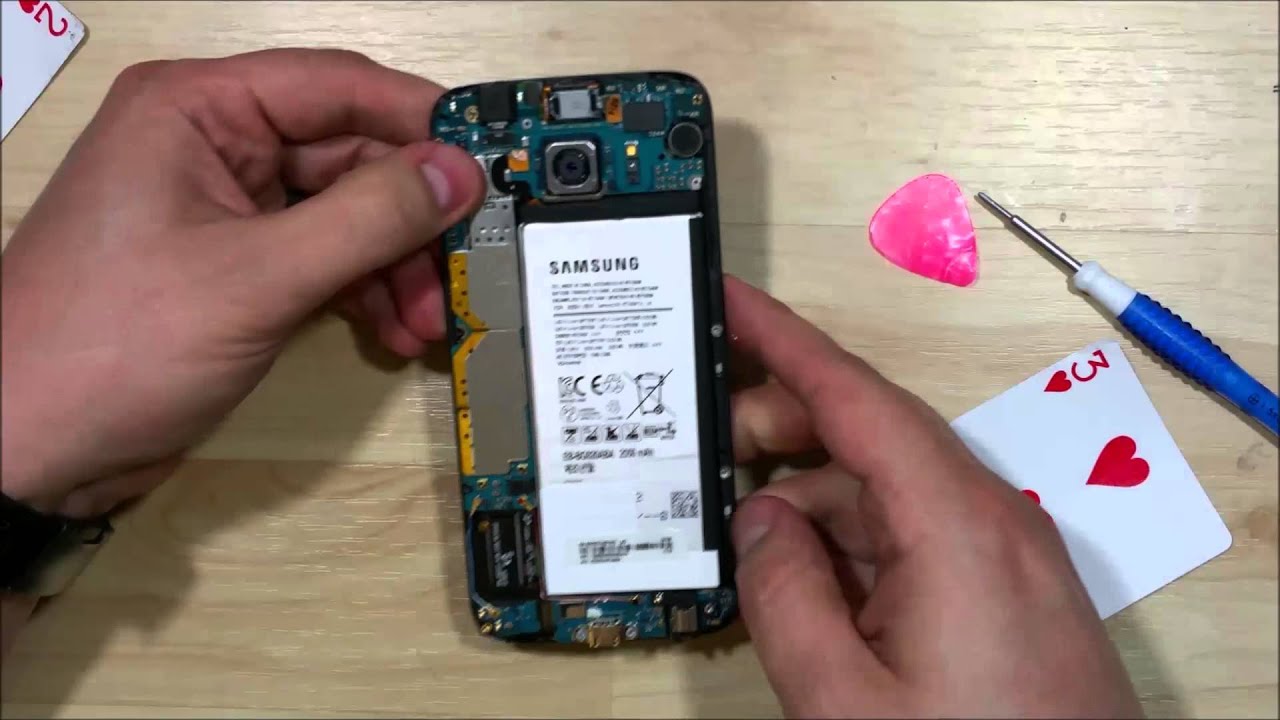
Step 4: Disconnect the Battery
1.
Carefully use a plastic prying tool or tweezers to gently lift the connector upwards.
Be cautious not to apply excessive force to avoid damaging the connector or the motherboard.3.
Once the connector is lifted, it will detach from the motherboard, disconnecting the battery from the gadget.4.
Gently set the disconnected battery connector aside.
Step 5: Remove the Rear Camera
1.
Locate the rear camera module, which is positioned on the back of the unit.2.
Use a Phillips screwdriver to loosen and remove any screws if necessary.3.
Avoid applying excessive force or twisting motions that may cause damage.
Step 6: Remove the Motherboard
1.
Locate the motherboard, which is the large rectangular board that the other components are connected to.2.
Carefully disconnect any ribbon cables or connectors attached to the motherboard.
Use a plastic prying tool or tweezers to gently lift the connectors away from their sockets.3.
If there are screws securing the motherboard in place, use a Phillips screwdriver to loosen and remove them.
Take note of the screw locations as they may differ depending on the gear model.4.
Once all the connectors and screws are removed, gently lift the motherboard out of its housing.
Be cautious of any adhesive or clips that may still be holding the motherboard in place.5.
Set the motherboard aside in a safe location to prevent any damage or static electricity discharge.
When handling the motherboard, it is essential to be gentle and avoid applying excessive force.
The motherboard is a delicate and sensitive component, and mishandling it can result in irreparable damage.
Removing the motherboard allows you to access other internal components or proceed with repairs.
Step 7: Accessing the Charging Port
1.
Locate the charging port, which is usually positioned at the bottom of your gadget.2.
Inspect the charging port for any dust, lint, or debris that may have accumulated over time.
Use a small brush or a toothbrush with soft bristles to gently clean out any obstructions.
Be careful not to damage the pins or connector inside the charging port.4.
Use a plastic prying tool or tweezers to gently lift the connectors away from their sockets.
Take note of the connections and the order in which they are attached.5.
Again, take note of their locations as they may differ depending on the equipment model.6.
Pay close attention to the connectors and pins when cleaning or disconnecting the charging port.
Excessive force or mishandling can result in damage to the unit or the charging port itself.
If necessary, you might also proceed with replacing the charging port assembly.
Step 8: Reassembling the gadget
1.
Begin by aligning the motherboard into its housing.
verify all connectors and cables are properly connected to their respective sockets.2.
Take care not to overtighten the screws.3.
Align the back cover with the edges of the rig and carefully press it down to reattach it.
Ensure it is sitting flush without any gaps or misalignment.5.
If necessary, apply slight pressure to the back cover to ensure the adhesive properly sticks to the unit.6.
Reinsert the SIM card tray into its slot, pushing it until it locks securely in place.7.
Double-check that all connections are secure, and there are no loose components or cables.8.
Take your time during the reassembling process to ensure that everything is properly aligned and securely in place.
Be cautious not to force any components together, as this can lead to damage or malfunctioning.
If any issues persist, double-check the connections and make necessary adjustments.
Conclusion
Congratulations!
You have successfully learned how to bring up the Samsung Galaxy S6.
Remember to power off the gear, gather the required tools, and handle the delicate components with care.
Always remember to proceed with caution and prioritize safety throughout the process.
Happy repairing and experimenting with your equipment!
