Google Photos has emerged as a popular platform for managing and backing up our media files.
Ensure that both devices are powered on and ready for use.
Locate the appropriate port on your Mac and connect the USB or Thunderbolt cable accordingly.
you could verify this by checking File Explorer on Windows or Finder on Mac.
Ensure that your external hard drive is properly powered if required.
This app allows you to easily upload and sync your photos and videos with your Google Photos account.
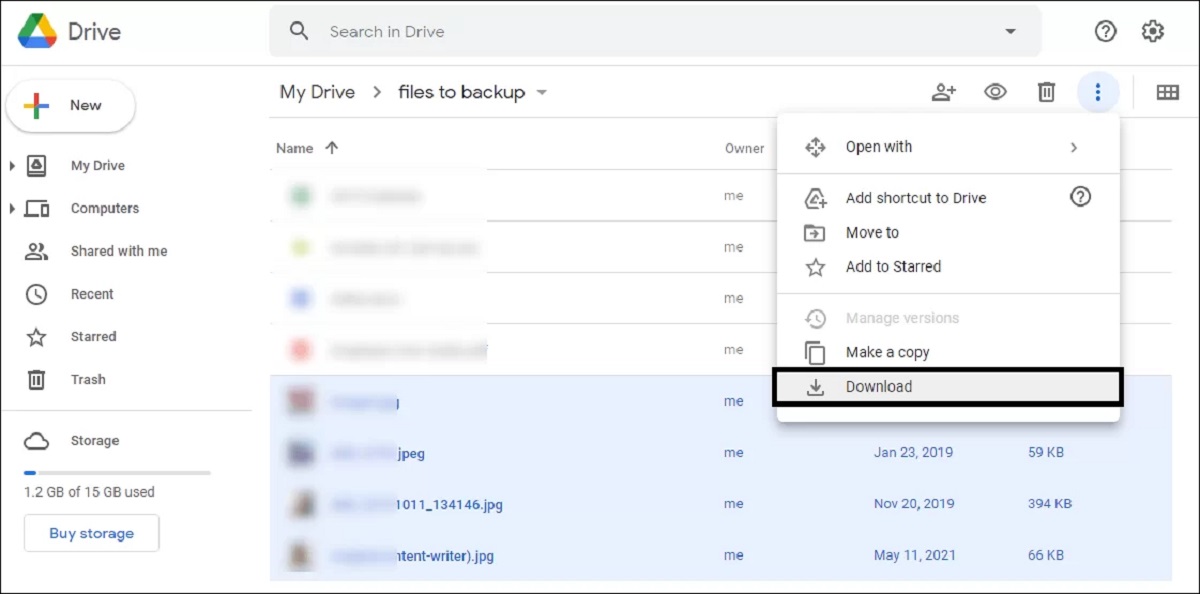
Start by opening the web web app on your box and navigating to the Google Photos website.
Once there, punch the Download or Download Desktop Uploader button to begin downloading the system.
Provide the necessary credentials and proceed with the installation.
Once the installation is complete, launch the Google Photos Desktop Uploader program on your box.
You may be prompted to sign in again using your Google account credentials.
After signing in, the utility will automatically scan your gear for photos and videos.
This will allow you to access your photos and videos and proceed with the transfer process.
Launch the Google Photos Desktop Uploader system on your machine.
If prompted, slide in your Google account credentials to sign in.
This should be the same account that you use for your Google Photos.
Be patient and let the tool complete the scanning and syncing process.
Well cover this in the next step of the process.
To select individual photos or videos, simply tap on them.
Alternatively, you might tap on the Select All button to choose all the available media files.
These configs will determine the quality of the files being transferred and the overall transfer process.
To configure the upload configs, press the configs or Preferences option within the Google Photos Desktop Uploader program.
This will open a menu where you’re free to make adjustments to suit your preferences.
One of the key options to consider is the upload quality.
Google offers two options High quality and Original quality.
High quality compresses the files to save storage space while maintaining good image and video quality.
Original quality preserves the files in their original resolution but utilises storage quota from your Google account.
when you obtain adjusted the controls to your liking, save the changes and proceed to the next step.
Depending on the size and number of files you have selected, the upload process may take some time.
Its important to be patient and let the software complete the transfer without interruption.
The transferred files should be present and accessible for viewing.
To do this, navigate to the folder on your external hard drive where the Google Photos were transferred.
fire up the folder and browse through the files to confirm that all the images and videos are present.
If necessary, you may need to repeat the transfer process.
First, ensure that you connect the external hard drive to your setup properly.
Configure the upload configs according to your preferences, such as upload quality and destination folder.
when you obtain made these selections, start the upload process and patiently wait for the files to transfer.
Enjoy the convenience and security of having your photos and videos stored on an external hard drive!
