Introduction
Welcome to this guide on how to move the camera on your DJI Mini 2.
The DJI Mini 2 is a compact and lightweight drone that offers incredible features and capabilities.
Updating the firmware ensures that you have access to the latest features and fixes any potential issues.
Along the way, we will provide troubleshooting tips to help you overcome any potential challenges you may encounter.
Firmware updates often come with performance improvements, new features, bug fixes, and enhanced stability.
Its recommended to periodically check for firmware updates to ensure optimal performance.
In rare cases, firmware updates may encounter issues or fail due to technical glitches.
The remote controller allows you to have a seamless and responsive connection between your drone and your mobile rig.
double-check the cables are properly connected, and there are no obstructions that can interfere with the signal.
Always keep the remote controller in close proximity to your mobile equipment for the best connection.
if you hit any connectivity issues, try restarting both the remote controller and your mobile rig.
The DJI Fly App provides a user-friendly interface that allows you to access and control various camera controls.
Understanding these camera modes will help you make the most of your DJI Mini 2s capabilities.
Experimenting with different modes will help you unleash your creativity and capture unique and captivating shots.
Keep in mind that some camera modes may require additional setup or configuration.
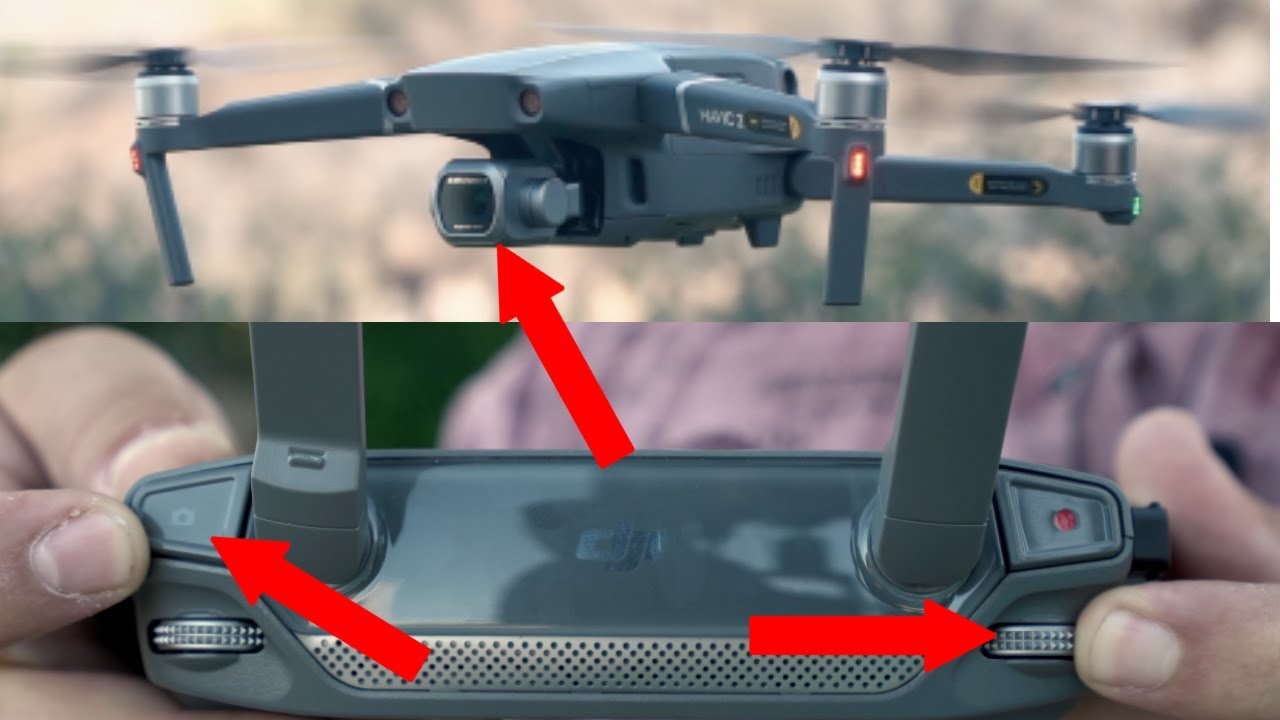
The remote controller is equipped with two joysticks that allow you to adjust the cameras pan and tilt.
Heres how you’ve got the option to effectively use the joysticks:
1.
Left Joystick (Vertical Movement):
2.
Smooth and gentle movements of the joysticks will result in smoother camera movements and better footage.
give a shot to avoid rapid and jerky movements, as they can affect the stability of the footage.
Familiarize yourself with these buttons and assign them according to your preferences to quickly access frequently used camera controls.
Remember, practice makes perfect!
Spend some time getting used to the joysticks sensitivity and responsiveness.
Experiment with different combinations of camera movements to understand their impact on your shots.
With practice, you will be able to smoothly and confidently maneuver the camera with precision.
The gimbal pitch refers to the angle at which the camera is tilted.
By adjusting the gimbal pitch, you’re free to frame your shot and capture the desired angle.
Heres how it’s possible for you to effectively adjust the gimbal pitch:
1.
Using the Joysticks:
2.
Sudden or jerky movements can impact the stability of the footage and result in shaky videos.
Practice precise and controlled movements to achieve the desired angle and capture steady shots.
Remember to consider the composition and framing of your shot when adjusting the gimbal pitch.
Experiment with different angles and perspectives to add depth and creativity to your aerial photography.
This hands-free control feature makes it convenient to capture photos and videos without needing to use the remote controller.
Heres how you’re able to use gesture control:
1.
Activating Gesture Control:
2.
Keep in mind that gesture control has certain limitations.
The gimbal controls control parameters such as gimbal pitch speed, smoothness, and stabilization.
Heres how you could configure the gimbal controls:
1.
Launch the DJI Fly App:
2.
Adjusting Gimbal Pitch Speed:
3.
Refer to the user manual or online resources provided by DJI for specific details on the gimbal controls options.
With ActiveTrack, you’re free to capture dynamic shots with ease and precision.
Heres how you’ve got the option to explore ActiveTrack:
1.
Activating ActiveTrack:
2.
Selecting and Tracking a Subject:
3.
It enables you to capture stunning footage of moving subjects while keeping them in the frame throughout their motion.
Proper mounting ensures stability and safety during your drones operation.
Here are the steps to follow when mounting the aircraft:
1.
Find a Suitable Location:
2.
Unfold the Arms:
3.
Power on the Drone:
4.
Prepare the Remote Controller:
5.
Calibrate the Compass (if required):
6.
Remember, proper mounting and preparation ensure a more enjoyable and worry-free flying experience with your DJI Mini 2.
Troubleshooting Tips
While using your DJI Mini 2, you may encounter certain issues or challenges.
Here are some troubleshooting tips to help you overcome common problems:
1.
Connection Issues:
2.
Inaccurate GPS Positioning:
3.
Unstable Flight or Shaking:
4.
They can provide specific troubleshooting steps or arrange repairs if necessary.
Conclusion
Congratulations!
Remember to always fly responsibly and abide by local regulations and guidelines.
Continue to practice and experiment with different techniques and camera configs to hone your skills and capture breathtaking footage.
With persistence and creativity, you might capture unique perspectives and memorable moments with your DJI Mini 2.
