They will have the necessary tools, equipment, and knowledge to ensure a successful move.
Proper planning will help you identify potential challenges and minimize any disruptions to your operations.
Here are the key steps to follow:
1.
Assess the new location:Examine the new space where the server rack will be placed.
Create a detailed inventory:Document all the equipment currently housed in the server rack.
Take pictures and label each component.
This will help you keep track of everything during the move and ensure that nothing gets lost or damaged.
Develop a timeline:Set a realistic timeline for the entire moving process.
Allocate sufficient time for each task to avoid rushing or causing delays.
Provide them with the necessary information and instructions to minimize any disruption to their work.
Consider whether you should probably involve a professional moving company or if your IT team can handle the job.
Having the right tools at hand will make the disassembly, transportation, and reassembly much easier.
Here are some essential tools and equipment to gather:
- check that you have both flathead and Phillips-head screwdrivers in your toolkit.
These tools will help you maintain order and ease the reconnection process later on.
This will prevent any confusion during disassembly and make it easier to reconnect everything correctly at the new location.
Moving blankets and padding:Protecting your server rack and equipment during transportation is crucial to prevent any damage.
Anti-static tools:When handling sensitive electronic equipment, its essential to minimize the risk of static electricity damage.
Toolkits and tool cases:Keep all your tools organized and easily accessible by using toolkits or tool cases.
This will prevent any delays or frustration triggered by searching for the right tool when you need it.
Removing any obstacles and creating a safe working environment will help prevent accidents and ensure a smooth move.
Here are the steps to follow:
1.
Ensure there is enough space to maneuver the rack without causing any damage to the items around it.
Secure loose cables:Carefully gather and secure any loose cables that are not attached to the server rack.
This will prevent them from getting tangled or causing tripping hazards during the moving process.
Use cable management solutions such as ties or Velcro straps to keep them organized.
Ensure proper ventilation:Check that the area where the server rack is located has adequate ventilation.
verify there is sufficient airflow to prevent overheating of the equipment during the move.
If necessary, temporarily redirect or remove any items that may block the airflow.
Take the time to double-check the surroundings and prioritize safety throughout this step.
Properly managing the cables ensures that they wont get tangled, damaged, or misplaced during the move.
Here are the steps to follow:
1.
Take pictures of the setup:Before disconnecting any cables, take clear photographs of the current cable configuration.
These pictures will serve as a helpful visual reference when reconnecting the cables at the new location.
Power down the equipment:Start by powering down and shutting off the equipment connected to the server rack.
This prevents any data corruption, electrical accidents, or equipment damage while handling the cables.
This labeling system will make it easier to identify and reconnect the cables correctly during the reassembly phase.
Group cables based on their functions or proximity to each other to simplify the reconnection process later on.
Avoid using zip ties, as they are difficult to undo or adjust if changes are needed.
Document cable connections:Create a detailed document or spreadsheet that lists the cable connections.
Safely disconnect the cables:Carefully unplug each cable from its respective port.
Keep the cables organized and separate to prevent tangling during the moving process.
Keeping the cables tidy and properly secured minimizes the risk of damage or accidental disconnection during transportation.
Keep them in a safe place to avoid losing or damaging these valuable components.
Take your time and pay attention to details to prevent any complications or frustrations during this crucial step.
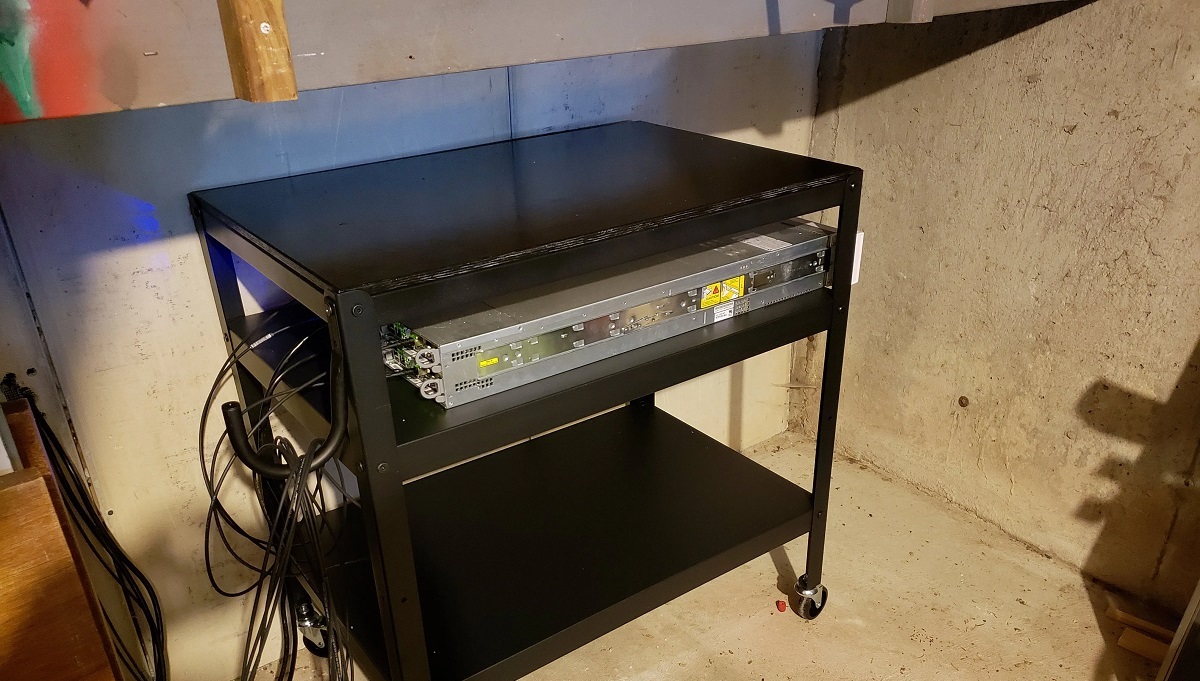
Removing Equipment from the Rack
1.
Different equipment may have unique procedures or precautions that need to be followed.
This prevents any potential damage to lower equipment when removing items from above.
Use proper lifting techniques:When removing heavy equipment, use proper lifting techniques to prevent strain or injury.
Lift with your legs, not your back, and ask for assistance if necessary.
Secure these components using appropriate packaging or antistatic bags for safe storage and transportation.
This helps protect the equipment from any potential impact or static damage during the handling process.
Additionally, tune up your inventory list to keep track of the equipments location.
If you notice any issues, take note of them and address them before reinstalling the equipment.
Store equipment securely:Find a secure and organized storage area for the removed equipment.
Keep it in a controlled environment to prevent any damage from temperature fluctuations or other external factors.
By following these steps, youll be able to remove the equipment from the server rack safely and efficiently.
Here are steps to effectively secure loose components:
1.
Separate them into individual groups and label them accordingly.
This will make it easier to identify and locate the specific components during the reassembly process.
Use antistatic bags or cases:Place each loose component in an antistatic bag or protective case.
These bags and cases prevent electrostatic discharge and shield the components from potential damage triggered by static electricity.
This extra cushioning will provide an added layer of protection during transportation.
Use cable ties, Velcro straps, or twist ties to prevent tangling and maintain organization.
Attach them securely to their respective components to avoid misplacement or confusion when reconnecting.
Store components in a safe location:Find a secure and dedicated storage area for the secured loose components.
confirm the storage area is properly labeled for easy identification.
Transport components separately:If possible, transport the secured loose components separately from the server rack.
This helps reduce the risk of damage because of jostling or impact during transportation.
Consider using padded bags or containers to provide an extra layer of protection.
Dismantling and Disassembling the Rack
1.
This prevents any electrical accidents and allows for a safe disassembly process.
Remove shelves or drawers:If your rack contains shelves or drawers, remove them next.
Unscrew any fasteners or release any clips holding them in place and carefully set them aside.
Detach horizontal cable management panels:Remove any horizontal cable management panels within the rack.
These panels are typically located at the front or rear of the rack and help organize and route cables.
Ensure that any cables running through the panels are properly secured or disconnected.
Set them aside in a secure area, ensuring they are properly labeled for easy reassembly.
Disassemble the rack frame:Unscrew the bolts or fasteners that hold the racks frame together.
Start from the top and work your way down, carefully disassembling each section.
Keep all screws and small parts in a labeled bag or container to avoid misplacement.
By following these steps, youll be able to dismantle and disassemble the server rack efficiently.
Installing the Server Rack on the Moving Dolly
1.
Ensure that it has locking wheels for added safety during transportation.
check that the dolly is on a level surface to ensure stability.
Slowly and evenly distribute the weight to avoid any imbalance or strain on the dolly and its wheels.
This will help maintain balance and stability when moving the rack.
This will prevent the rack from shifting or falling off during transportation.
This will help identify any potential issues or loose connections.
Adjust the straps or fasteners as necessary to ensure a stable and secure setup.
This will prevent any accidental movement of the rack during loading or unloading.
By following these steps, it’s possible for you to move the server rack safely:
1.
Plan the path:Before attempting to move the server rack, plan out the path you will take.
wipe the path and ensure it is safe for the movement of the rack.
Enlist sufficient help:Moving a server rack is a task that should not be done alone.
Ensure you have enough people to assist you, especially if the rack is large and heavy.
Communicate and coordinate with the team to carry out the movement smoothly and safely.
Bend your knees, keep your back straight, and lift with your legs.
Lift in unison with your team members to maintain balance and distribute the weight evenly.
Take breaks if needed:Moving a server rack can be physically demanding.
Move slowly and steadily:When transporting the server rack, move slowly and steadily to maintain control.
Avoid sudden movements or jerks that can cause the rack to sway or tip over.
Keep the rack level and ensure a clear line of sight while moving.
Communicate effectively:Maintain clear communication among team members throughout the moving process.
Use straps or tie-downs to anchor the rack securely, keeping it stable and preventing any potential accidents.
By following these safety measures, you could ensure the smooth and secure movement of the server rack.
Refer to documentation:Consult the inventory list and any notes or documentation you made during the disassembly process.
Use these references to guide you in reassembling the rack and its components.
Start with the rack frame:Begin by reassembling the rack frame itself.
Use the screws or fasteners that were previously removed to secure the rack sections together.
Start from the bottom and work your way up until the frame is fully assembled.
Carefully align them with the appropriate positioning marks or measurements to ensure that equipment can be mounted securely.
Reinstall shelves or drawers:Place the shelves or drawers back into the rack as needed.
Reconnect vertical cable management panels:Attach the vertical cable management panels to their designated locations on the rack.
Align them properly and fasten them securely using screws or clips.
ensure they are properly aligned and securely attached to help organize and route the cables.
Reattach loose components:Take the secured loose components and reattach them to their respective locations within the rack.
Pay close attention to labels and documentation to ensure correct placement and connection of each component.
Take your time to ensure that each cable is connected properly to the appropriate ports or devices.
Organizing and Reconnecting Cables
1.
Use these references to identify the correct cable connections and ensure that you reconnect them in the right order.
Separate and organize the cables:Group the cables based on their punch in and destination.
Ensure these connections are secure, align appropriately, and verify that the correct ports or switches are used.
Optimize cable lengths:Adjust cable lengths as needed to maintain a clean and efficient setup.
Testing and Troubleshooting
1.
Power on the equipment:Begin by turning on the power to the server rack and all associated equipment.
Observe the startup process and check for any error messages or unusual behavior on the systems displays or indicators.
Verify that all devices can communicate with each other and connect to the connection successfully.
Use temperature monitoring tools or physical temperature sensors to identify any areas of concern or potential overheating.
Disconnect power or data pipe cables from primary components to verify that their backup counterparts take over seamlessly.
Investigate and address any issues promptly to prevent potential downtime or data loss.
Troubleshoot identified issues:If any issues are detected during the testing process, troubleshoot them systematically.
Throughout the entire process, it is vital to prioritize safety, communication, organization, and documentation.
