Introduction
Welcome to the world of homemade ice cream!
Theres nothing quite like the creamy, flavorful goodness of a scoop of homemade ice cream.
We will cover everything from choosing the right ice cream maker to selecting the perfect milk for your recipe.
Whether youre a beginner or an experienced home cook, making homemade ice cream can be a delightful experience.
So, lets dive in and discover how to make ice cream with milk in an ice cream maker.
One popular option is a traditional ice cream maker that requires ice and rock salt.
These machines have a built-in freezing mechanism and can churn the ice cream in a shorter amount of time.
Its important to consider the capacity of the ice cream maker as well.
Keep in mind that larger capacity machines may require more space for storage.
Additionally, consider the ease of use and maintenance of the ice cream maker.
Last but not least, read reviews and gather feedback from other users before making a decision.
This will give you insights into the performance and durability of the ice cream maker.
So, take your time and do some research to find the perfect machine for your ice cream-making adventures.
Here are some factors to consider when selecting the milk for your ice cream:
1.
Freshness: Using fresh milk is key to achieving the best flavor in your ice cream.
Opt for milk with a later expiration date to ensure the milk is as fresh as possible.
Just be aware that the texture and taste may differ slightly from traditional dairy-based ice cream.
Experimentation: Dont be afraid to experiment with different types of milk to find your favorite flavor combination.
The possibilities are endless, so feel free to get creative and tailor the milk selection to your preferences.
Heres how to prepare the perfect ice cream mixture:
1.
Common flavorings include vanilla extract, cocoa powder, fruit purees, or even coffee.
double-check all your ingredients are measured and ready to go.
The amount of sugar can vary depending on your personal preference and the sweetness of the desired ice cream.
Start with a moderate amount and adjust to taste.
Add in your desired flavoring.
For vanilla ice cream, add a teaspoon or two of vanilla extract.
For chocolate ice cream, whisk in cocoa powder.
Feel free to experiment with different flavor combinations to create your own unique ice cream flavors.
The eggs will add richness and a smooth custard-like texture to the ice cream.
Continue whisking until all the ingredients are well combined and the mixture is smooth.
You want to achieve a homogeneous mixture with no lumps or visible sugar granules.
Take a moment to taste the mixture and adjust the sweetness or flavorings if needed.
Heres what it’s crucial that you do:
1.
Transfer the ice cream mixture to a lidded container or a bowl covered with plastic wrap.
This will prevent any unwanted flavors or odors from seeping into the mixture.
Place the container in the refrigerator.
The chilling process typically takes a few hours, but overnight chilling is even better.
This allows the flavors to meld together, creating a more cohesive and delicious ice cream.
During the chilling process, the mixture may thicken slightly.
This is a normal occurrence, as the ingredients in the mixture cool and come together.
Stir the mixture occasionally to promote even cooling.
Be careful not to let any water from the ice bath enter the container.
Heres how to get your ice cream maker ready:
1.
Read the manufacturers instructions: Different ice cream makers have different operating procedures and requirements.
Its crucial to read and understand the instructions provided with your specific ice cream maker.
This will help you to set up the machine correctly and avoid any mishaps.
double-check to place the bowl in the freezer for the recommended amount of time before starting the process.
Its typically recommended to freeze the bowl for at least 24 hours prior to churning.
This will prevent any issues or malfunctions during the churning process.
kill the lid or cover and check that it is properly locked.
If your ice cream maker has a built-in freezing mechanism, plug it into a power source.
Turn on the ice cream maker: Start the ice cream maker according to the manufacturers instructions.
By properly preparing your ice cream maker, you are setting the stage for successful ice cream making.
This step is crucial in transforming your ingredients into a creamy and delightful frozen treat.
Heres how to pour the mixture into the ice cream maker:
1.
Take the chilled ice cream mixture out of the refrigerator.
Give it a quick stir to ensure that the ingredients are evenly distributed.
This will help to prevent any separation and create a uniform texture in the ice cream.
- fire up the lid or cover of your ice cream maker.
If necessary, remove the freezer bowl from the machine to avoid any spills or messes.
Slowly pour the prepared ice cream mixture into the ice cream makers freezer bowl.
Be cautious not to overfill the bowl, as the mixture will expand as it freezes and churns.
Leave enough room for the ice cream to expand and incorporate air during the churning process.
Replace the lid or cover of the ice cream maker and ensure it is securely closed.
This will prevent any leakage or spills during the churning process.
The machine will begin churning the mixture, gradually freezing it and transforming it into ice cream.
This will churn the mixture and help incorporate air, creating a light and creamy texture.
Remember to follow the specific instructions provided by your ice cream makers manufacturer.
The churning time and process may vary depending on the machine.
Typically, it takes around 20-30 minutes to churn the ice cream to the desired consistency.
Pouring theice cream mixture into the ice cream makersets the stage for the churning and freezing process.
Take care to pour the mixture slowly and avoid overfilling to ensure optimum results.
Proper churning helps to incorporate air, prevent the formation of ice crystals, and achieve the desired texture.
Heres how to effectively churn your ice cream:
2.
Monitor the churning: Keep an eye on the ice cream as it churns.
You may notice the mixture gradually thickening and increasing in volume.
This is an indication that the ice cream is coming together and freezing properly.
Over-churning can result in the formation of small ice crystals and a grainy texture.
Pay attention to the consistency of the ice cream and begin checking for doneness around the recommended churning time.
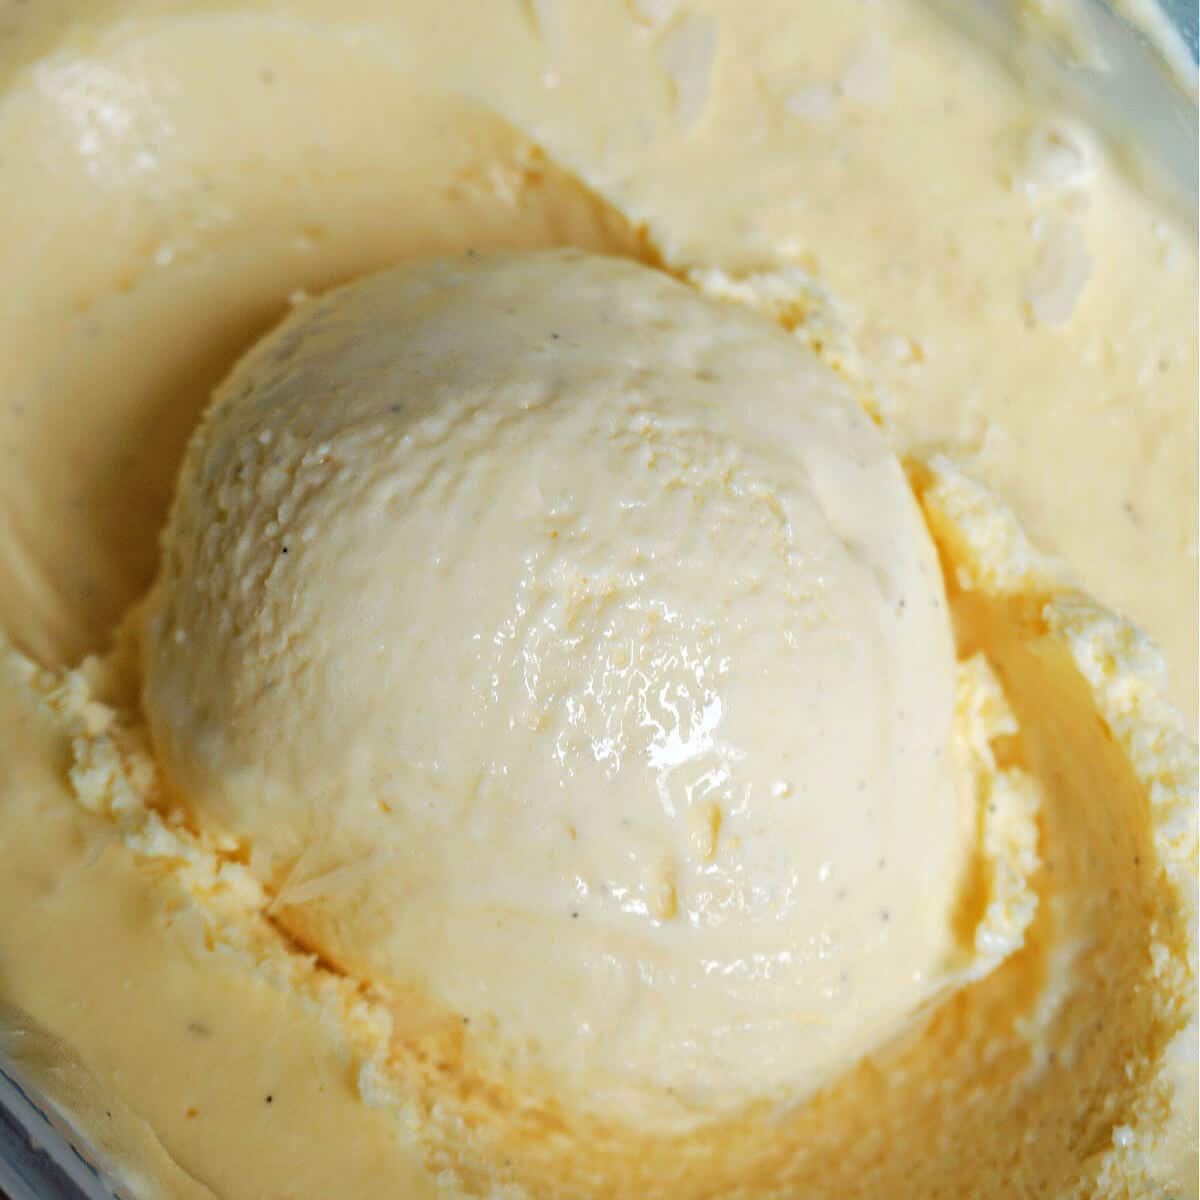
The ice cream should be thick and creamy, resembling the texture of soft-serve ice cream from a machine.
Continue the churning process in short increments, checking for the desired consistency until it reaches the desired texture.
Churning is a transformative step that turns the liquid ice cream mixture into a velvety and luscious frozen treat.
Heres how to incorporate mix-ins into your ice cream:
1.
Choose your mix-ins: The options for mix-ins are practically endless.
Prepare the mix-ins: Depending on the chosen mix-ins, you may need to prepare them in advance.
If youre using solid mix-ins like chocolate chips or nuts, chop or crush them to your desired size.
With the ice cream maker still running, slowly pour in the prepared mix-ins.
Gradually fold or swirl the mix-ins into the ice cream using a spatula or spoon.
Distribute mix-ins evenly: Ensure that the mix-ins are distributed evenly throughout the ice cream.
Gently fold or stir the mixture, making sure that no clumps of mix-ins remain concentrated in one area.
This will result in a uniform distribution of flavor and texture.
Keep an eye on the mixture and adjust the churning time accordingly.
Continue churning until the mix-ins are well incorporated, and the ice cream reaches the desired consistency.
Adding mix-ins to your ice cream allows you to unleash your creativity and customize your frozen treat.
Properly transferring the ice cream ensures that it maintains its texture and flavor during storage.
Heres how to transfer your ice cream to a container:
1.
Prepare a storage container: Choose a container that is freezer-safe and has a tight-fitting lid.
Work quickly to minimize melting and maintain the desired texture.
Smooth the surface of the ice cream, ensuring an even layer in the container.
Seal the container: Place the lid securely on the container or wrap the container tightly with plastic wrap.
This will create an airtight seal, ensuring the ice cream stays fresh and protected from freezer odors.
This will help maintain the texture and prevent any melting or thawing during storage.
Keep the ice cream away from strong-smelling foods to avoid any flavor transfers.
If using a lidded container, verify the lid is securely in place.
If using plastic wrap or aluminum foil, wrap it tightly to create an airtight seal.
Allow enough space around each container to maintain their shape and avoid any deformation.
This will make scooping easier and ensure a smoother texture.
However, be cautious not to let the ice cream melt completely.
Take care to retain the shape and texture of the scoops as much as possible.
Add toppings (optional): Enhance your ice cream experience by adding delicious toppings.
Consider options like hot fudge, caramel sauce, sprinkles, nuts, whipped cream, or fresh fruit.
The toppings can provide additional flavors, textures, and visual appeal to your already delicious homemade ice cream.
Enjoy and savor: Sit back, relax, and savor each creamy scoop of your homemade ice cream.
Conclusion
Congratulations!
Youve now learned the step-by-step process of making delicious homemade ice cream with milk in an ice cream maker.
