While store-bought ice cream is readily available, theres something special about crafting your own batch from scratch.
One of the key ingredients that sets this ice cream apart is the use of real vanilla beans.
The tiny black specks scattered throughout the ice cream not only add visual appeal but also enhance the flavor.
Choosing high-quality vanilla beans is essential to extract the maximum flavor and aroma.
Get ready for a delightful culinary adventure that will leave your taste buds longing for more!
The quality of the beans directly impacts the flavor and aroma of the final product.
Here are some tips to help you choose the perfect vanilla beans:
1.
They are often preferred for their superior flavor and are suitable for infusing the ice cream mixture.
Grade B beans are drier and have a lower moisture content.
Appearance: Look for vanilla beans that are moist, shiny, and pliable.
They should be free from any mold or dark spots.
The exterior of the bean should be dark brown or black, indicating ripeness.
Flexibility: Gently bend the vanilla bean to test its flexibility.
A fresh and high-quality bean should be soft and supple, allowing you to bend it easily without breaking.
Aroma: Give the vanilla bean a sniff.
It should emit a strong, sweet, and intoxicating aroma.
If the smell is weak or lacking, it may indicate lesser quality beans.
Source: Purchase vanilla beans from reputable suppliers to ensure their authenticity and quality.
On average, 2-3 vanilla beans should suffice for a standard batch of homemade ice cream.
Remember, the quality of your vanilla beans will significantly influence the taste of your homemade ice cream.
Invest in premium beans to elevate the flavor profile of your dessert and unlock the true essence of vanilla.
Heres a step-by-step guide to help you get started:
1.
Ensure that all the necessary ingredients are on hand before you begin.
These seeds hold the concentrated vanilla flavor that will infuse your ice cream mixture.
Heat the mixture until it becomes hot but not boiling.
Stir occasionally to prevent scorching.
The sugar helps to sweeten the ice cream while the egg yolks provide a smooth and creamy texture.
Gently whisk the mixture together to temper the eggs, gradually raising their temperature without causing them to scramble.
Whisk constantly to combine all the ingredients thoroughly.
Once the mixture has thickened, remove it from the heat.
Let the mixture cool completely before moving on to the next step of using your ice cream maker.
Using Your Ice Cream Maker
1.
Freeze the bowl: Most ice cream makers require the bowl to be frozen prior to use.
Ensure that the bowl has been properly frozen according to the manufacturers instructions.
This step is essential for the churning process.
Assemble the ice cream maker: Set up your ice cream maker according to the manufacturers instructions.
This typically involves attaching the paddle or dasher to the motor and securing the frozen bowl onto the machine.
Carefully pour the mixture into the ice cream maker while it is still running.
Be cautious not to overfill the machine, as the mixture will expand as it churns.
Typically, it takes around 20-30 minutes to reach the desired consistency.
Monitor the progress: Keep an eye on the ice cream as it churns.
The mixture will gradually thicken and increase in volume.
Youll notice a transformation from a liquid state to a soft, creamy texture.
Avoid over-churning, as it can lead to a grainy texture.
This will ensure even distribution throughout the ice cream.
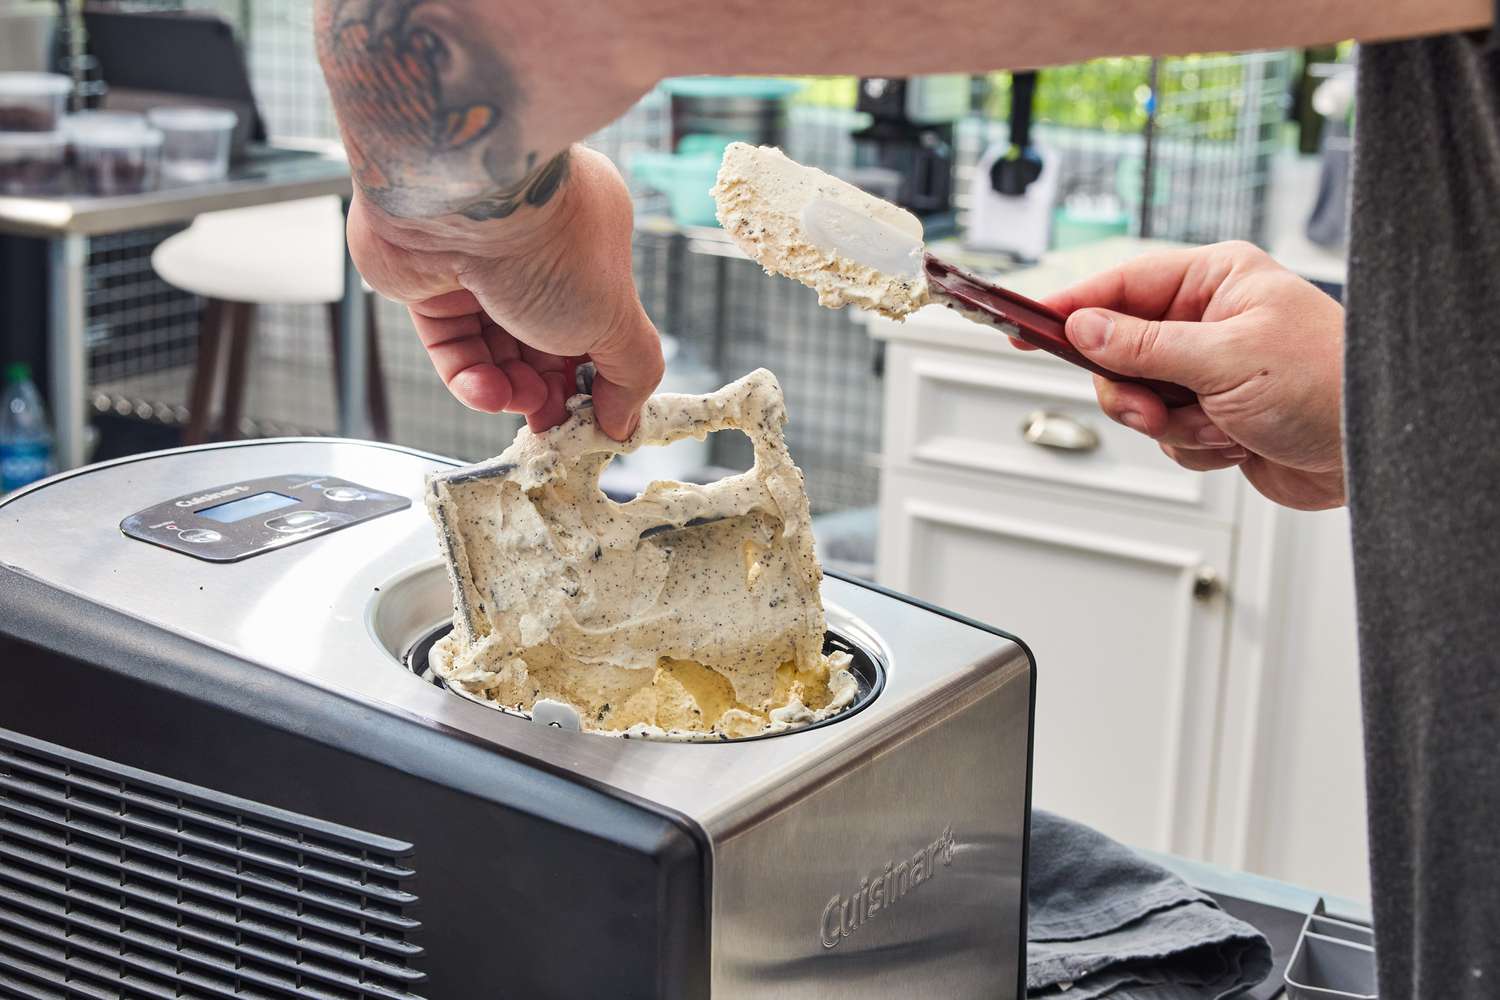
Scoop the freshly churned ice cream into an airtight container.
Smooth the surface with a spatula and cover the container tightly.
This rest period will allow the flavors to meld and the texture to set.
Heres how to do it:
1.
Retrieve the vanilla beans: Take the split vanilla beans that you prepared earlier.
Hold them over the ice cream mixture and carefully scrape any remaining seeds directly into the mixture.
Add the beans: Drop the scraped vanilla bean pods into the ice cream mixture as well.
These pods will continue to infuse flavor as the mixture chills and develops.
The beans should be submerged in the mixture, allowing their essence to be released during the churning process.
This resting period allows the flavors to meld together and intensify, resulting in a more pronounced vanilla taste.
Simply pour the mixture through a fine-mesh sieve into a separate container, discarding the spent vanilla bean pods.
This step is optional and primarily a matter of personal preference.
Heres how to churn your ice cream mixture to perfection:
1.
This usually involves placing the frozen bowl onto the machines motor and securing it in place.
Be cautious not to overfill, as the mixture will expand as it churns.
Start churning: Turn on the ice cream maker and let it do its magic.
The machine will slowly begin to churn the ice cream mixture, incorporating air and creating a creamy texture.
Monitor the churning process: Keep an eye on the progress of your ice cream as it churns.
It will gradually thicken and increase in volume.
Youll notice a transformation from a liquid consistency to a soft, smooth, and creamy texture.
It should be soft, smooth, and have a texture similar to soft-serve ice cream.
Here are some exciting add-in options to customize your homemade vanilla bean ice cream:
1.
Chocolate: Add a touch of decadence to your vanilla bean ice cream by incorporating chocolate.
Fruits: Enhance the natural sweetness of your vanilla bean ice cream by folding in fresh, ripe fruits.
Strawberries, raspberries, blueberries, or sliced bananas are popular choices.
Roasted peaches or caramelized apples also add a delightful twist.
Nuts: For a satisfying crunch and added richness, consider adding chopped nuts.
Walnuts, almonds, peanuts, or pecans not only provide texture but also complement the creamy vanilla flavor.
These sweet and gooey additions add depth and complexity to the vanilla base.
Spices: Experiment with adding warm and aromatic spices to your vanilla bean ice cream.
Dont be afraid to get creative and mix and match different add-ins to create your own signature flavor combinations.
Here are some tips to help you achieve that perfect texture:
1.
Opt for a combination of heavy cream and whole milk in your recipe.
The higher the fat content, the smoother and creamier the ice cream will be.
Chill the mixture thoroughly: Before churning the ice cream, ensure that the mixture is thoroughly chilled.
This allows the fats to solidify and helps in creating a smoother texture.
Refrigerate the mixture for at least 2-3 hours, or preferably overnight, before churning.
These ingredients help bind the water molecules and create a smoother mouthfeel.
Over-churning can cause the ice cream to become stiff and lose its creaminess.
Ensure that the container is tightly sealed to prevent the formation of ice crystals.
Now, lets move on to storing and serving your delicious creation!
Here are some tips for storing and serving your creation:
1.
Use an airtight container: Transfer the freshly churned ice cream into an airtight container.
Ensure that the container is large enough to hold the entire batch and has a tight-fitting lid.
This will help prevent ice crystals from forming and maintain the creaminess of the ice cream.
This helps create a barrier and prevents the formation of ice crystals on the top layer.
This helps maintain the creamy texture and prevents the ice cream from becoming too hard.
Avoid storing near strong-smelling foods: Ice cream has a tendency to absorb odors from strong-smelling foods.
This makes it easier to scoop and enhances the creamy texture.
Serve with care: Use a sturdy ice cream scoop to serve your homemade vanilla bean ice cream.
Dip the scoop in hot water and wipe it dry between each scoop.
This helps the ice cream glide smoothly onto the dessert dishes without sticking.
Get creative and experiment with various combinations!
Enjoy immediately: Homemade ice cream is best enjoyed fresh, as it retains its optimal texture and flavor.
Serve and savor your creation immediately after scooping, ideally on chilled dessert bowls or cones.
Now, its time to indulge in the heavenly flavors youve created!
Throughout this guide, we have explored the step-by-step process of creating homemade vanilla bean ice cream.
Using an ice cream maker simplifies the process and ensures consistently delightful results.
Dont be afraid to experiment with different variations and add-ins to customize your vanilla bean ice cream.
