Introduction
Welcome to this step-by-step guide on how to make an external hard drive.
Now, lets get started on the journey of creating your own external hard drive.
So, grab your tools, put on your DIY hat, and lets begin the adventure!
Consider your current and future needs for storing files, documents, media, and other data.
External hard drives come in a variety of capacities, ranging from a few hundred gigabytes to multiple terabytes.
Form Factor: Consider the form factor of the external hard drive.
Most are 2.5-inch or 3.5-inch drives, with 2.5-inch being the smaller and more portable option.
Brand and Reliability: Research different brands and consider their reputation for reliability.
Opting for a reputable brand can help ensure a higher quality and more durable external hard drive.
Price: Set a budget for your external hard drive and look for options within that price range.
Compare prices and features to find the best value for your money.
Compare different models, read customer reviews, and make an informed decision based on your needs and budget.
Remember to keep in mind the future use of your external hard drive and anticipate any potential expansion needs.
USB cables are widely used and are compatible with most computers.
If your machine supports Thunderbolt technology, opt for a Thunderbolt cable for faster data transfer speeds.
Check the specifications of your hard drive and enclosure to determine if a power adapter is necessary.
If so, confirm to have the appropriate power adapter on hand.
Refer to the specifications of your hard drive and enclosure to determine the appropriate cable types and connectors needed.
This will help avoid any delays or inconveniences during the assembly process.
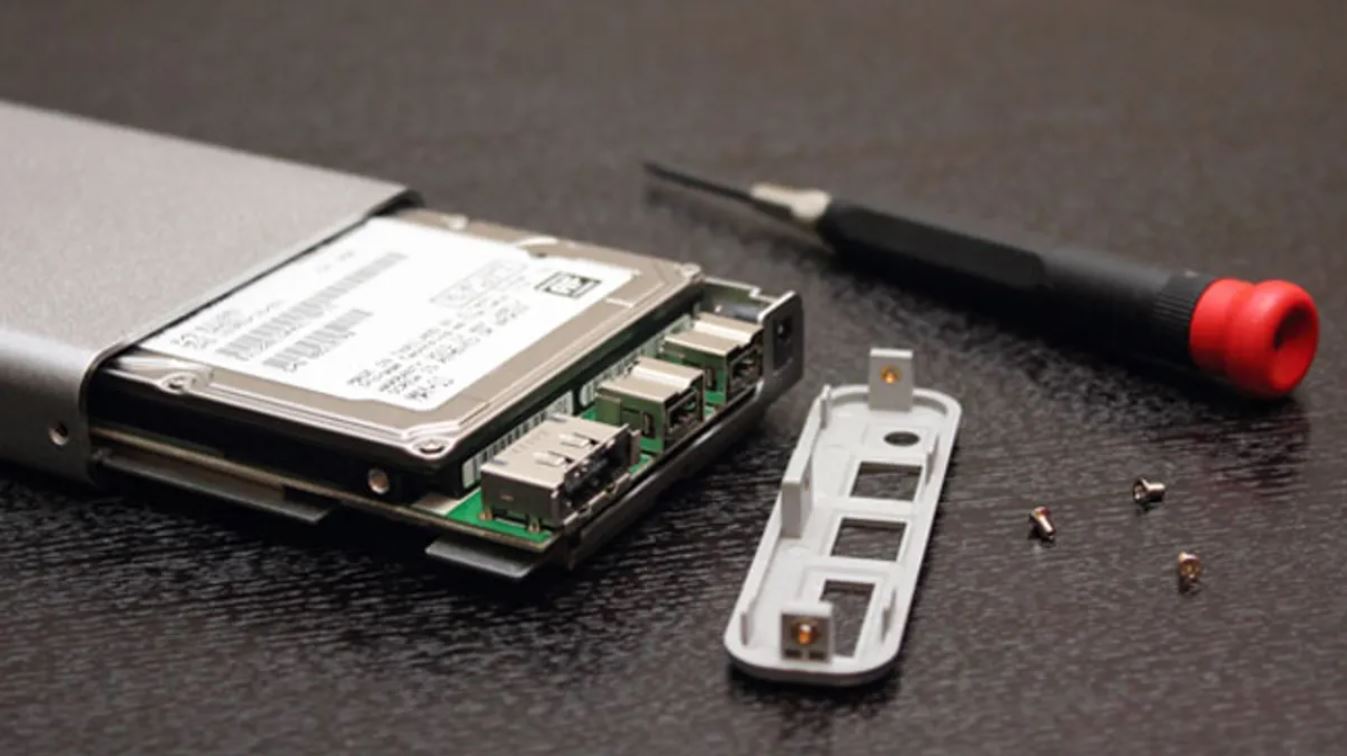
This will allow you to prepare it for installation into a new enclosure.
Hard drives are delicate electronic components that can be easily damaged by physical shock or static electricity.
The next step will involve preparing a new enclosure for the hard drive installation.
With the right preparation, youll be one step closer to having your own customized external hard drive.
Additionally, follow any specific instructions provided by the manufacturer for your particular enclosure model.
Proper installation ensures the longevity and performance of your external hard drive.
Use a moderate amount of force to ensure a secure fit.
Proper reassembly is crucial for the longevity and proper functioning of your external hard drive.
Take a moment to ensure that the external hard drive is functioning correctly.
Remember to back up any important data before formatting, as it will be permanently erased.
Remember to follow these ejection steps every time you want to disconnect the external hard drive from your box.
Doing so will help maintain the integrity and longevity of your data stored on the drive.
You have successfully learned how to make an external hard drive and completed the process from start to finish.
it’s possible for you to now enjoy the benefits of your customized external storage solution.
Take your time and handle the components with care to avoid damage to the hardware.
Additionally, you might customize the formatting and partitioning of the hard drive to suit your data organization preferences.
Implementing regular backups of your external hard drive is also recommended to safeguard your valuable data against unforeseen incidents.
Thank you for following this guide on how to make an external hard drive.
