Introduction
Welcome to the world of mini PCs!
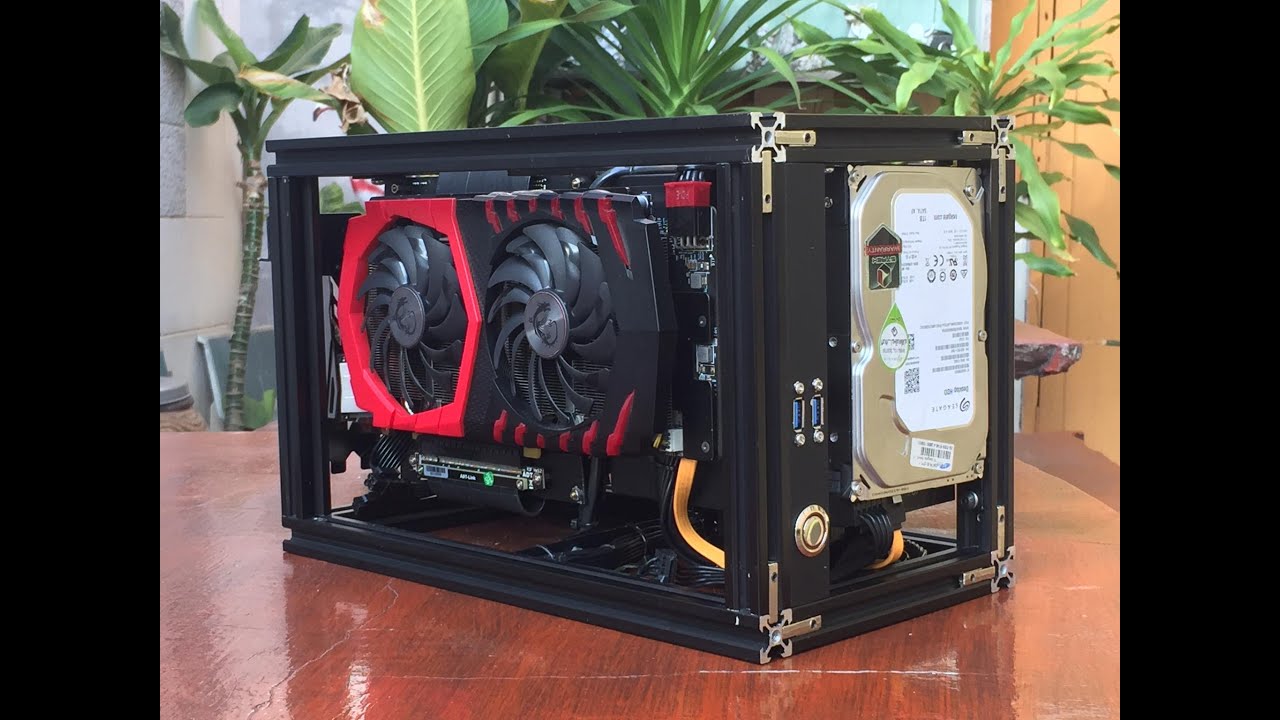
In this guide, we will take you through the step-by-step process of making your own mini PC case.
One of the key factors in building a mini PC case is choosing the right components.
Well discuss the different options available and help you decide which components will work best for your needs.
Gathering the necessary tools and materials is the next important step.
Having the right tools and materials will ensure a smooth and efficient building experience.
when you’ve got everything ready, its time to prepare the case.
Proper preparation is essential for a well-functioning and long-lasting mini PC case.
Routing cables is another crucial step in building a mini PC case.
Well show you how to efficiently route and manage your cables to maintain a clean and organized interior.
Proper cable management not only improves airflow but also makes future upgrades and maintenance easier.
In the next step, well focus on securing and organizing the components within the case.
Well discuss different mounting options and techniques to ensure that all components are held securely in place.
Additionally, well explore methods for organizing cables and ensuring they dont obstruct airflow.
Testing and troubleshooting are important steps in any PC build.
Additionally, well provide troubleshooting tips in case you encounter any issues during testing or operation.
Finally, well cover the steps for finalizing your mini PC case.
Well provide tips to help you put the finishing touches on your creation.
Here are some key factors to consider when choosing the components for your mini PC case.
Motherboard:The motherboard is the foundation of your mini PC case.
CPU:Choose a CPU that offers the right balance between performance and power consumption.
Consider factors such as clock speed, number of cores, and cache size to ensure smooth operation.
RAM:The amount of RAM you choose will depend on your computing needs.
Aim for at least 8GB of RAM to ensure smooth multitasking.
Storage:Determine the punch in and capacity of storage that best suits your requirements.
Graphics Card:If youre a gamer or work with graphics-intensive applications, a dedicated graphics card is essential.
Look for models that offer a good balance between performance and power consumption.
Modular or semi-modular PSUs are recommended for easier cable management and better airflow.
Consider options such aslow-profile CPU coolersand compact case fans.
Proper airflow is vital to prevent overheating and maintain optimal performance.
When selecting components, its essential to consider the specific requirements of your intended usage.
Remember to research and read reviews to make informed decisions.
Consider the compatibility, performance, and reliability of the components before making your final choices.
By carefully selecting the right components, youll lay a solid foundation for a successful mini PC build.
Having the right equipment and materials will ensure a smooth and successful build process.
Here are the essential tools and materials youll need:
1.
Screwdriver Set:A good set of screwdrivers is a must-have for any PC build.
This will come in handy when assembling and securing components.
Thermal Paste:Thermal paste is essential for ensuring proper heat transfer between the CPU and the cooler.
see to it to have a small tube of high-quality thermal paste on hand.
This will help prevent overheating and ensure optimal CPU performance.
Cable Ties:Cable ties are essential for keeping your cables organized and secure.
They help minimize cable clutter and improve airflow within the case.
Opt for reusable cable ties for easy adjustments and repositioning.
Needle-nose Pliers:Needle-nose pliers are useful for manipulating cables, connectors, or small components within the case.
They come in handy when tight spaces make it difficult to handle certain tasks with your fingers alone.
Thermal Monitor:A thermal monitor is an optional but highly recommended tool.
It helps you monitor the temperature inside the case and ensures your components are running at safe temperatures.
There are various software options available that provide real-time temperature readings.
It helps protect your components and ensures they are not negatively affected by static electricity.
Its essential to use an anti-static wrist strap when handling components.
Mini PC Case:Of course, youll need an appropriate mini PC case to house all your components.
There are various mini PC case options available on the market, each with its own design and features.
Consider factors such as size, ventilation, and aesthetics when choosing your mini PC case.
These materials can enhance the functionality and aesthetics of your mini PC case.
confirm to have all the tools and materials ready before starting the build process.
Having everything on hand will save you time and ensure a smooth workflow.
Having the right tools at your disposal will make the assembly process more efficient and enjoyable.
Heres a guide on how to prepare your case:
1.
Cleaning:Begin by thoroughly cleaning the case to remove any dust or debris that may have accumulated.
Use a soft, lint-free cloth or compressed air to clean the exterior and interior of the case.
This will help maintain proper airflow and prevent overheating.
Carefully remove any unnecessary components from the case to create more space and improve cable management.
Be sure to refer to the cases manual for proper removal instructions.
Checking Ventilation:Proper ventilation is crucial for maintaining optimal temperatures inside your mini PC case.
Check the case for built-in ventilation options, such as fan mounts or mesh panels.
Ensure that these areas are clear from any obstructions, allowing for good airflow.
Pay attention to the size and number of fan mounts available in your case.
Consider installing fans in strategic locations to promote efficient airflow and heat dissipation.
Cable Management:Before installing any components, its a good idea to plan your cable management strategy.
Designate specific routes and tie-down points for your cables to ensure a clean and organized interior.
Consider using adhesive-backed cable clips or Velcro straps to secure and route cables.
Cable Routing Holes:test whether your mini PC case has designated holes or cable routing channels.
Take advantage of these features to achieve a clutter-free interior.
Installing Dust Filters:Preventing dust buildup is important for the longevity and performance of your components.
Regularly clean and maintain these filters to ensure their effectiveness.
Handling Static Electricity:Static electricity can damage sensitive components, so its important to take precautions.
Avoid working on carpeted areas, as carpets can generate static electricity.
By properly preparing your mini PC case, youll set a solid foundation for a successful build.
Installing Components
1.
Motherboard Installation:Begin by installing the motherboard into the case.
Carefully align the motherboards I/O shield with the corresponding cutouts on the case.
Secure the motherboard in place using the provided screws.
double-check to use standoffs to elevate the motherboard and prevent it from touching the case directly.
CPU Installation:Carefully place the chosen CPU into the motherboards CPU socket.
Ensure that the orientation is correct by matching the notches or markers on both the CPU and the socket.
Gently lower the CPU into place and secure it using the retention mechanism provided by your motherboard.
Apply even force to both ends of the module until it clicks into place.
Confirm that the RAM modules are securely seated by gently pushing down on them.
Connect any necessary power cables from the power supply to the graphics card.
Secure them in place using screws or brackets provided by the case.
Connect the data and power cables from the storage gear to the corresponding ports on the motherboard.
Power Supply Installation:Place the power supply unit (PSU) into its designated spot in the case.
Align the screw holes on the PSU with the mounting points on the case and secure it with screws.
Front Panel Connections:Connect the front panel cables from the case to the corresponding headers on the motherboard.
Refer to your motherboards manual for the correct pin configurations.
Use cable ties, clips, or Velcro straps to secure cables and keep them neatly organized.
Pay attention to cable placement to avoid obstructing airflow or components.
Pay attention to detail and refer to the manuals provided with your components for any specific instructions.
Remember, a properly installed and configured system is the foundation for optimal performance and longevity.
Routing Cables
1.
Plan Ahead:before you jump in routing the cables, take a moment to plan your route.
Identify the desired locations for each cable, considering the length and flexibility of the cables.
Avoid obstructing airflow paths and ensure that the cables are not taut or pulling on the components.
Use cable ties or Velcro straps to secure the cables in place.
SATA Data and Power Cables:Route the SATA data cables and power cables to connect your storage devices.
Place the cables neatly and ensure they are not blocking any ventilation areas.
Secure the cables with ties or clips to maintain a tidy appearance.
Use cable ties or clips to secure the cables along their route.
Keep the cables organized and tucked away to ensure they do not obstruct airflow or interfere with other components.
Consider using adhesive-backed cable clips or Velcro straps for clean cable management.
Keep these cables grouped together and secured using ties or clips to prevent tangling or cluttering.
Ensure that there is enough slack to allow for easy component removal or installation.
Adjust cable positions as necessary to achieve the desired length and tension.
Securing and Organizing Components
1.
Motherboard and Components:Check that the motherboard is securely attached to the case using screws or standoffs.
Gently press down on the components to confirm their secure placement.
Cable Management:Organize and secure cables using cable ties, clips, or Velcro straps.
Bundle cables together where possible to minimize clutter and ensure good airflow.
Use screws or brackets provided by the case to secure the drives in place.
Tighten the screws enough to hold the drives securely, but avoid overtightening.
Use the retention mechanism or screws provided by the case to secure the cards in place.
Ensure that the cards are aligned properly and fully seated.
CPU Cooler and Case Fans:Check that the CPU cooler and case fans are properly installed and secured.
Ensure a snug fit between the CPU cooler and the CPU, with proper thermal paste applied.
Ideal Cable Lengths:Review the lengths of your cables and adjust them to ideal lengths.
Avoid excessive cable slack or tension that can impede airflow or interfere with components.
Secure Loose Components:Double-check that there are no loose or hanging components within the case.
Ensure that all screws, brackets, or clips are securely fastened.
Loose components can cause rattling, interfere with cooling, or result in damage during transport.
By securing and organizing the components within your mini PC case, youll create a clean and well-structured interior.
This not only enhances the aesthetics but also promotes efficient airflow and ease of maintenance.
Testing and Troubleshooting
1.
Power On:Connect your mini PC to a power source and press the power button.
Ensure that all fans are spinning, and the LEDs on the components light up.
Listen for any abnormal noises or vibrations that could indicate loose components or faulty fans.
Adjust any necessary configs, such as boot order or fan curves.
Monitor Connectivity:Connect your monitor to the graphics card and ensure that it displays the expected output.
Check for any visual abnormalities, such as artifacts, flickering, or screen tearing.
Adjust the display configs, resolution, and refresh rate as needed.
Monitor temperatures, voltages, and overall system stability during these tests.
Make note of any unexpected behavior, such as crashes, overheating, or excessive noise.
Ensure that temperatures stay within safe limits under load.
Excessive heat can lead to performance issues or even long-term damage to your components.
Ensure that all cables are securely connected, and components are properly seated.
If issues persist, consult the manuals or seek help from technical forums or support channels.
Update Drivers and BIOS:Keep your drivers and BIOS up to date to ensure compatibility and stability.
Visit the manufacturers website for your components and download the latest drivers and BIOS updates.
Regularly check for firmware updates for peripherals, such as keyboards or mice, to avoid compatibility issues.
Keep a Record:Document any troubleshooting steps you took and the solutions you found.
This record can be helpful for future reference or if you hit similar issues.
Thorough testing and troubleshooting are critical to ensure the stability and functionality of your mini PC build.
Finalizing the case involves making any desired customizations and ensuring that everything is in its proper place.
Here are some steps to consider when finalizing your mini PC case:
1.
Cable Management:Take a final look at your cable management to ensure that everything is neat and tidy.
Adjust any cables that may have become displaced during testing or troubleshooting.
Use cable ties, clips, or Velcro straps to secure any loose cables or make minor adjustments.
Aesthetic Customizations:Add any additional aesthetic touches to personalize your mini PC case.
Consider installing LED lighting strips or fans with RGB functionality to bring a visually appealing glow to your build.
Adhere to your desired color scheme or lighting effects to achieve your desired aesthetic.
Fan Filters:Install washable fan filters on the intake fans to reduce dust buildup inside the case.
These filters will help maintain clean airflow and prevent dust from accumulating on sensitive components.
Regularly clean and maintain these filters to ensure their effectiveness.
These products can help conceal and organize cables while adding a touch of customizability to your build.
Choose colors and patterns that complement your case and personal style.
Cable Identification:Label cables for quick and easy identification in the future.
Use cable ties or wire sleeves to group cables together and attach small labels to identify their purpose.
This step will simplify any future maintenance or troubleshooting, saving you time and effort.
This allows you to strike the right balance between performance and noise levels.
Consult the motherboard manual or search for compatible fan control options specific to your motherboard model.
Use a soft, lint-free cloth and appropriate cleaning solutions to maintain the appearance of your case.
verify that the cases panels are properly aligned and secured.
Give the case a gentle shake to ensure there are no rattling noises indicating loose components.
By following these steps, youll achieve a visually appealing and fully functional mini PC case.
Have fun exploring the capabilities of your new mini PC and the endless possibilities it offers.
Conclusion
Building your own mini PC case can be a rewarding and fulfilling experience.
Throughout the process, attention to detail and patience are key.
This will help keep your system running smoothly and ensure its longevity.
Remember, the world of mini PCs is always evolving, with new technologies and components constantly being introduced.
Your journey as a DIY builder and tech enthusiast has just begun!
