Introduction
Welcome to the world of virtualization!
It enables users to run software and applications in a controlled environment without interfering with the host system.
Virtual machines offer several benefits, including:
1.
Resource Optimization
Virtual machines allow you to make the most out of your hardware resources.
This makes virtualization an excellent choice for servers or development environments.
Easy Deployment and Management
Creating and managing virtual machines is a straightforward process.
you’ve got the option to easily deploy, clone, and migrate virtual machines as needed.
This flexibility allows you to replicate and distribute virtual machines across different physical machines or cloud platforms.
Computer Hardware Requirements
confirm that your gear meets the minimum requirements for running a virtual machine.
This includes sufficient RAM, CPU, and hard disk space.
Virtualization Software
You will need virtualization software to create and run your Linux virtual machine.
Linux Distribution ISO
grab the Linux distribution you want to install on your virtual machine.
Visit the official website of your chosen distribution and download the ISO file.
This software will serve as the foundation for creating and managing your Linux virtual machine.
Lets explore your options and help you make the right choice in the next section.
Here are three popular options to consider:
1.
VirtualBox is a free and open-source software, making it an excellent choice for both personal and commercial use.
VMware Workstation Player
VMware Workstation Playeris a free version of the popular VMware Workstation software.
It is available for personal use on Windows and Linux platforms.
While it doesnt provide all the advanced features of the paid version, it still offers robust virtualization capabilities.
Hyper-V
Hyper-V is a virtualization platform built into Windows 10 Pro, Enterprise, and Education editions.
It provides a reliable and secure environment for creating and managing virtual machines.
To download a Linux distribution ISO, run with this:
1.
Some popular choices include Ubuntu, Fedora, CentOS, Debian, and Linux Mint.
Consider your needs, familiarity, and preferences when selecting a distribution.
Visit the Official Website
Go to the official website of the Linux distribution you have chosen.
double-check to download the latest stable release for optimal performance and security.
Most Linux distributions provide checksums or hash values for their ISO files.
You will need this file later during the virtual machine creation process.
This will enable you to start building your Linux virtual machine.
The virtualization software will serve as the platform for creating and managing your Linux virtual machine.
Double-press the installer to launch the installation wizard.
Select Installation Options
During the installation process, you may be presented with various installation options.
These options could include selecting additional components or customizing specific prefs.
Review the options and opt for ones that best suit your needs.
The virtualization software will be installed on your machine.
To create a new virtual machine, do these things:
1.
Launch the Virtualization Software
kick off the virtualization software you installed in the previous step.
The softwares interface should appear, providing options for creating and managing virtual machines.
It is typically labeled as New or Create New VM.
press it to start the VM creation process.
Choose a descriptive name that identifies the Linux distribution you will be installing.
Additionally, snag the operating system punch in and version that matches the Linux distribution you downloaded.
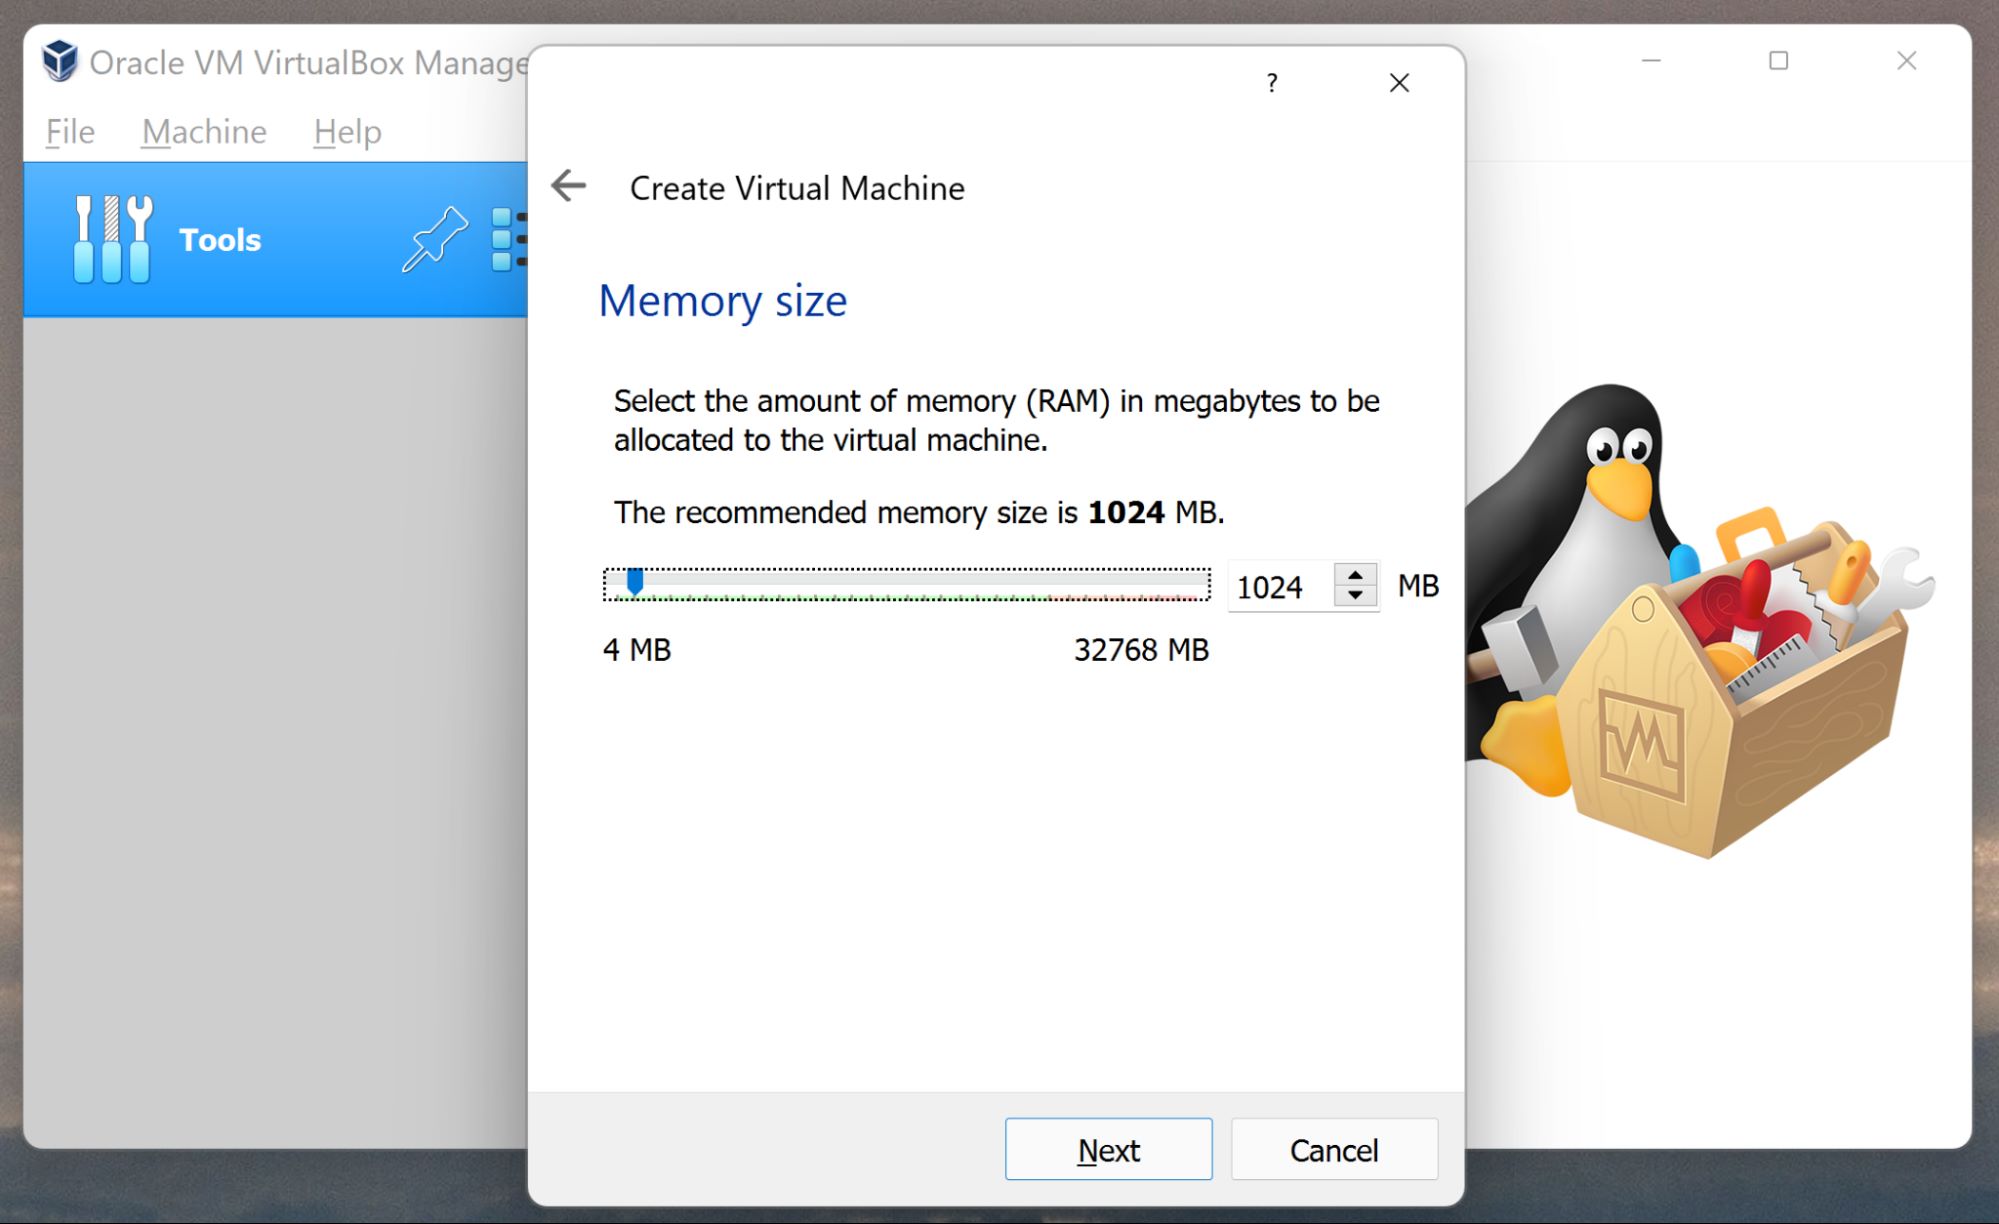
Allocate Memory (RAM)
Choose the amount of memory (RAM) to allocate to your virtual machine.
The recommended amount varies depending on the Linux distributions requirements and the capabilities of your host system.
Allocate a sufficient amount of memory to ensure smooth performance.
Create a Virtual Hard Disk
Create a virtual hard disk for your virtual machine.
Configure Hardware prefs
Review and configure additional hardware prefs for your virtual machine.
Finish the VM Creation Process
Congratulations!
You have successfully created a new virtual machine for your Linux installation.
To configure the virtual machine configs, adhere to these instructions:
1.
Start the Virtual Machine
Launch the virtualization software and go for the newly created virtual machine from the list.
punch the Start or Power On button to start the virtual machine.
2. enter the VM prefs
Once the virtual machine is running, locate the prefs menu.
In most virtualization software, you’re able to find it under the Machine or VM menu.
punch it to dive into the virtual machine parameters.
Adjust Display tweaks
Configure the display tweaks to ensure optimal resolution and monitor compatibility.
Adjust the display configs to match your screen size and preferred graphics adapter.
You may also have options to enable hardware acceleration or install guest additions later for improved graphics performance.
Customize Storage Options
Determine the storage options for your virtual machine.
Adjust the storage prefs according to your requirements.
Configure web connection controls
Set up the web connection controls to enable web connection connectivity within the virtual machine.
go for the appropriate mode and configure any additional data pipe prefs if necessary.
Customize Other tweaks
Review and customize any other available tweaks according to your needs.
Save and Apply Changes
when you obtain configured all the desired prefs, save and apply the changes.
This ensures that your virtual machine is properly configured and ready for the Linux installation.
You have successfully configured the options for your virtual machine.
pick the Start or Power On button to start the virtual machine.
snag the Linux distribution ISO file you downloaded and attach it to the virtual machines optical drive.
This will make the ISO file accessible as if it were a physical CD/DVD inserted in a real computer.
Boot from the ISO
Restart the virtual machine to initiate the boot process.
The virtual machine will now boot from the Linux distribution ISO and present you with the installation menu.
Input your desired username, password, and any additional information required for user configuration.
Select any optional software you wish to include or continue with the default installation.
Once the installation is complete, you will be prompted to reboot the virtual machine.
You have successfully installed the Linux operating system on your virtual machine.
choose the Start or Power On button to start the virtual machine.
2. pull up the Virtual Machine configs
Locate the configs menu within the virtualization software.
In most cases, you’re able to find it under the Machine or VM menu.
choose it to jump into the virtual machine controls.
Adjust the CPU Allocation
Determine the number of CPU cores allocated to the virtual machine.
it’s possible for you to increase or decrease the CPU allocation based on your workload and performance requirements.
Adjust the amount of memory (RAM) allocated to the virtual machine.
Increasing the memory allocation can enhance the virtual machines performance, especially when running memory-intensive applications.
Ensure that you have enough available memory on your host system to accommodate the increase.
Modify Storage Allocation
Review and adjust the storage allocation for your virtual machine if needed.
This allows you to install and store more applications and files within the virtual machine.
Configure web connection controls
Review and modify the web connection controls for your virtual machine.
when you obtain made the necessary adjustments, save and apply the changes to the virtual machines tweaks.
The virtual machine will now utilize the updated resource allocation for improved performance.
You have successfully adjusted the resources of your virtual machine according to your specific needs.
To install Guest Additions, take these actions:
Launch the virtualization software and start your Linux virtual machine.
Look for an option like Insert Guest Additions CD Image.
select this option to mount the Guest Additions CD image within the virtual machine.
initiate the installation script from the CD image.
The script is usually named VBoxLinuxAdditions.run or similar.
4. execute the Installation Script
5.
This will ensure that the new drivers and features are activated and functioning properly.
Enable Guest Additions Features
Once the virtual machine has restarted, fire up the desired Guest Additions features.
These features may include seamless mouse integration, shared folders, shared clipboard, and improved display performance.
reach the options within the virtualization software to activate and configure these features.
It allows for smoother file sharing, better mouse control, and overall improved user experience.
They are particularly useful before performing system updates, making significant changes, or testing experimental configurations.
Navigate to the Snapshot Menu
Within the virtual machine window, locate the snapshot menu.
It is usually found in the toolbar or under the Machine or VM menu of the virtualization software.
tap on the snapshot menu to open it.
Take a New Snapshot
In the snapshot menu, pick the option to take a new snapshot.
Give the snapshot a descriptive name and provide an optional description if needed.
This will help you easily identify and understand the purpose of the snapshot in the future.
Capture the Snapshot
Confirm the creation of the snapshot.
This process may take a few moments, depending on the size and complexity of your virtual machine.
This allows you to have a series of restore points or save different system configurations.
This will roll back the virtual machine to the selected snapshot, undoing any changes made after that point.
Install Required Software
Begin by installing the necessary software and applications within your Linux virtual machine.
Use the package manager of your Linux distribution to easily install and update software packages.
Use the package manager or update manager of your Linux distribution to keep the system up to date.
This will help maintain the stability and security of your virtual machine.
Secure Your Virtual Machine
Implement security measures to protect your Linux virtual machine.
This includes enabling a firewall, using strong passwords for user accounts, and disabling unnecessary services.
Regularly audit your virtual machines security configuration to identify and address potential vulnerabilities.
Back up Your Virtual Machine
Regularly back up your Linux virtual machine to safeguard your data and configurations.
Optimize Performance
Monitor and optimize the performance of your Linux virtual machine regularly.
Utilize Snapshots for Testing and Development
Take advantage of snapshots for testing and development purposes.
This could include shared folders, clipboard sharing, or drag-and-drop functionality.
Explore and leverage these features to enhance your workflow and productivity.
Enjoy the journey and unlock the full potential of Linux!
Conclusion
Congratulations on successfully creating, setting up, and managing your Linux virtual machine!
Remember to continue managing and maintaining your virtual machine effectively.
Take advantage of the collaboration and integration features available in your virtualization software to streamline your workflow.
Now its time to embark on your Linux journey!
Enjoy your Linux virtual machine and have fun exploring everything that this incredible operating system has to offer!
