Introduction
Welcome to our guide on how to roll out the Nest Hello video doorbell!
Adding a video doorbell to your home security system can provide you with peace of mind and convenience.
The Nest Hello is a popular choice due to its advanced features and easy installation process.
With its high-resolution camera and two-way audio, you could see and speak to visitors in real-time.
Before we begin the installation process, its important to ensure that you have the necessary tools and materials.
This will help you avoid any unnecessary delays or trips to the hardware store.
Installing the Nest Hello requires turning off the power to your existing doorbell to ensure your safety.
Well walk you through the steps to do this properly.
Youll then learn how to remove the existing doorbell and roll out the Nest Hello mounting bracket.
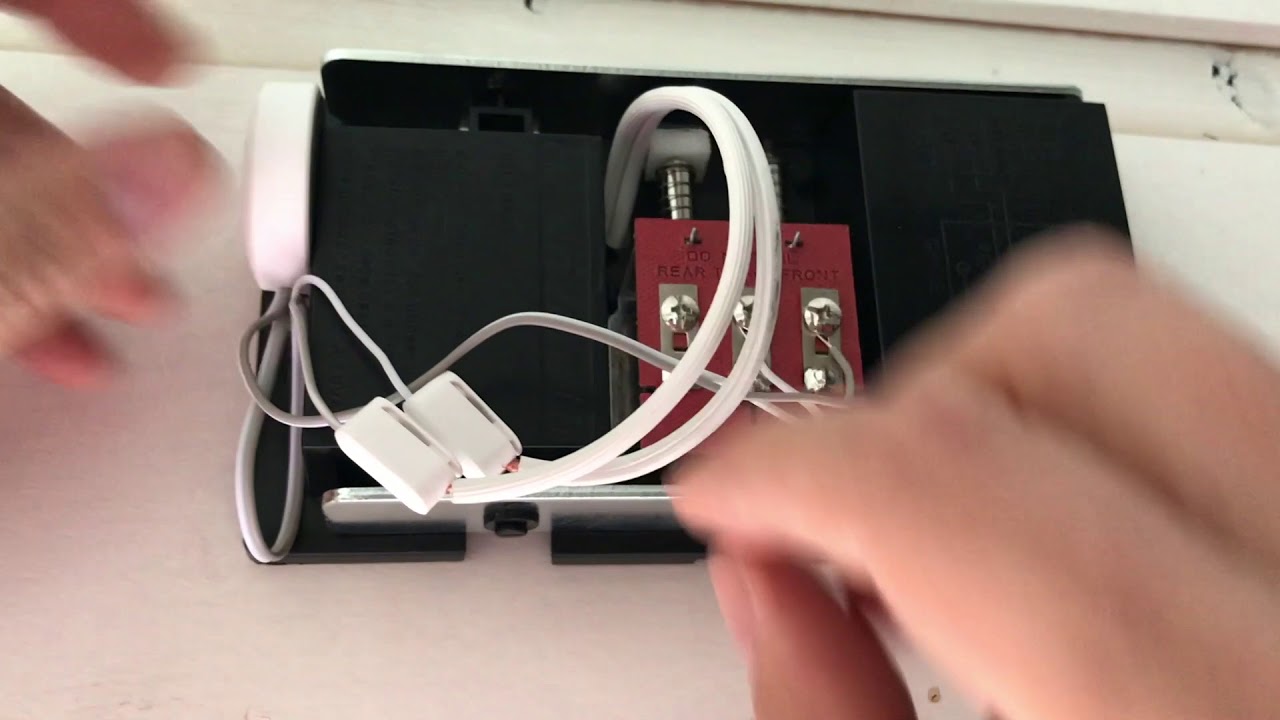
Connecting the wires to the Nest Hello is a crucial step in the installation process.
Our guide will provide you with clear instructions on how to do this correctly.
Lets get started with Step 1: Gather the necessary tools and materials.
Having everything on hand will make the installation process much smoother and efficient.
It can be frustrating to discover youre missing a crucial tool in the middle of the installation process.
Lets continue our installation journey to ensure a successful setup.
This step will help you avoid any surprises or issues during the installation process.
This step will protect you from any potential electrical shocks or accidents during the installation process.
This extra step ensures your safety and gives you peace of mind during the installation process.
They have the expertise to handle electrical tasks safely and efficiently.
This step will prepare the installation site for the Nest Hello video doorbell.
Lets move forward in our installation journey!
Its worth noting that some existing doorbells may be attached using adhesive or other unconventional methods.
Lets continue our installation journey!
Lets continue with the installation process!
If you are unsure about the wiring or have any concerns, consult a professional electrician for assistance.
Lets continue with the installation of your Nest Hello video doorbell!
This will prevent the doorbell from accidentally falling or shifting out of position.
Once the Nest Hello is securely attached to the mounting bracket, youre almost there!
Lets proceed with the final steps of installing your Nest Hello video doorbell!
They can provide guidance and troubleshooting tips to ensure that your Nest Hello is working optimally.
Lets move on to the last step of installing your Nest Hello video doorbell!
Its recommended to explore the different options and parameters within the Nest app to personalize your Nest Hello experience.
you might customize features like Home/Away Assist, activity zones, and integration with othersmart home devices.
They can provide comprehensive guidance and troubleshooting assistance.
You have successfully set up your Nest Hello on your smartphone, completing the installation process.
Thank you for following this installation guide.
Enjoy your new Nest Hello video doorbell!
Conclusion
Congratulations on successfully installing your Nest Hello video doorbell!
You have taken an important step towards enhancing your home security and convenience.
By following the step-by-step guide provided, you have ensured a proper and reliable installation of your Nest Hello.
Remember to consult the provided Nest Hello installation guide or product manual for specific instructions and guidelines.
Thank you for choosing Nest Hello and we hope that this installation guide has been helpful to you.
Enjoy the added security and convenience that your Nest Hello video doorbell brings to your home!
