Introduction
Are you looking to boost the performance of your Lenovo Ultrabook?
In this article, we will guide you through the step-by-step process of installing an SSD in yourLenovo Ultrabook.
We will cover everything from gathering the necessary tools to formatting the newly-installed SSD.
So, lets get started and give your Lenovo Ultrabook a performance boost by installing an SSD!
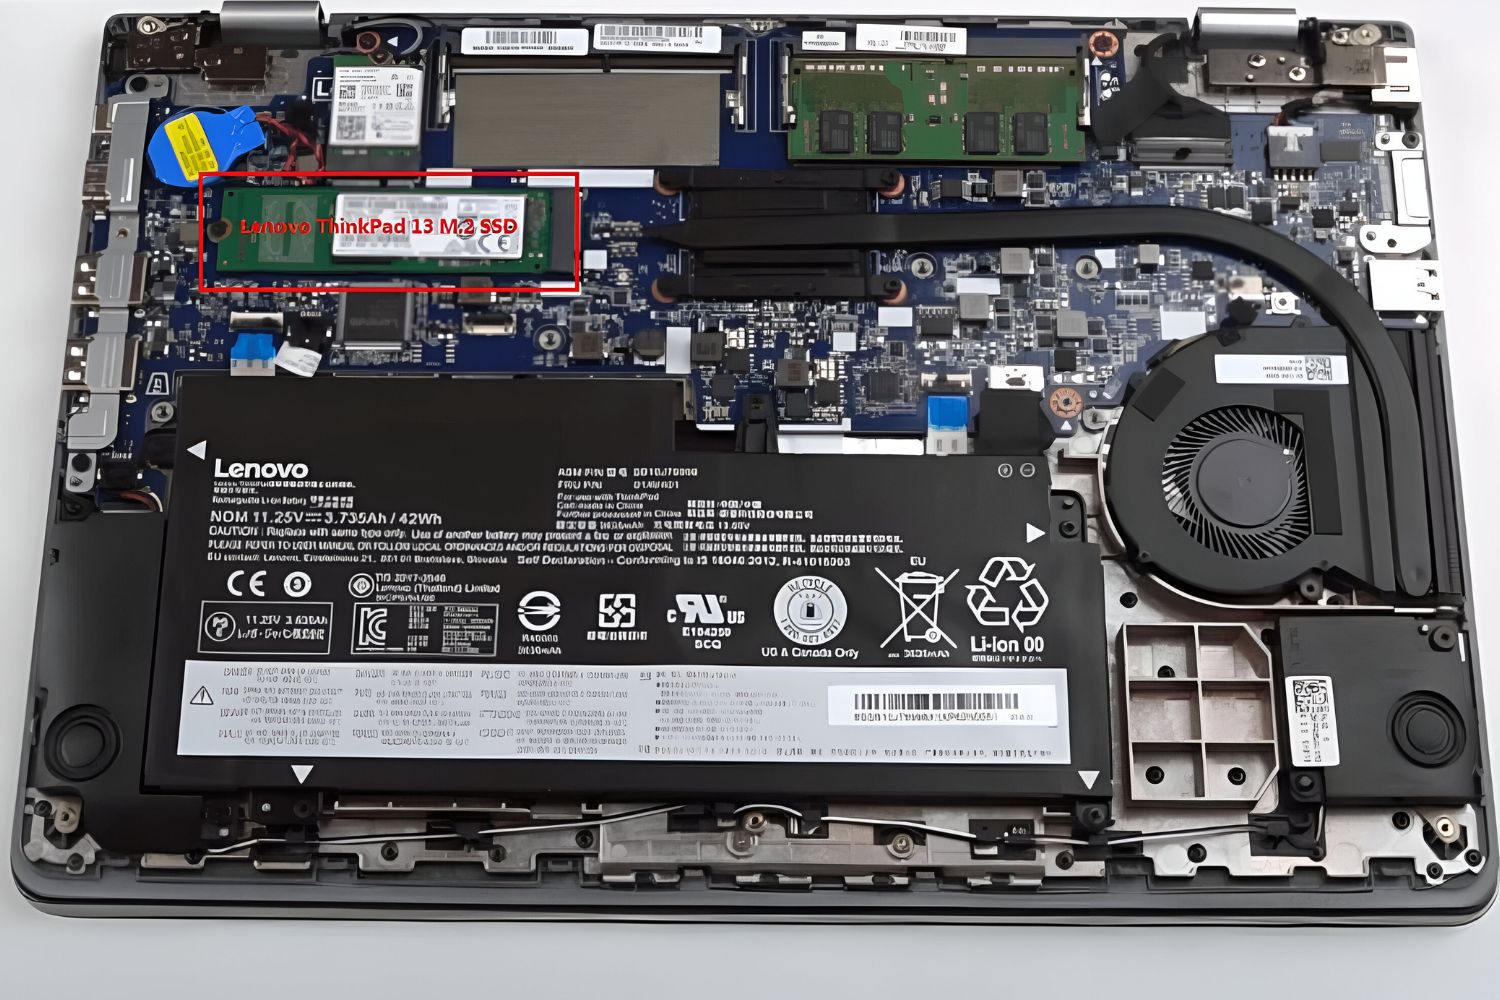
Take a moment to familiarize yourself with the inside layout and locate the SSD slot on the motherboard.
With the SSD successfully installed, you are now ready to secure it in place.
Proceed to the next step to learn how to fasten the SSD using screws or clips.
This ensures a reliable and stable connection, maximizing the performance of your installed SSD.
This will be covered in the next step, so lets move on!
Once the back cover is securely closed, youre almost done!
You have successfully installed an SSD in your Lenovo Ultrabook.
Enjoy the improved performance and responsiveness that the SSD brings to your Ultrabook experience.
With the SSD formatted and initialized, you have completed the installation and setup process.
Enjoy the enhanced performance, speed, and storage capacity that the new SSD brings to your Lenovo Ultrabook!
Conclusion
Congratulations on successfully installing an SSD in your Lenovo Ultrabook!
Finally, you formatted and initialized the SSD to ensure optimal functionality.
