It also allows you to keep your unit running smoothly by offloading resource-intensive files to the external storage.
Some newer models, such as Google Pixel and some Samsung Galaxy devices, do not have this feature.
Therefore, the first step is to test whether your Android phone is compatible with an SD card.
Now that you have the SD card, its time to power off your Android phone.
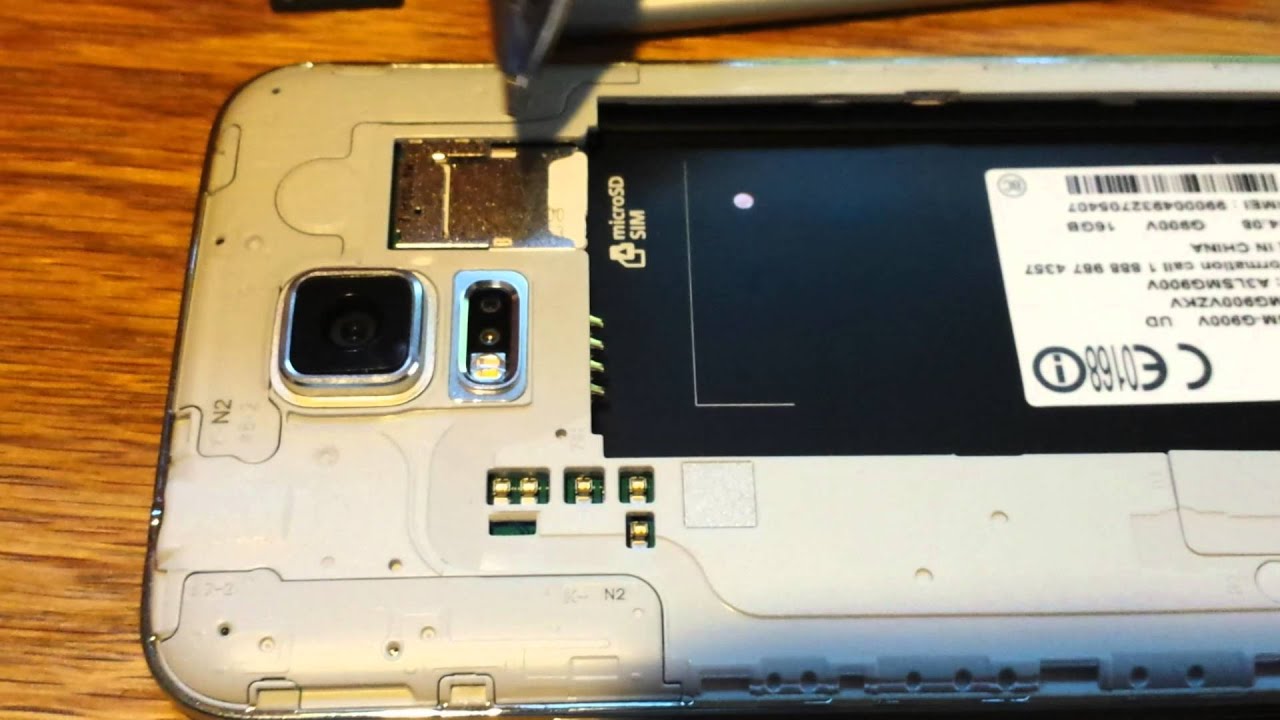
To locate the SD card slot, refer to your phones user manual.
The placement and design of the slot vary among different phone models.
Avoid using excessive force, as it may damage the card or the slot.
However, in some cases, you may need to format the SD card using your phones options.
This can be done through the app tweaks or storage tweaks of your Android machine.
Additionally, you’re able to inspect your phone physically to locate the SD card slot.
The slot may be labeled with an SD logo or the words SD card.
These options allow you to use a SIM card and an SD card simultaneously or interchangeably.
Again, consulting the user manual or conducting an online search will provide you with the necessary information.
This helps prevent any potential damage to the SD card or phones storage system.
In some cases, you may find it beneficial to remove the phones battery if it is removable.
However, many newer models have non-removable batteries, so powering off the gadget through the software is sufficient.
Rushing this process may result in unexpected issues or complications during the installation of the SD card.
The manual will provide detailed instructions on where to find the slot and how to access it.
Its important to note that not all Android phones have an SD card slot.
This process is straightforward, but it requires careful handling to ensure a secure and proper connection.
Its important to handle the SD card with care and avoid touching the gold contacts or circuitry.
Touching these components can potentially damage the card and impede its performance.
if you bump into any resistance or difficulty while inserting the SD card, do not force it.
Recheck the alignment and take another crack, applying gentle and even pressure until the card is properly inserted.
This initialization process should occur automatically, without any additional input from you.
Once the formatting is complete, the SD card will be ready to use with your phone.
Therefore, it is crucial to back up any important files before initiating the formatting process.
However, carefully consider the pros and cons and ensure that your rig supports this feature before proceeding.
like note that not all apps can be moved to the SD card.
However, many user-installed apps can be moved to the SD card, along with associated data and files.
Therefore, always see to it to follow the proper steps to safely remove the SD card.
Remember to handle the SD card with care, avoiding contact with the gold contacts or circuitry.
Store the SD card in a protective case or sleeve when not in use to prevent any physical damage.
Take the extra time to adhere to these instructions and safeguard your SD card and files.
We started by checking the compatibility of your Android phone to ensure that it supports an SD card.
We then guided you through the process of inserting the SD card correctly to ensure a secure connection.
Consult your phones user manual or online resources for accurate and equipment-specific instructions if needed.
With proper care and maintenance, your SD card can serve you well for a long time.
Enjoy the convenience and flexibility that extra storage brings to your Android experience!
