Introduction
Installing a CPU cooler is an essential step when building or upgrading a computer.
The CPU cooler ensures that your processor is kept at an optimal temperature, preventing overheating and potential damage.
ACPU cooleris responsible for dissipating heat generated by the processor, maintaining its performance and longevity.
Thats why its important to understand the process of installing a CPU cooler correctly.
In this guide, we will walk you through the step-by-step process of installing a CPU cooler.
yo consult the instruction manual that came with your specific cooler for any manufacturer-specific guidelines or recommendations.
Now, lets gather our tools and equipment and dive into the exciting world of CPU cooler installations!
Thermal Paste: Thermal paste is a crucial component in conducting heat from the processor to the CPU cooler.
It helps fill in microscopic imperfections between the CPU and cooler, ensuring efficient heat transfer.
CPU Cooler: Of course, youll need the CPU cooler itself.
There are various types of CPU coolers, including air coolers and liquid coolers.
Choose one that is compatible with your processor and fits within your budget and cooling preferences.
These are the essential tools and equipment needed for installing a CPU cooler.
ensure you have everything on hand before you proceed to the next step.
Having all the necessary tools ready will ensure a smooth and hassle-free installation process.
Preparing the Motherboard
1.
Power Off and Disconnect: Ensure that your rig is powered off and unplugged from the electrical outlet.
This will prevent any accidents or damage during the installation process.
Gently twist and lift the cooler to detach it from the processor.
Be gentle and avoid applying excessive pressure while cleaning.
Check Mounting Holes: Examine the motherboardsCPU socketarea to locate the mounting holes for the cooler.
Ensure that the mounting holes align with the cooler youre installing.
Install Backplate (if necessary): Some CPU coolers require a backplate to provide additional stability.
verify it is properly aligned with the CPU socket.
Check the coolers instructions and attach the standoffs or brackets as directed.
By carefully preparing the motherboard, youll ensure a solid foundation for the CPU cooler installation.
Applying Thermal Paste
1.
Locate the CPU: Identify the location of the CPU on the motherboard.
It is usually a square or rectangular shape with numerous tiny pins or contacts.
Identify the contact surface: Look for a smooth, metallic surface on top of the CPU.
This is where the thermal paste will be applied.
This will help maximize heat transfer between the CPU and the cooler.
Avoid applying too much thermal paste, as it can lead to poor heat transfer efficiency.
Verify the CPU coolers instructions: Some CPU coolers may have specific guidelines for thermal paste utility.
Consult the instructions provided with your cooler to ensure you follow any manufacturer recommendations or requirements.
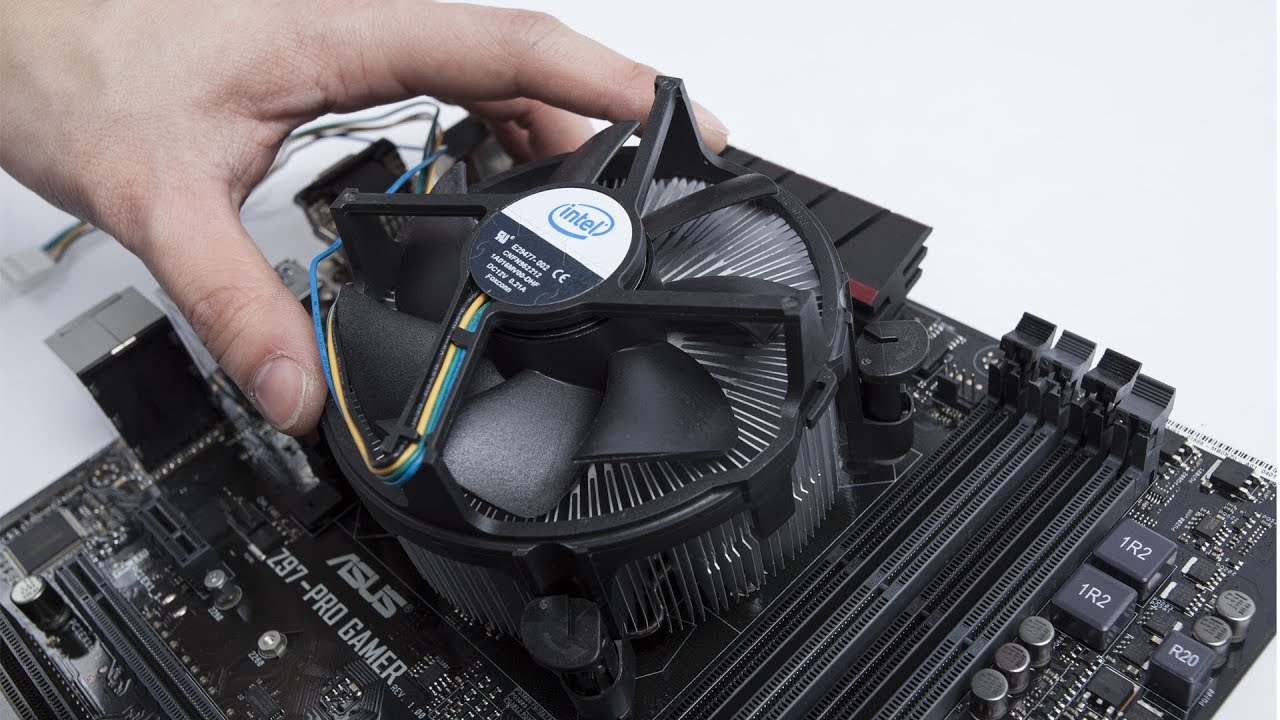
Attaching the CPU Cooler
1.Orient the CPU cooler: Identify the correct orientation ofthe CPU cooler.
Most coolers have an arrow or marking that indicates the direction of airflow.
see to it this aligns with the desired airflow direction in your system.
Take note of any additional brackets or retention mechanisms that need to be attached.
Gently press down and align the screw holes or mounting points.
Check for proper installation: Ensure that the CPU cooler sits flush and level on the CPU socket.
Double-check that it is securely fastened and there is no wobbling or movement.
Confirm that any retention mechanisms or brackets are properly engaged.
Also, connect any additional cables such as RGB lighting or fan control cables according to the manufacturers instructions.
By following these steps, youll securely attach the CPU cooler to your motherboard.
Take your time to ensure proper alignment and fastening to avoid any potential damage or poor cooling performance.
Checking for Proper Installation
1.
Visual Inspection: Take a close look at the CPU cooler and surrounding components.
Proper Contact: Verify that the CPU cooler is making full contact with the CPU.
Check for an even spread of thermal paste between the cooler and the CPU surface.
Uneven contact or gaps may lead to inadequate cooling performance.
Secure Mounting: Gently press on the CPU cooler to confirm that it is securely attached.
It should not move or wiggle excessively.
If you notice any instability, carefully inspect the mounting screws or clips and tighten them if necessary.
Fan Operation: Power on your system and observe the CPU coolers fan(s).
Ensure that the fan(s) spin freely and that there are no unusual noises.
Compare the temperature readings to the normal operating range for your specific CPU.
If the temperatures are significantly higher than expected, it may indicate an improper installation or inadequate cooling.
Troubleshooting Tips
Though installing a CPU cooler is a straightforward process, issues can occasionally arise.
Here are some troubleshooting tips to help you overcome common challenges:
1.
Check the fan speed and adjust it if necessary.
Clean the fan and heatsink to remove any accumulated dust or debris.
If the noise persists, consider replacing the fan with a quieter model.
Incompatibility with motherboard/CPU: Its essential to check for compatibility between the CPU cooler, motherboard, and CPU.
If there are compatibility issues, consider finding an alternative CPU cooler that is compatible with your setup.
Ensure that the temperature sensors are properly calibrated and functioning correctly.
Its also worth checking for any BIOS updates for your motherboard that may address temperature reporting issues.
ensure to use the appropriate amount and spread it evenly over the CPU surface to ensure optimal heat transfer.
They can provide specific solutions based on your hardware configuration and help troubleshoot any issues youre facing.
Conclusion
Installing a CPU cooler is a crucial step in building or maintaining a computer system.
Remember to consult your specific CPU cooler and motherboard manuals for any manufacturer-specific instructions or recommendations.
They can provide valuable insights and guidance.
We hope this guide has provided you with the necessary knowledge and confidence to install a CPU cooler successfully.
Remember to prioritize safety, double-check your work, and take your time during the installation process.
With proper cooling, your CPU will be able to deliver the best performance for all your computing needs.
