This step is essential to ensure a smooth and stress-free installation process.
Here are some steps to follow prior to beginning the installation:
1.
While SSDs are generally compatible with most PS4 models, its always better to be safe than sorry.
Refer to your PS4s user manual or visit the manufacturers website for compatibility details.
Having a clean, well-lit workspace is also important to avoid any damage or misplacement of components.
This step is crucial to ensure you dont lose any valuable data during the installation process.
Step 1: Power off and unplug your PS4
1.
This will ensure that all data is properly saved before shutting down.
confirm to wait a few moments to allow the console to fully power down.
This includes the power cord, HDMI cable, and any other peripherals that may be connected.
Gently pull out each plug, taking care not to damage the cables or ports.
Step 2: Remove the outer casing of your PS4
1.
Place a soft cloth or towel underneath the PS4 to protect the surface and prevent any scratches.
Unscrew the Casing Screws: Locate the plastic casing screws on the back of the PS4 console.
Usually, there are two large screws that secure the top cover.
Use a Phillips screwdriver to gently unscrew these screws in a counterclockwise motion.
Set the screws aside in a safe place as you will need them for reassembly later.
It should easily glide off and reveal the internal components.
Be careful not to force or pry the cover, as it may cause damage to the console.
you’re free to place it on the soft cloth or towel you prepared earlier.
Its important to handle the casing and screws with care to avoid any damage.
With the casing off, you are now ready to proceed to the next step of the installation process.
Step 3: Locate and remove the internal hard drive
1.
Look for the hard drive bay, which is usually located near the front-left corner of the console.
It will be a rectangular-shaped enclosure with a few screws holding it in place.
Use a Phillips screwdriver to carefully unscrew the screws holding the cover in place.
Gently unplug both cables from the hard drive, taking care not to pull on the cables themselves.
The connectors should come off easily with a slight amount of force.
Typically, the hard drive will be secured with a few screws or brackets.
Use a Phillips screwdriver to unscrew these screws and gently slide the hard drive out of the bay.
Also, keep the screws in a secure place, as you will need them for reassembly.
By following these steps, you have successfully located and removed the internal hard drive from your PS4.
double-check to handle the hard drive and screws with care to avoid any damage.
To ensure a smooth and successful upgrade, do these things to prepare your new SSD:
1.
Check Compatibility: Before proceeding, double-check that your new SSD is compatible with your PS4 model.
Consult the SSD manufacturers documentation or website for compatibility information.
This step ensures that you dont lose any valuable data during the installation process.
Avoid touching the connector pins and avoid exposing it to extreme temperatures or liquids.
By following these steps, you have successfully prepared your new SSD for installation in your PS4.
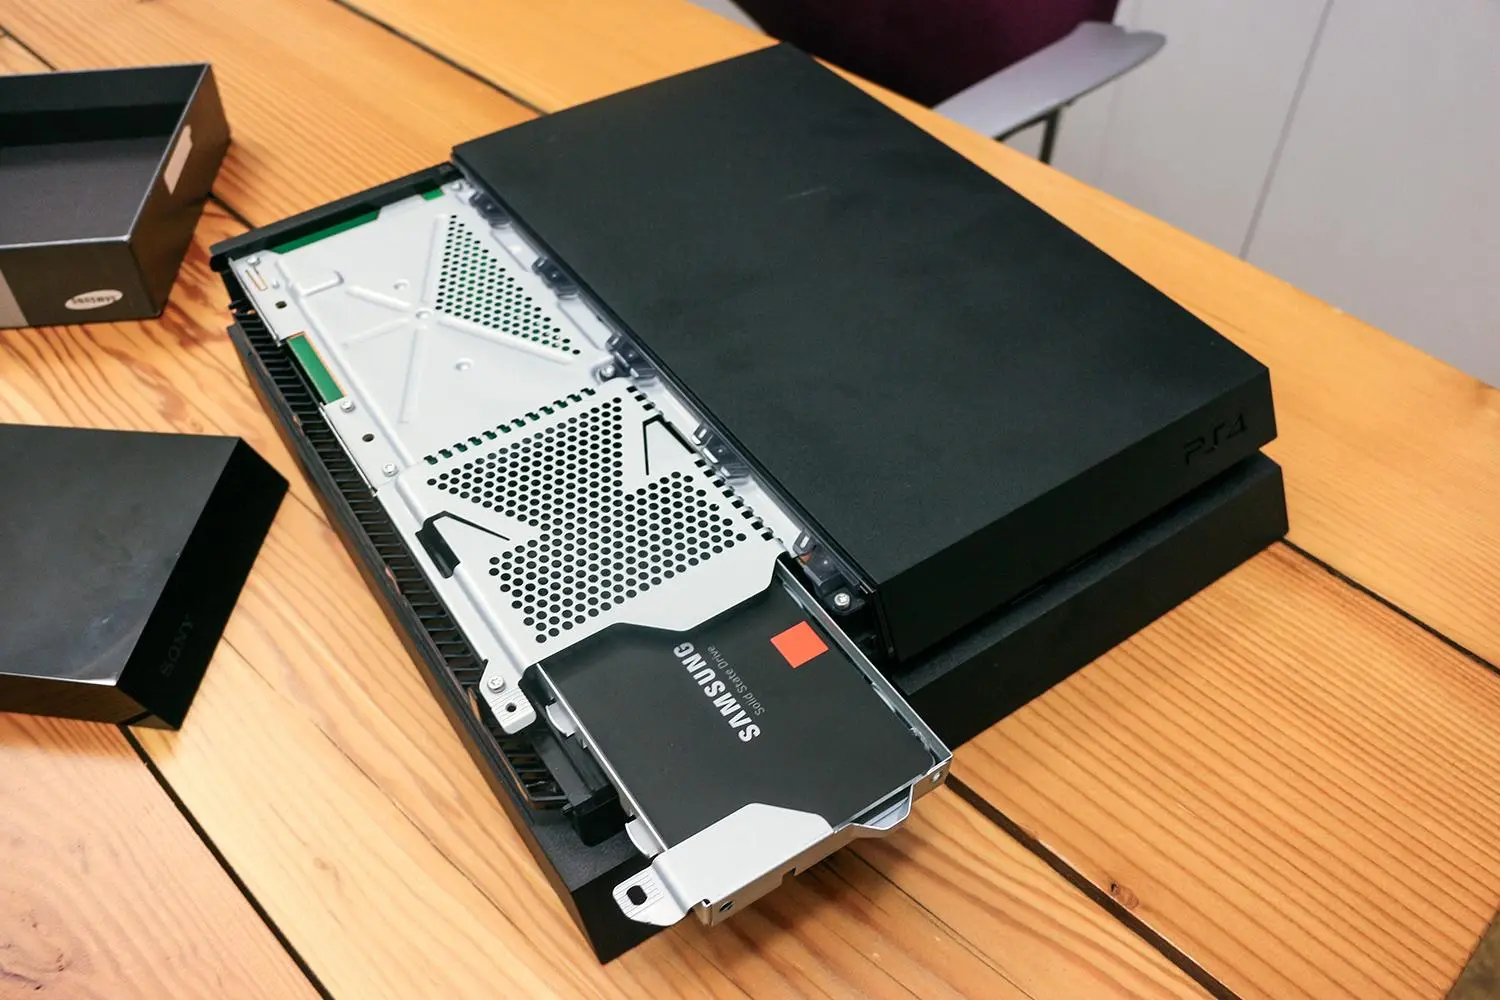
Step 5: load the SSD into your PS4
1.
This bracket is necessary to securely attach the SSD to the PS4s internal housing.
Connect the SSD: Take the prepared SSD and connect it to the PS4s internal connectors.
check that to align the SATA connector on the SSD with the corresponding port on the PS4.
Gently push the SSD into the connectors until it is firmly seated.
Slide the top cover of the PS4 back into place and tighten the screws to secure it.
Ensure that all screws are tightened, but be careful not to overtighten.
Double-check that all connections are secure and snug.
Finally, plug in your PS4 and power it on.
You should now have your newly installed SSD functioning as the primary storage equipment for your PS4.
By following these steps, you have successfully installed the SSD into your PS4.
Its important to handle the SSD and connectors with care during the installation process to prevent any damage.
Step 6: Reassemble your PS4
1.
Align the Casing: Take the top cover that you removed earlier and align it with the PS4 console.
ensure the edges and screw holes line up correctly.
Gently slide the cover back into place, ensuring that it fits snugly.
Start with the screws on the back of the console and tighten them in a clockwise direction.
confirm not to over-tighten, as this could damage the casing.
Check All Connections: Before fully reassembling the PS4, double-check that all cables and connections are properly secured.
This will ensure a strong and reliable connection.
Plug in the power cord and turn on the PS4.
Final Inspection: After testing, visually inspect the PS4 to ensure that everything is in order.
Check that there are no loose components or cables.
Verify that the PS4 is running smoothly and that the SSD is functioning as expected.
By following these steps, you have successfully reassembled your PS4 after installing the SSD.
Its important to take your time and handle the console and components with care to prevent any damage.
Step 7: Initialize and format your new SSD
1.
Power on the PS4: Plug in the power cord and turn on your PS4.
The console should boot up and display the home screen.
- jump into the tweaks Menu: Navigate to the PS4s main menu and pick the tweaks option.
Scroll down and select System from the prefs menu.
Initialize the SSD: Within the System prefs, snag the Initialization option.
You will see a few sub-options.
Choose Initialize PS4 to start the initialization process.
Select Quick or Full Initialization: You will be prompted to choose between Quick and Full initialization.
Choose the option that suits your needs.
Format the SSD: After the initialization process is complete, you will need to format the SSD.
The PS4 will guide you through this step as well.
grab the Format option when prompted and follow the on-screen instructions.
The PS4 will format the SSD to the appropriate file system.
Finalize the Formatting: Once the formatting process is complete, the PS4 will restart.
By following these steps, you have successfully initialized and formatted your new SSD in your PS4.
This ensures that the SSD is recognized and optimized for use with your console.
Step 8: Transfer data from your old hard drive (optional)
1.
This will allow you to pull up the data stored on it.
choose the Backup and Restore option and choose Back Up PS4.
This will create a backup of your old hard drive data onto an external USB storage unit.
Double-check that everything is functioning as expected, including your installed games and applications.
With the data transferred, you might now enjoy your upgraded PS4 experience with improved loading times and performance.
Step 9: Enjoy your upgraded PS4 experience!
Now its time to sit back, relax, and enjoy your upgraded PS4 experience.
Here are some highlights of the benefits you’re able to expect from your new SSD:
1.
This means less time waiting and more time playing your favorite games.
Say goodbye to stutters and freezing during gameplay.
Reduced Loading Screen Downtime: Large open-world games often come with long loading screens.
No more waiting for the console to start up; its ready to go in no time.
This means less worry about running out of storage and easier access to your favorite titles.
Immerse yourself in your favorite games and take full advantage of the improved loading times and smooth gameplay.
Experience the power of faster storage and watch your gaming sessions become more enjoyable than ever before.
Remember to regularly back up your data to ensure you never lose any progress or saved games.
Enjoy the enhanced speed, improved performance, and enriched gaming experience provided by your new SSD.
